sandbox
The “Sandbox” space makes available a number of resources that utilize and explore the data underlying "Secrets of Craft and Nature in Renaissance France. A Digital Critical Edition and English Translation of BnF Ms. Fr. 640" created by the Making and Knowing Project at Columbia University.
Jamie Bergen and Sofia Sabet
Spring 2022, GU4962: Hands-on History
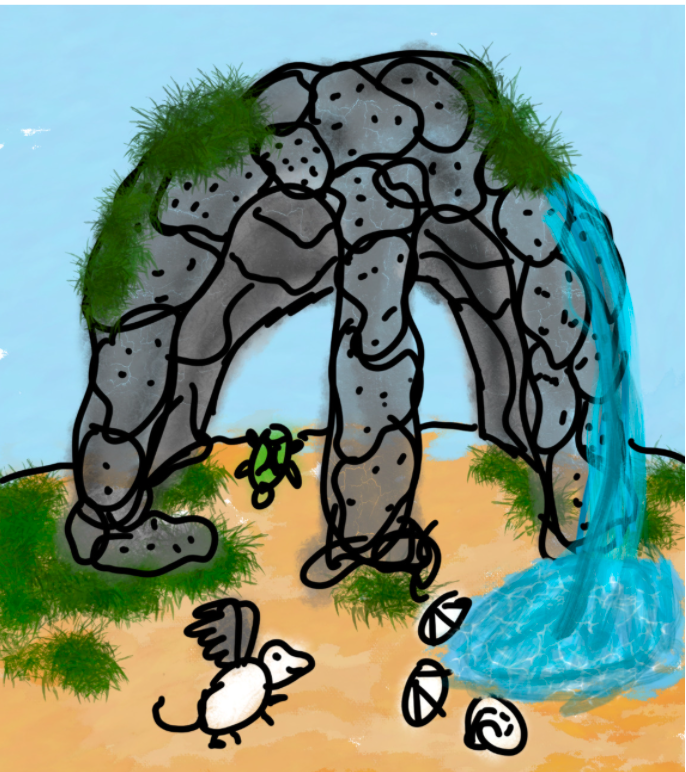
Creating a “Modern” Reconstruction of a Miniature Grotto
Grottos imitate a spring, often located in a cave-like structure, and usually contain fountains, sculpture, and imitation flora and fauna.
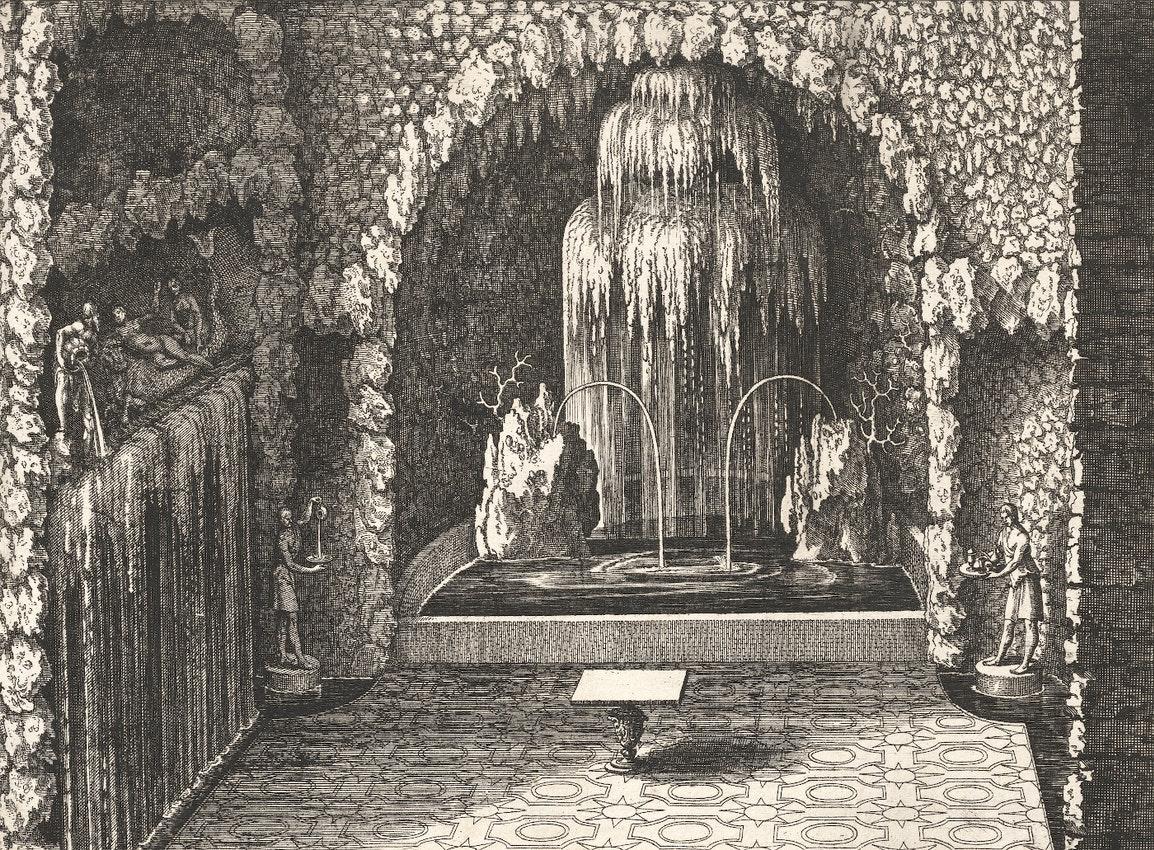
Engraving of a grotto in the gardens of Hortus Palatinus, Heidelberg, from Salomon de Caus’ Hortus Palatinus. Engraving done by Matthieu Marian’s (1620), https://digi.ub.uni-heidelberg.de/diglit/caus1620/0034/image,info,thumbs
In L’Idea della Architettura Universale (The Idea of a Universal Architecture), published in 1615, Italian architect Vincenzo Scamozzi described “grotto porticos” that were decorated with “pebbles [and] tuff and other materials petrified in various shapes of nature…and then decorated here and there with niches, with statues of stone and sometime of metal.”1 He continues that the grotto porticos’ “ornaments shall be fountains, niches, and tableaus with statues, inscriptions, and such things.” He notes that “the Ancients would [decorate them with] extravagant and ridiculous paintings… And because such paintings were found in some places [resembling] caves, for this they call them grottesche.”
As Reut Ullmann in “Artificial Grottos” notes, Sebastiano Serlio’s L’architettura was published first in Italian and translated into French in 1545. Serlio’s text urges readers to style grottos according to their own tastes using leaves, flowers, animals, birds, and other sculpted and painted objects.2 Other common ornaments included shells, as described in numerous sources, including in an entry about snails on fol. 118r in the sixteenth-century anonymous BnF Ms. Fr. 640.3 This is one of multiple references to grottos and their construction in Ms. Fr. 640. One of the first documented grottos built in France was in the palace of Fontainebleau in the 1540s.4 Yet only forty years later they were commonplace enough to earn several references in Ms. Fr. 640.
In the sixteenth century, grottos were part of a focus on understanding the relationship between natural and human artifice, and, for our project, we decided a modern reconstruction of a grotto should investigate the modern equivalent: investigating the relationship between the artifice of technology and the human hand. We therefore employed historical recreations from Ms. Fr. 640 such as artificial rock, oil paint, and stucco components as well as modern techniques such as laser engraving and 3D printing.
Steps to the Creation of a Miniature Grotto5
Scale Model
The first step in creating the miniature grotto was prototyping and planning.
Drawing/schematic of grotto design.
For a more modern component of the grotto, we decided to make the base/frame for it out of laser cut acrylic. We also decided to ornament the side walls with the lizard sketch found on fol. 124v of Ms Fr. 640 (which also serves as the Making and Knowing Project’s logo) as a playful touch. Before cutting the acrylic, we tested out our measurements by cutting a chipboard model first.
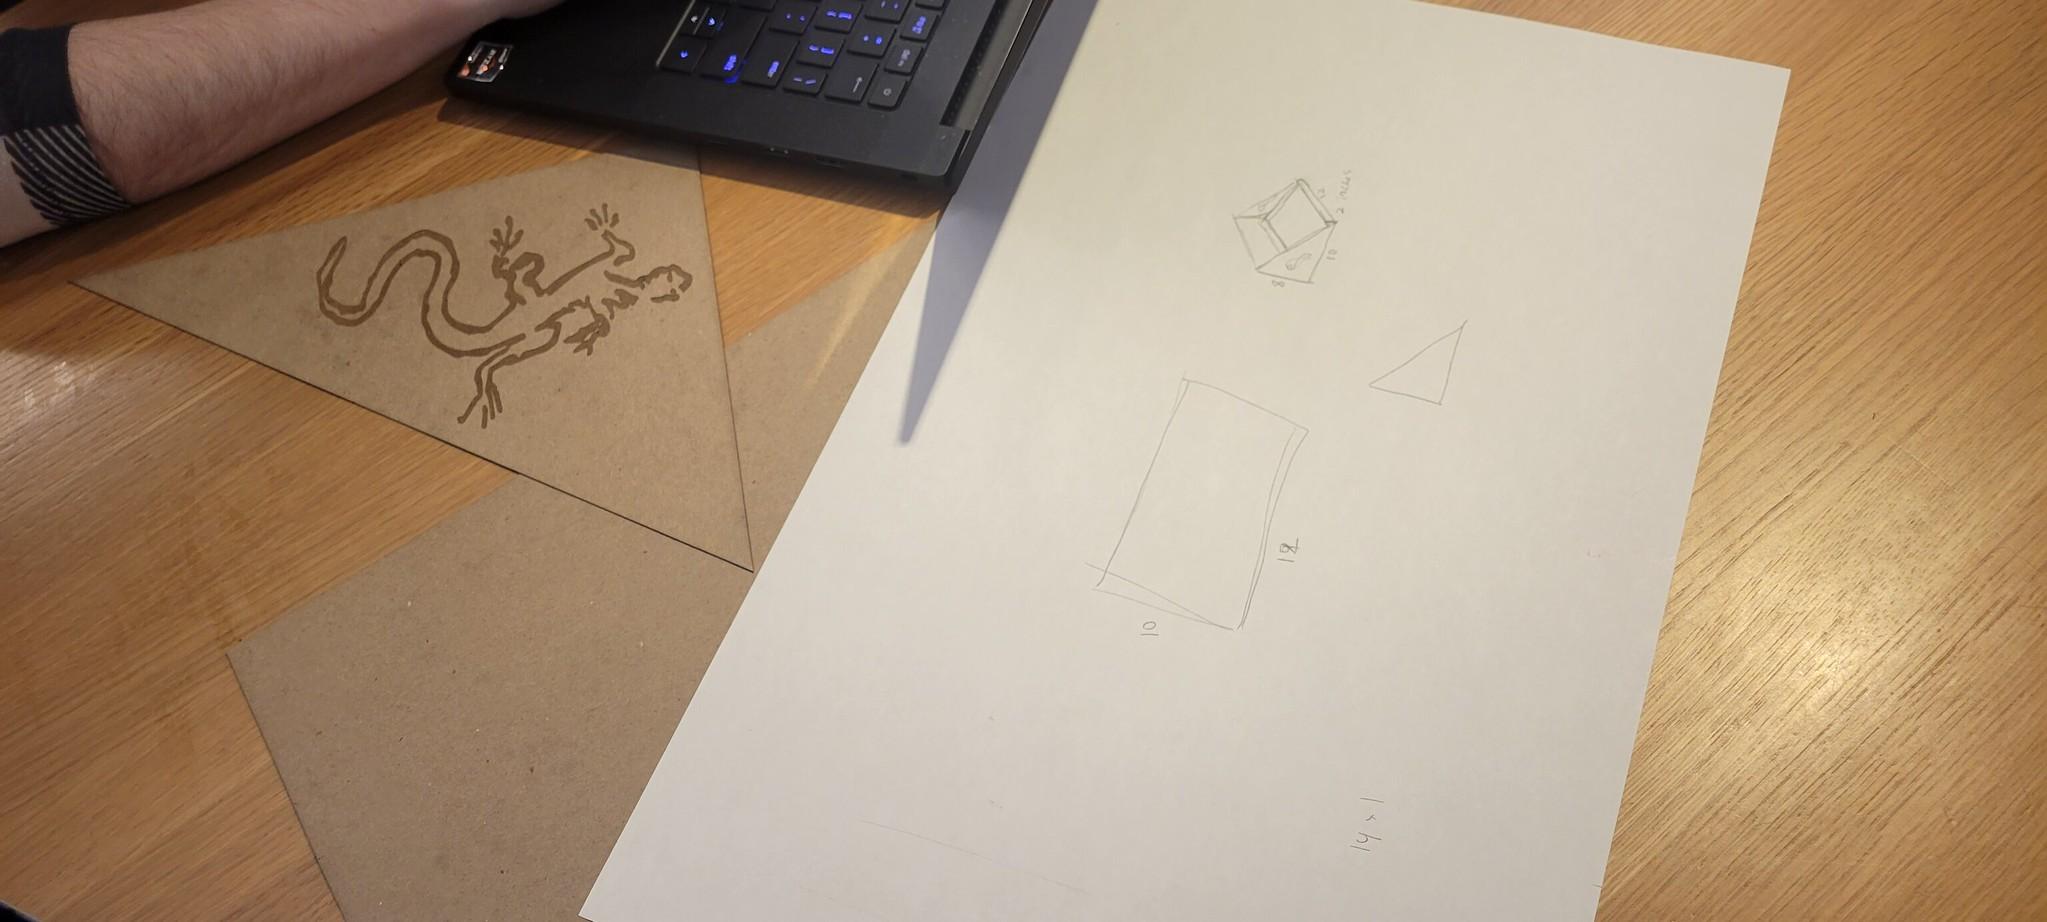
Designs for the cardboard model of the frame.
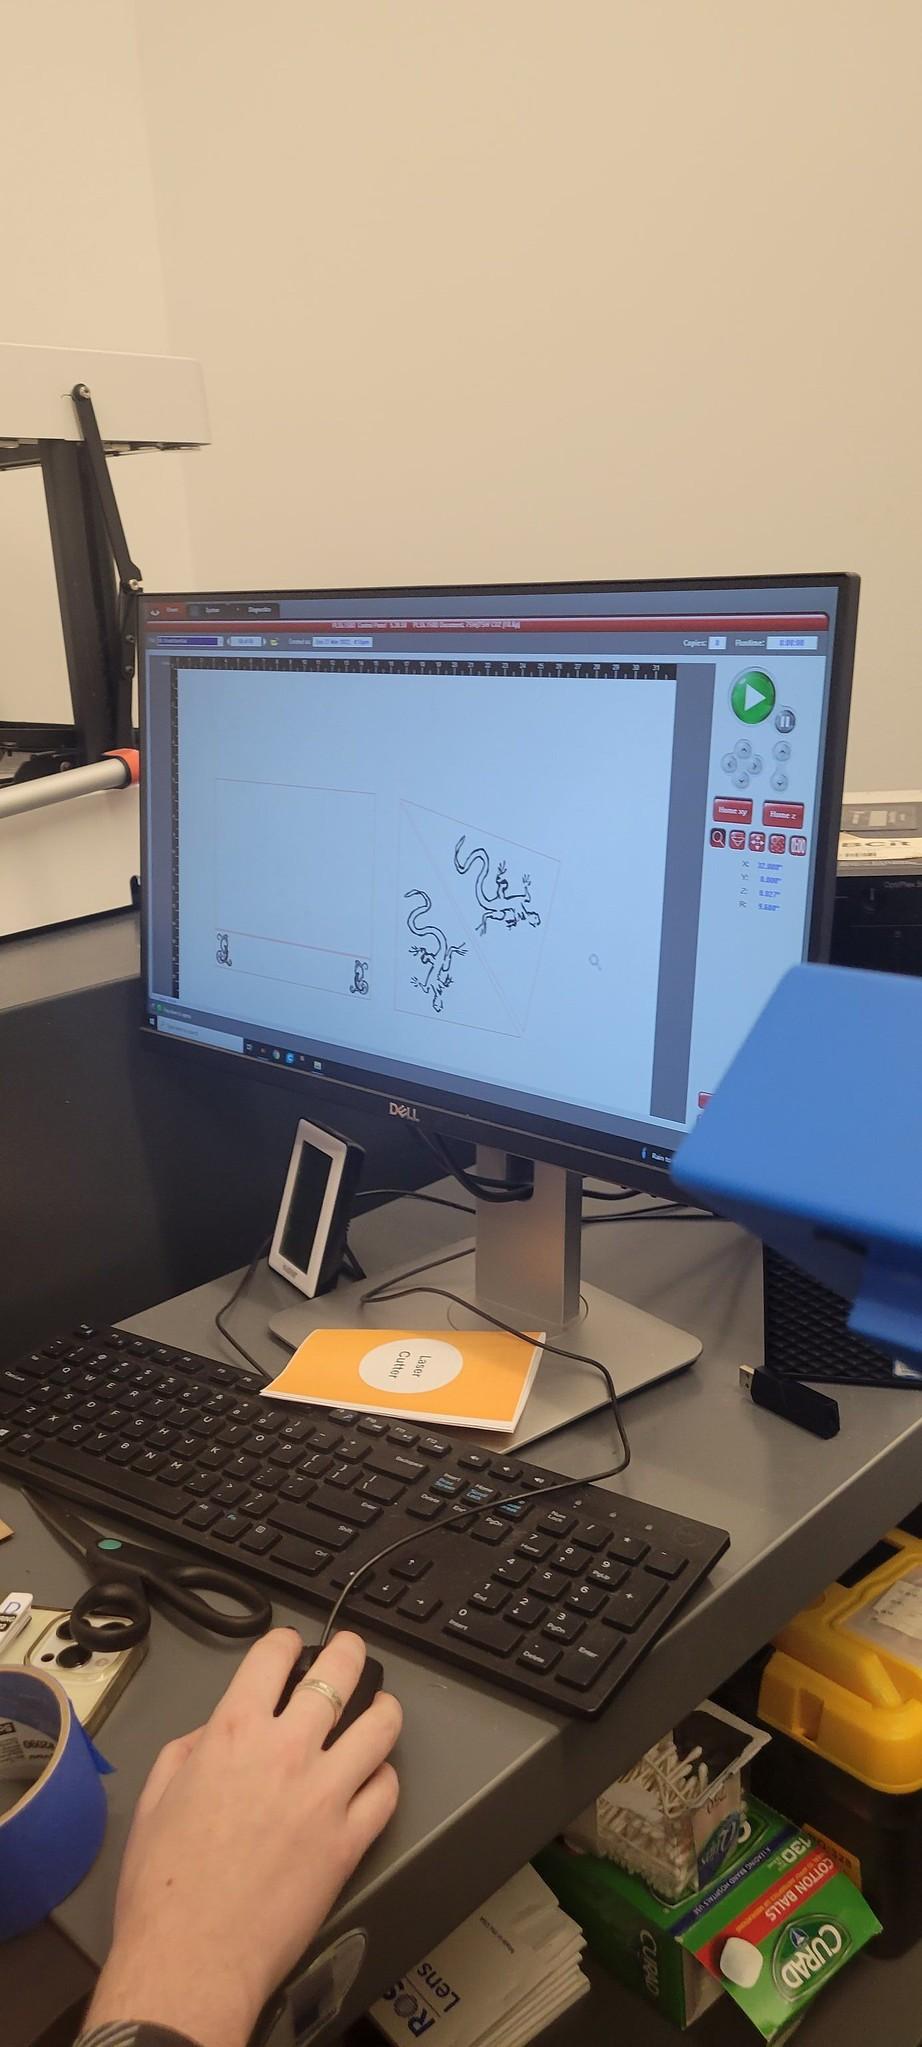
Adding the lizard sketch to our design.
On the first attempt fabricating it from the digital files, we realized that the right side wall was backwards so that the lizard faced the wrong direction. Once the design was fixed, we made another model out of chipboard, but miniaturized further to save material.The mini came out perfectly, so we cut another cardboard one to scale. We then taped the cardboard pieces together for the mini and full-sized model. We then used this model to draw on and plan the other components.
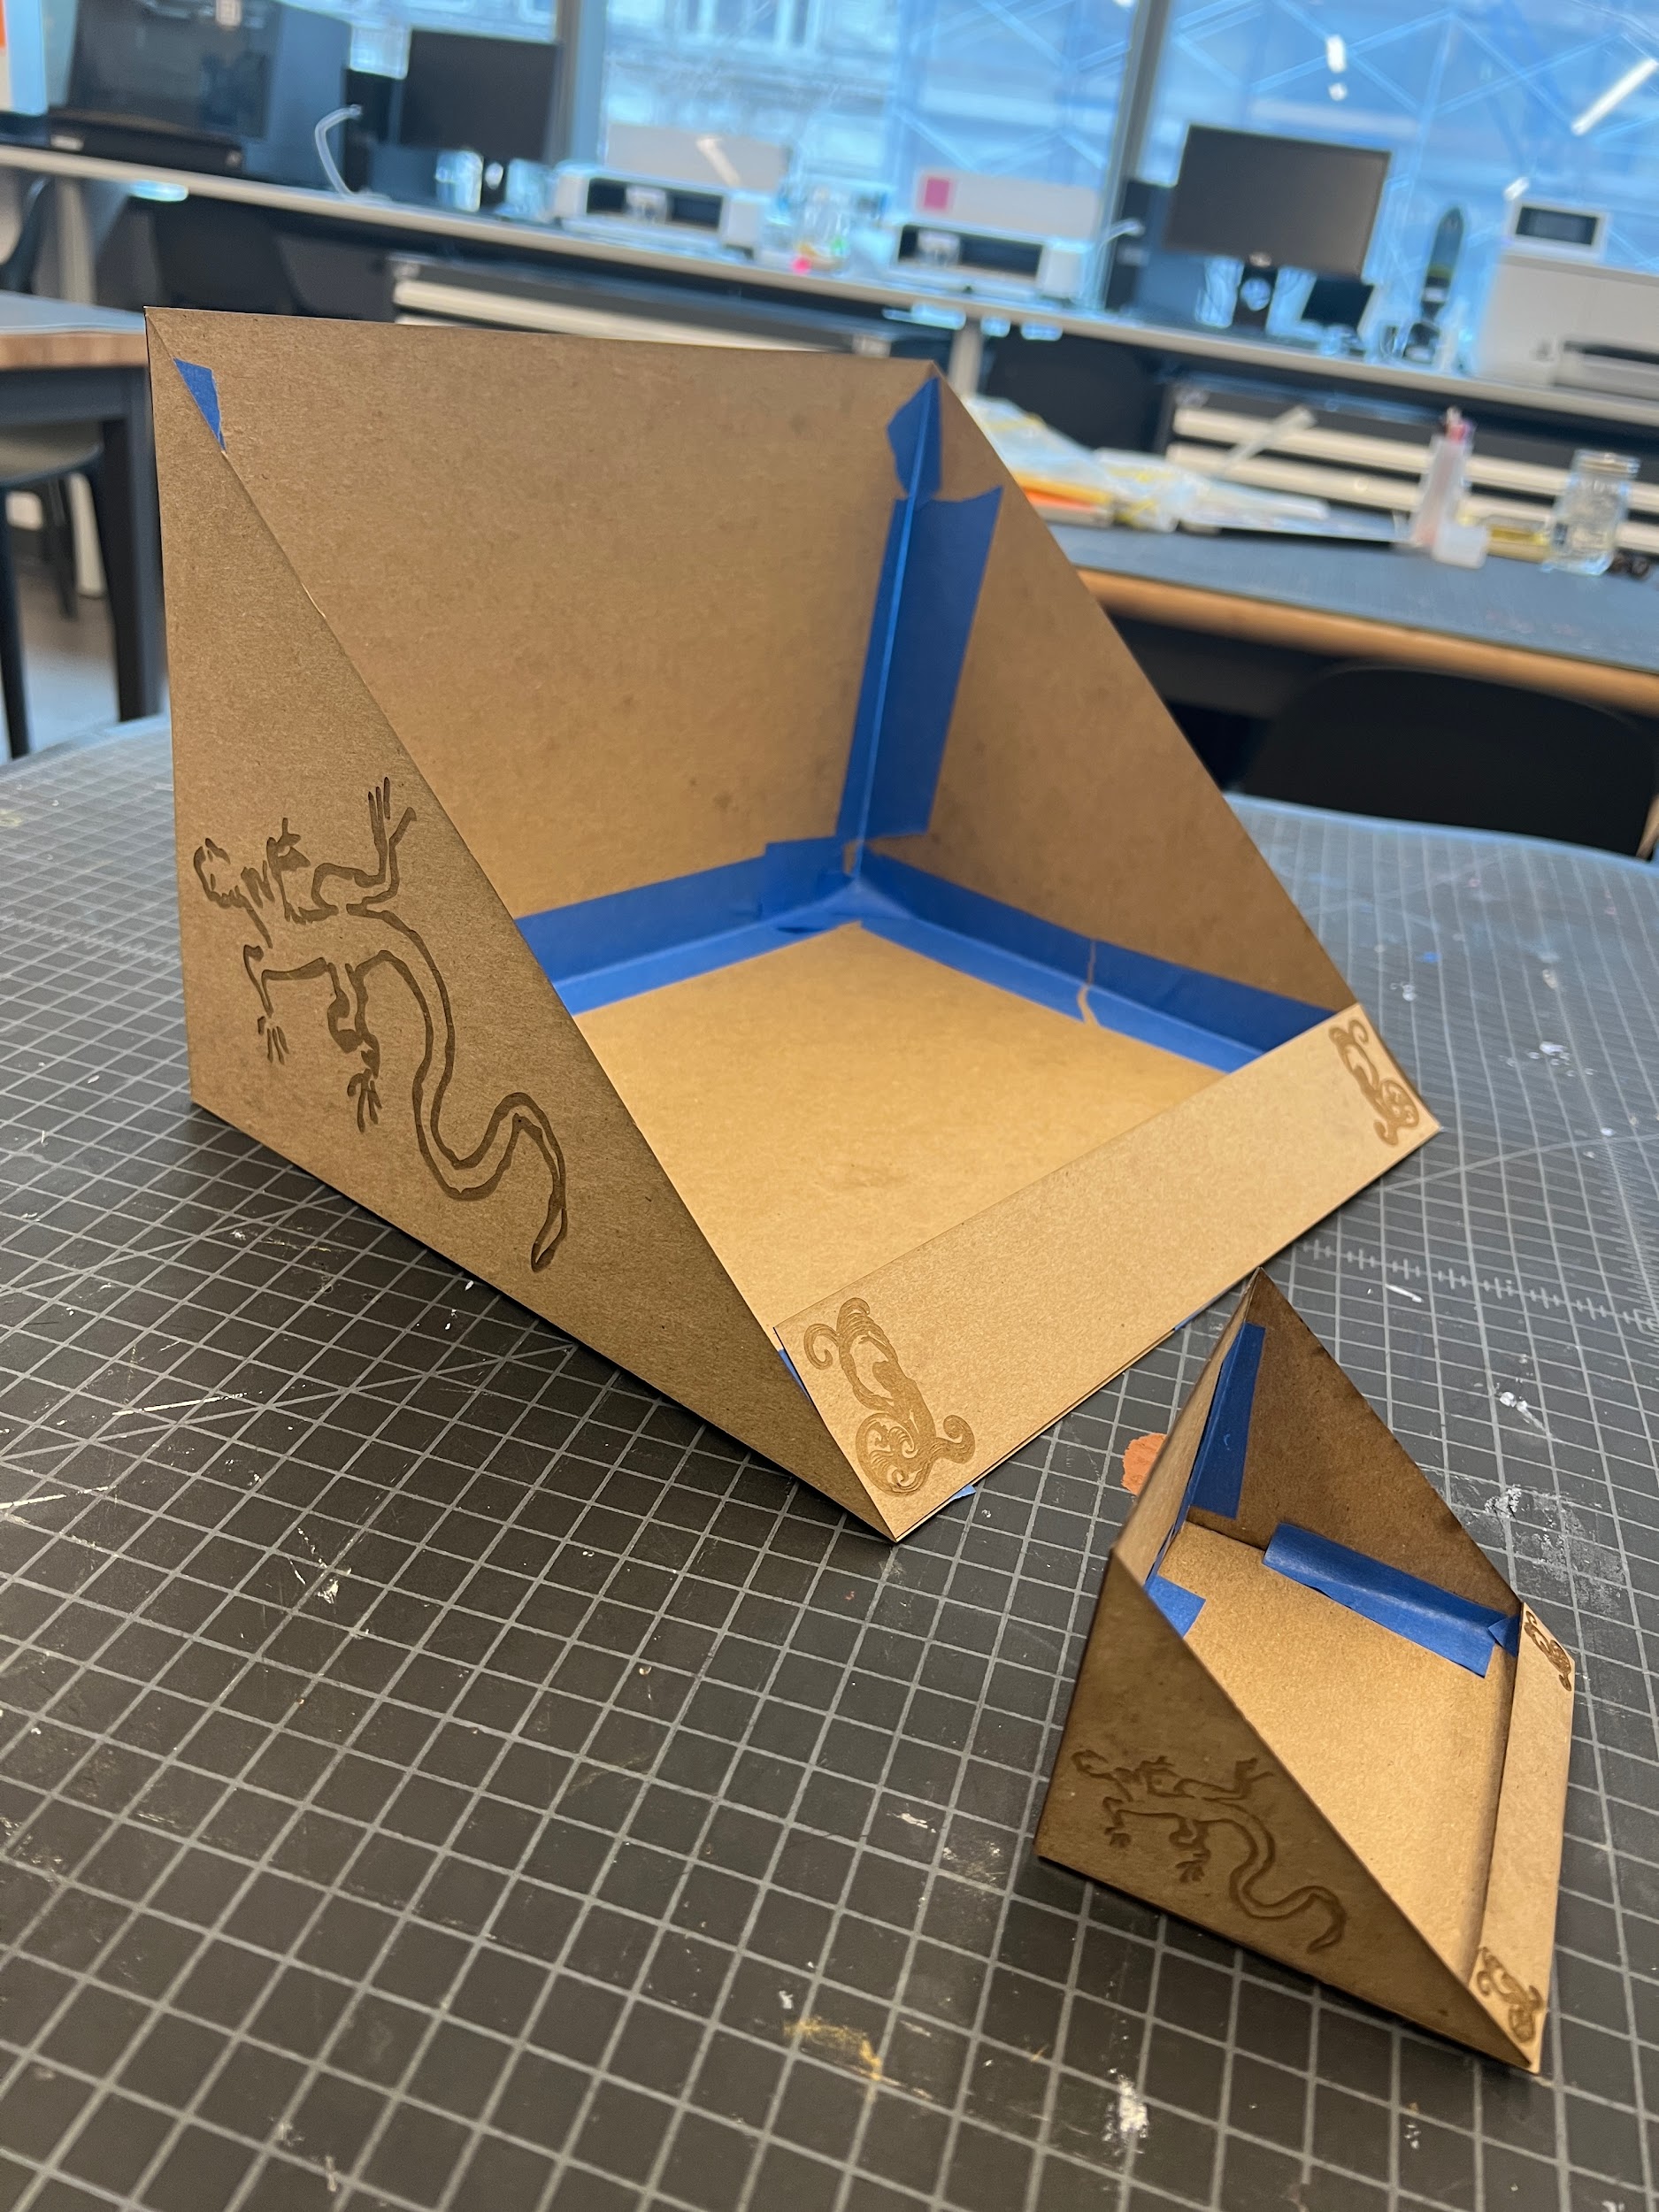
Preparation of the cardboard model in advance of the laser-cut acrylic version of the frame.
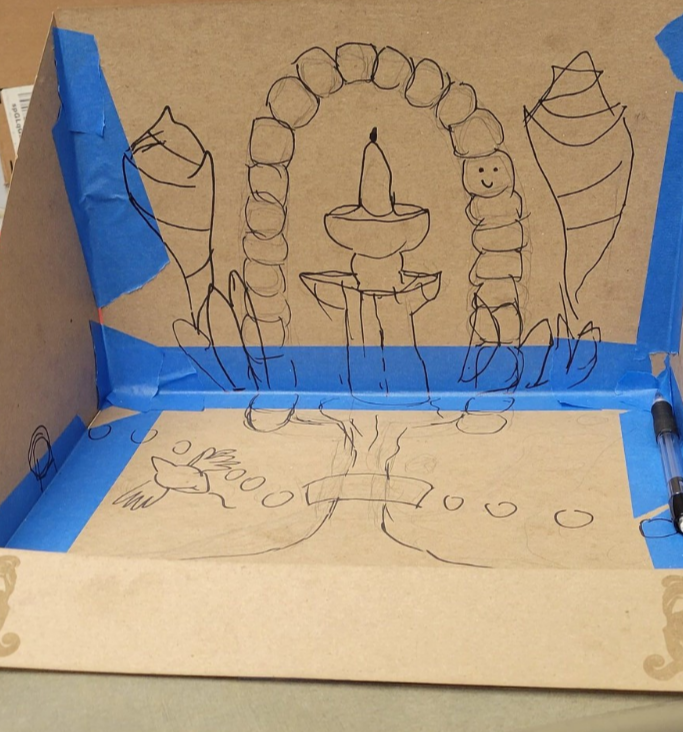
Planning the rest of the grotto elements on the assembled, full-size cardboard model.
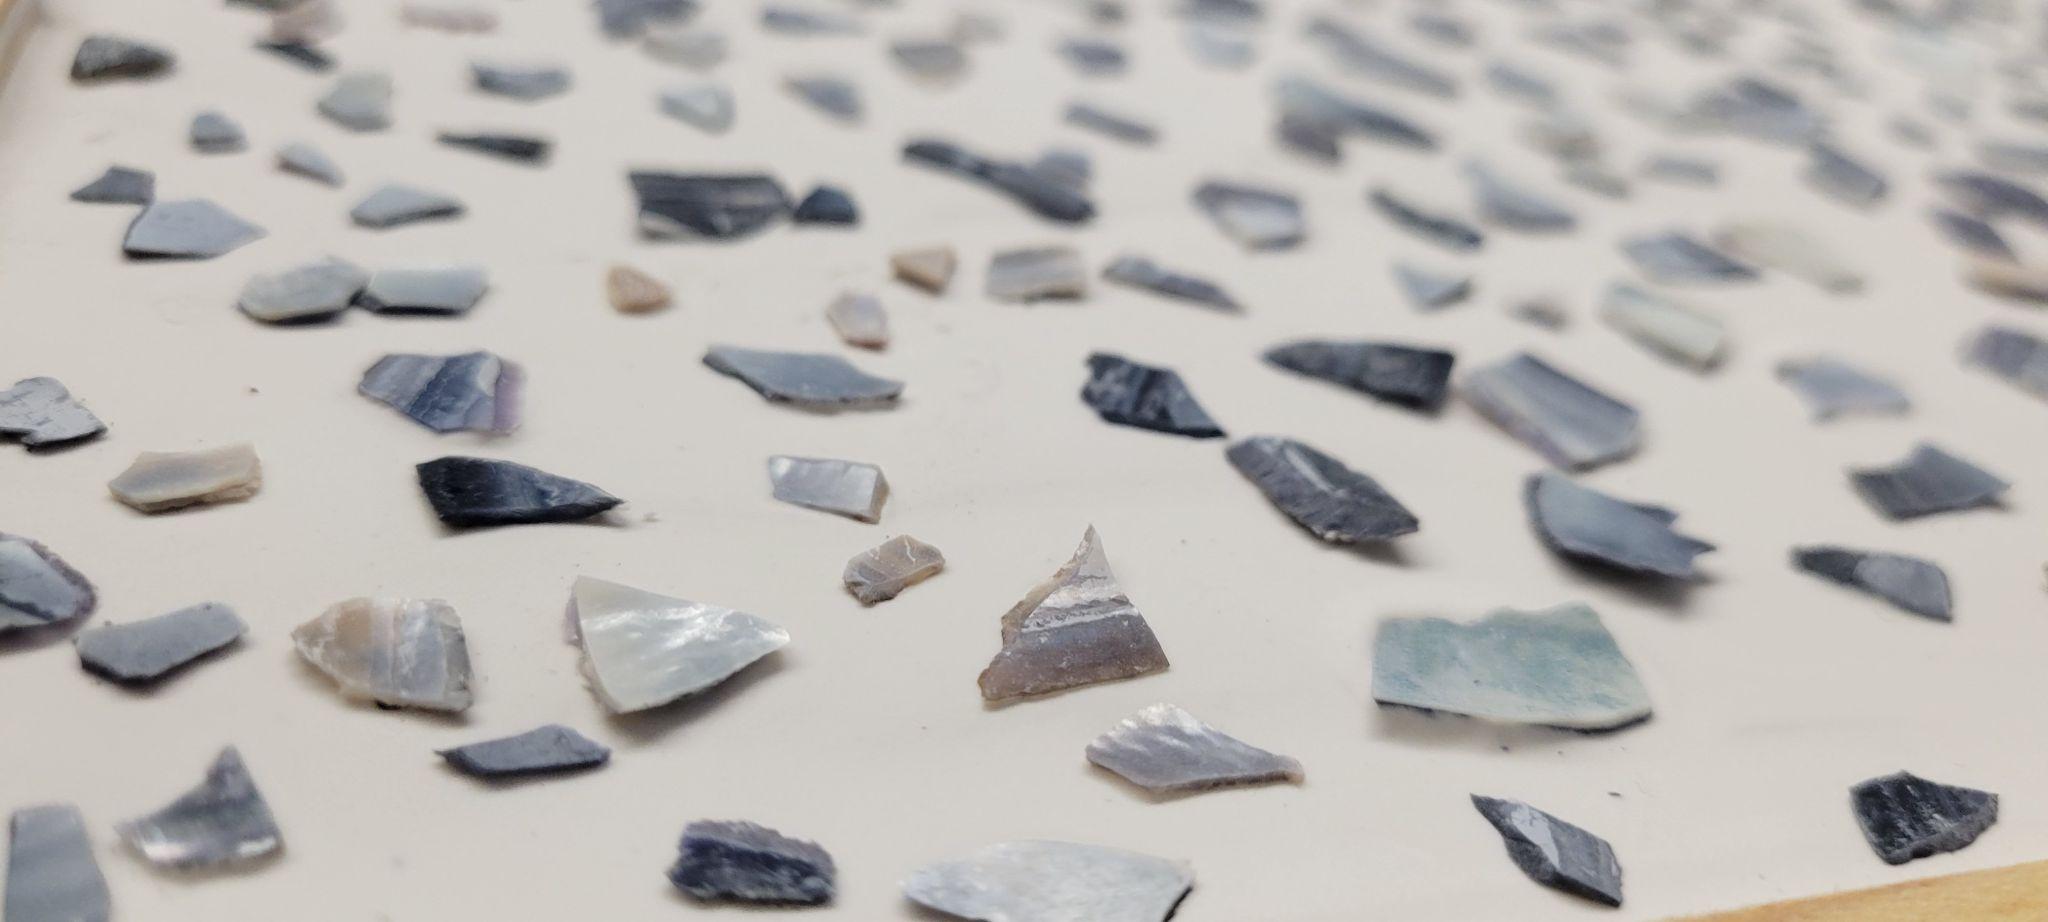
Shell Mosaic
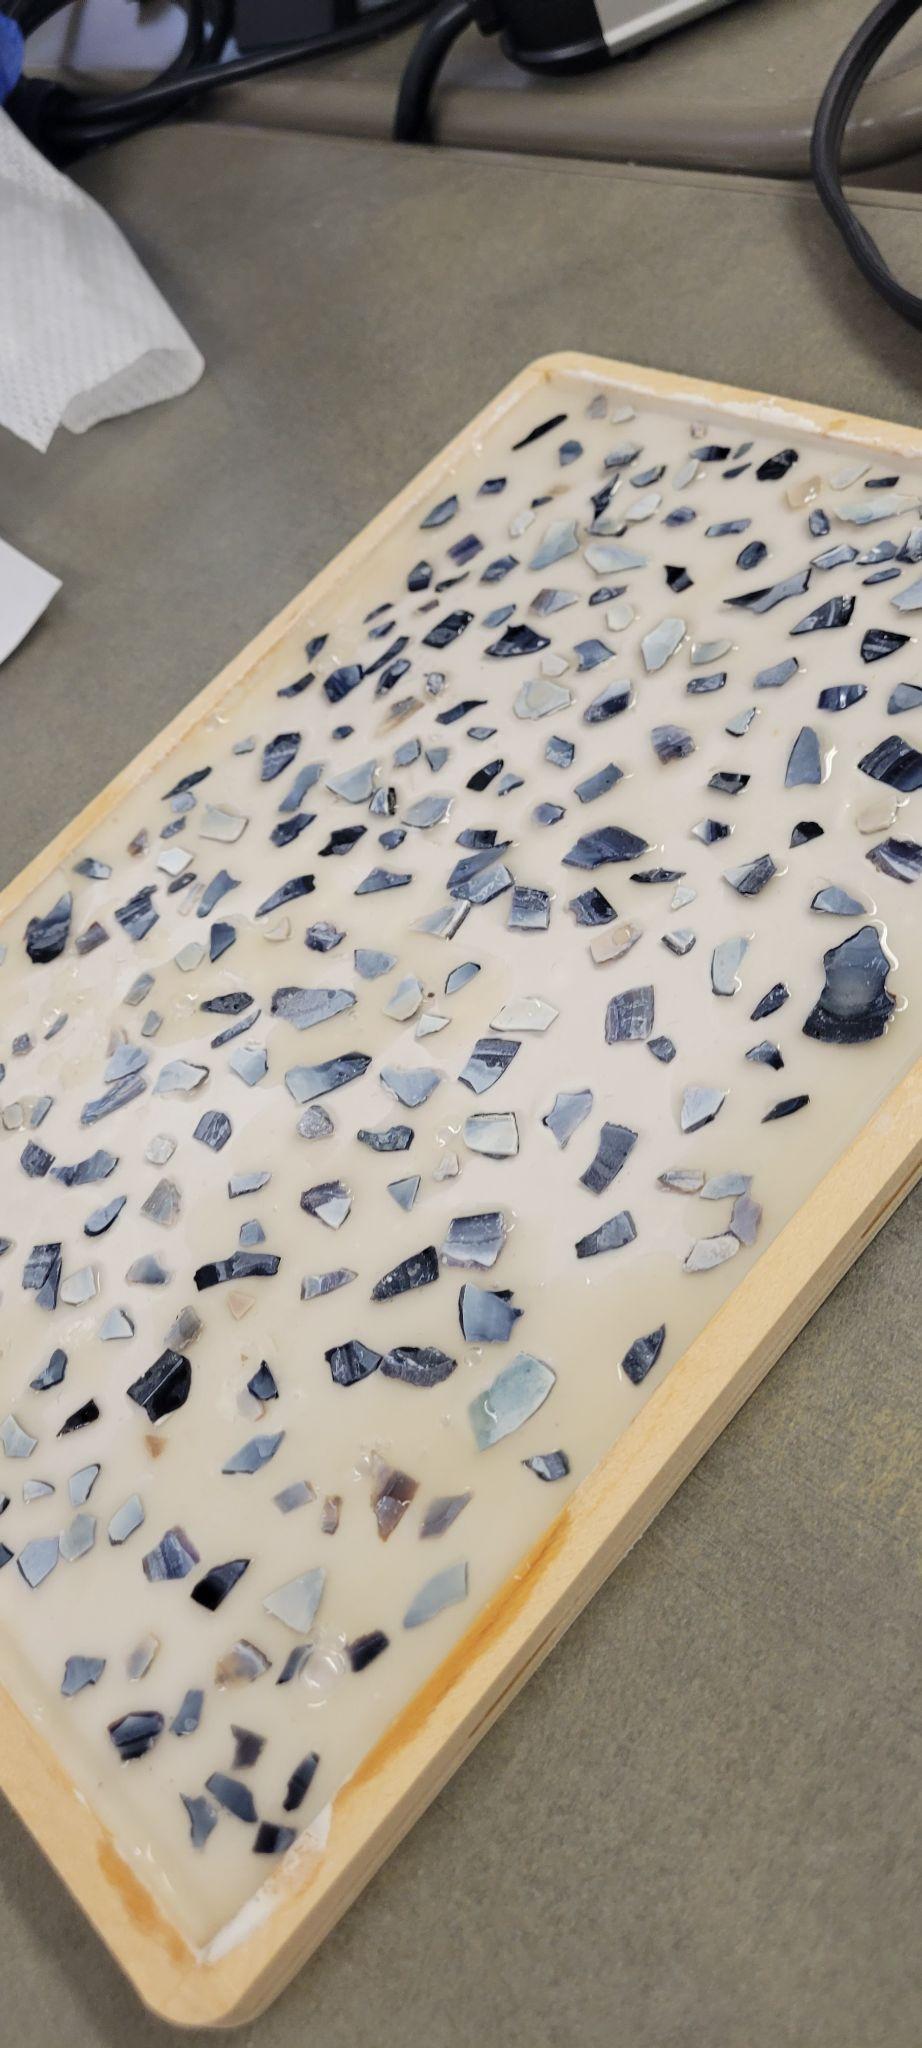
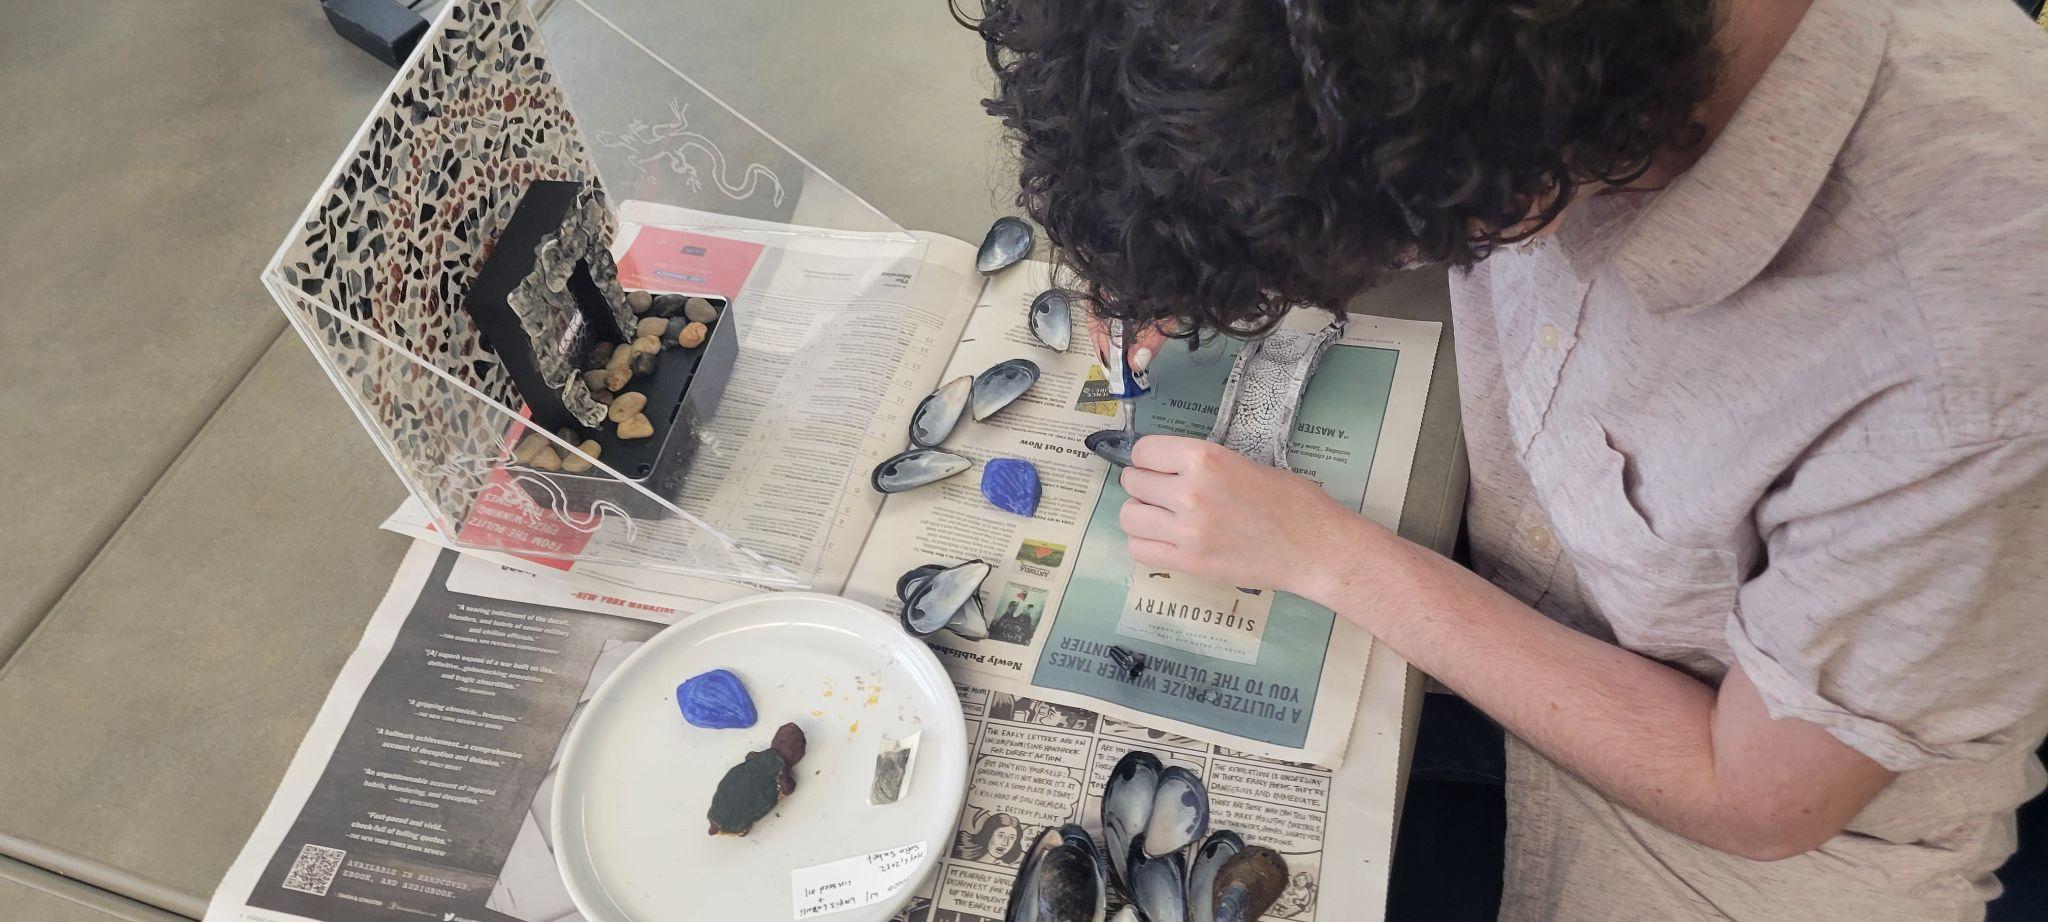
One of the most common ornaments in grottos was beautiful shells. This is also mentioned in Ms. Fr. 640: shells “which are found in the sea & similarly those in which certain small crabs dwell are very beautiful for grottos” (fol. 118r). This was therefore a must for our recreation and so we decided to make a mosaic of the shells on the back wall of the grotto. The first step in making the mosaic was crushing up shells. We opted for mussel and brown shells. To crush the shells, we placed three mussel shells or one brown shell at a time in a mortar because the brown shells were significantly harder to crush. Shells were crushed with a pestle until they were broken into approximately four millimeter pieces. When crushing the shell, shards could easily fly out in every direction. To prevent any injuries, we wore protective glasses and distanced ourselves from others. Once crushed they were ready to be arranged. However it turned out that getting the shells to behave similarly to ceramic or tile in a mosaic would be a challenge.
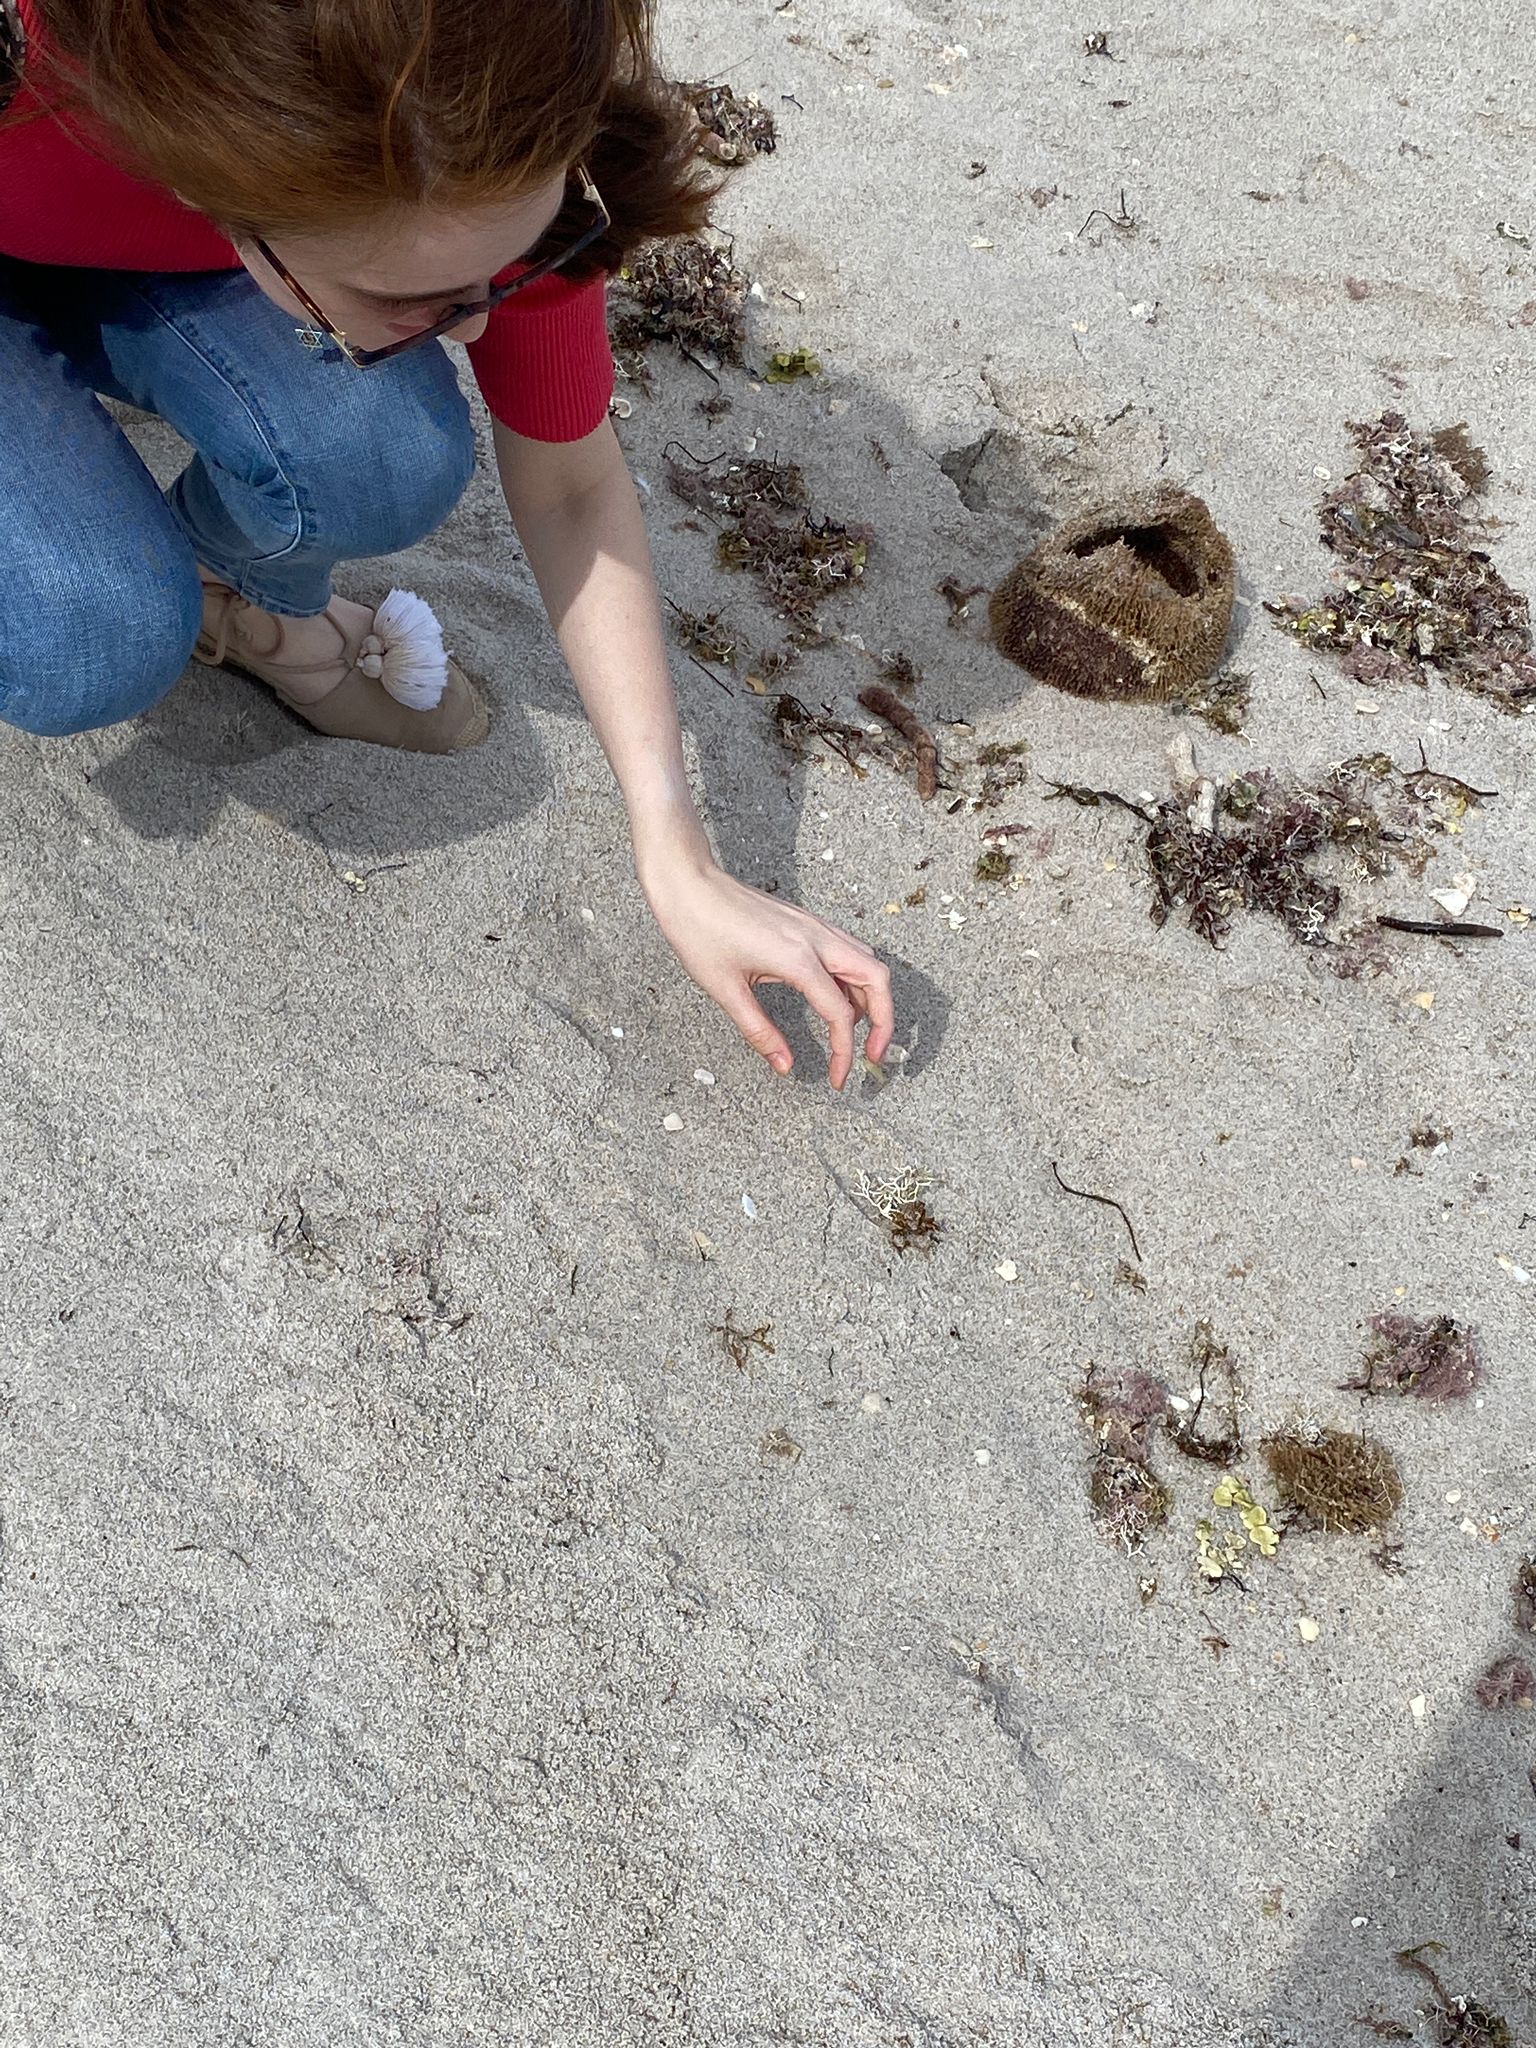
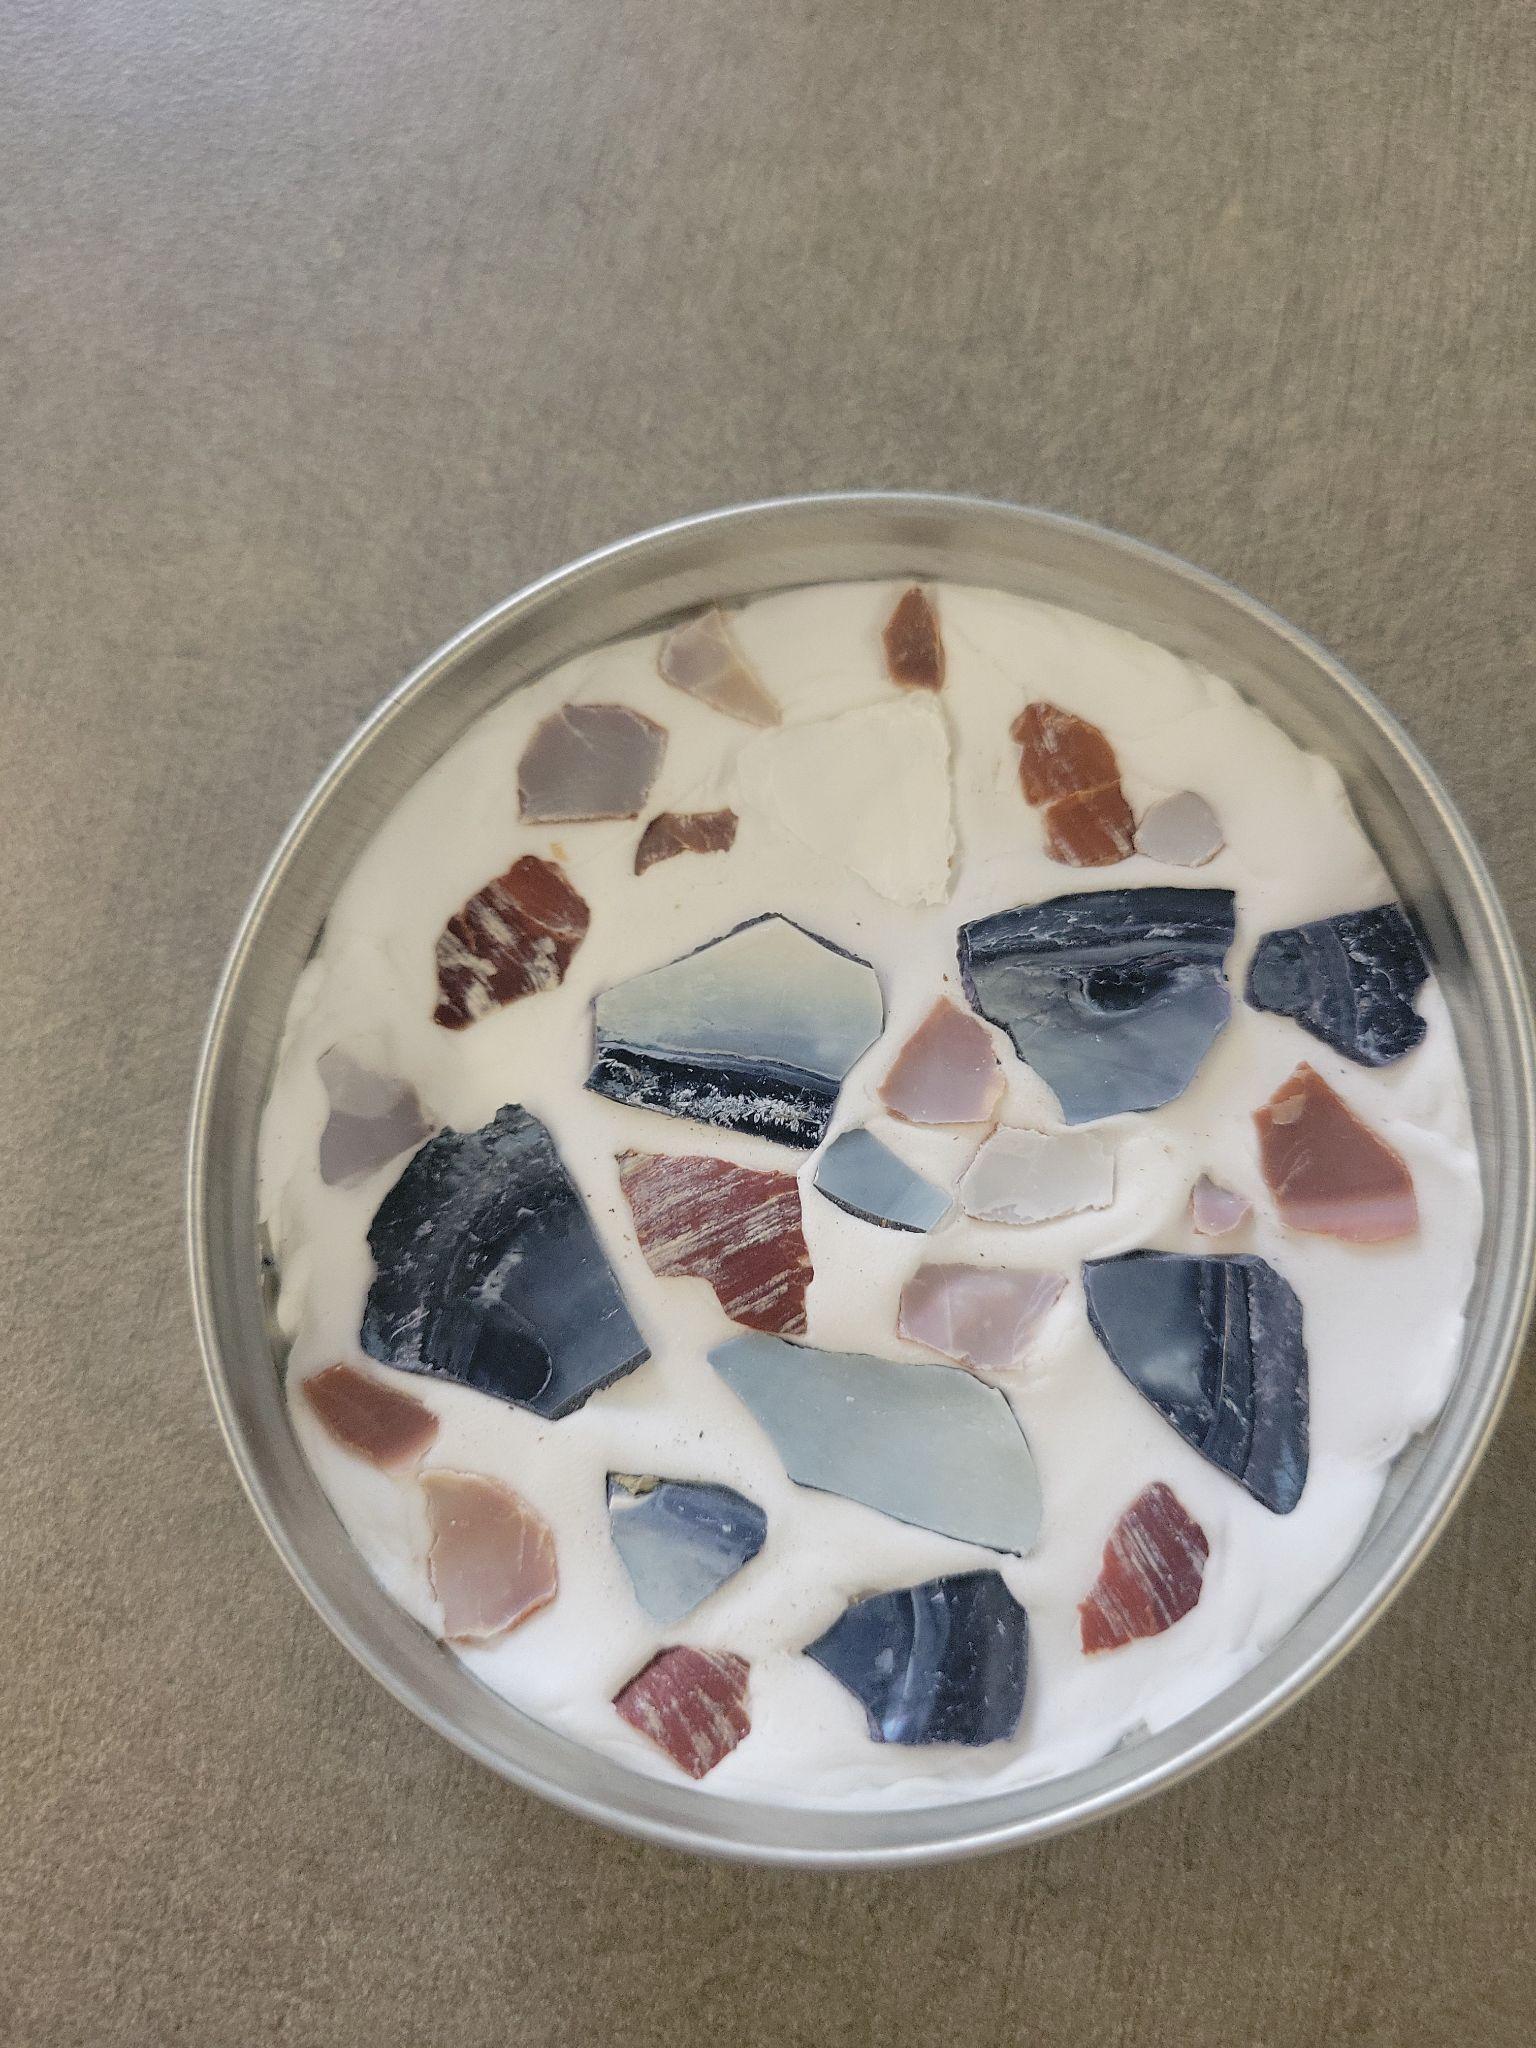
Collecting shells and rocks from the New Jersey shore.
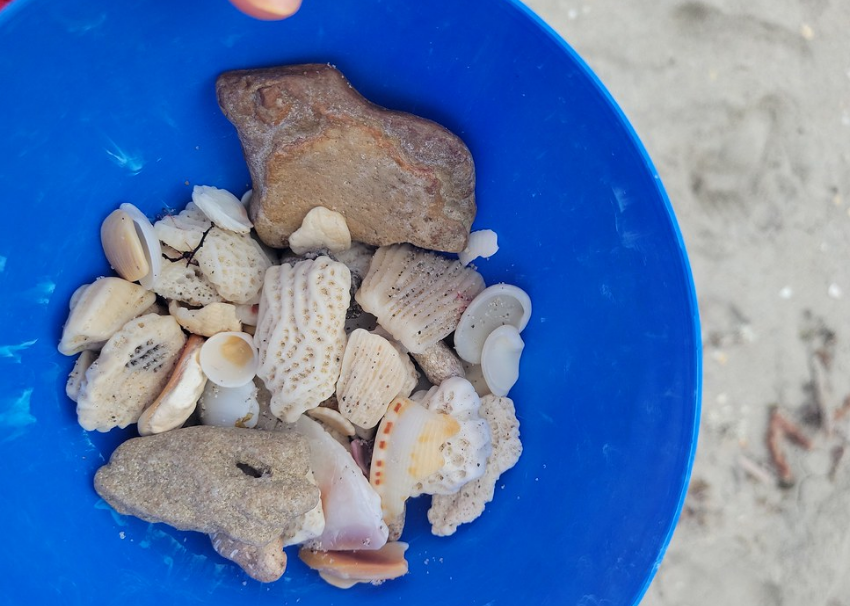
Shells and rocks collected from the New Jersey shore.
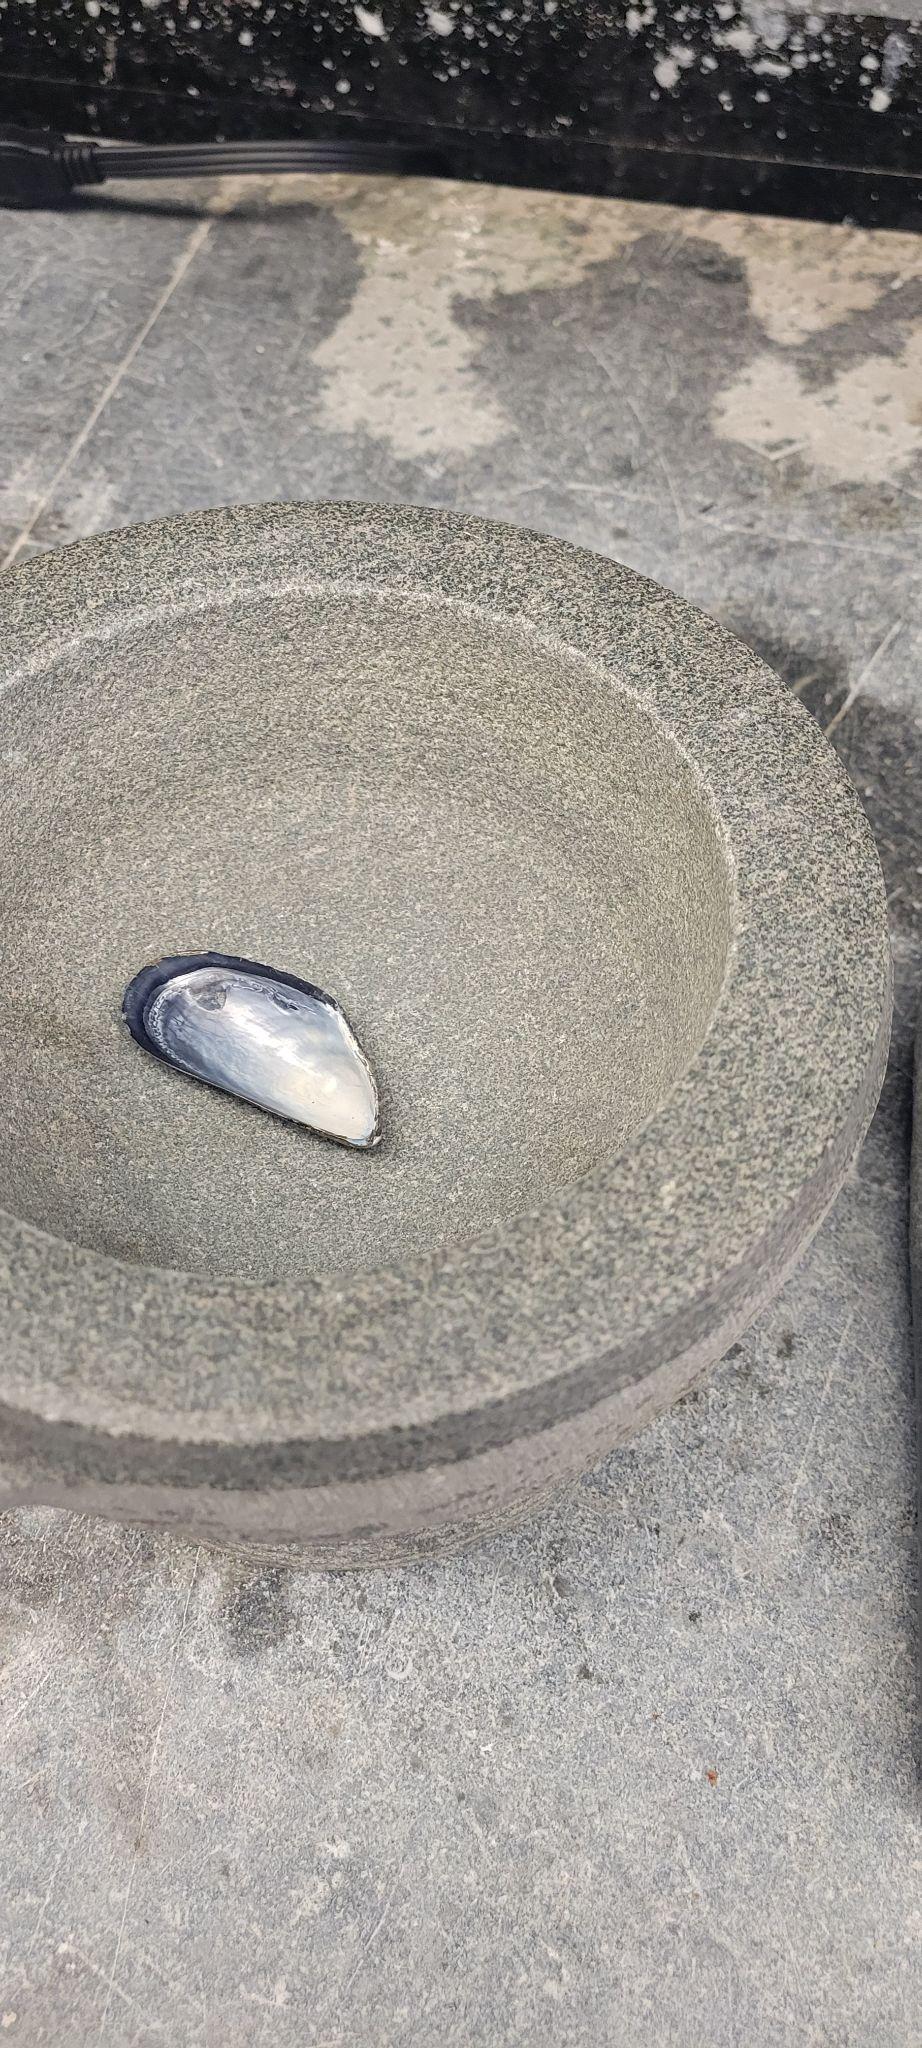
Mussel shell in a mortar, ready to be pestled.
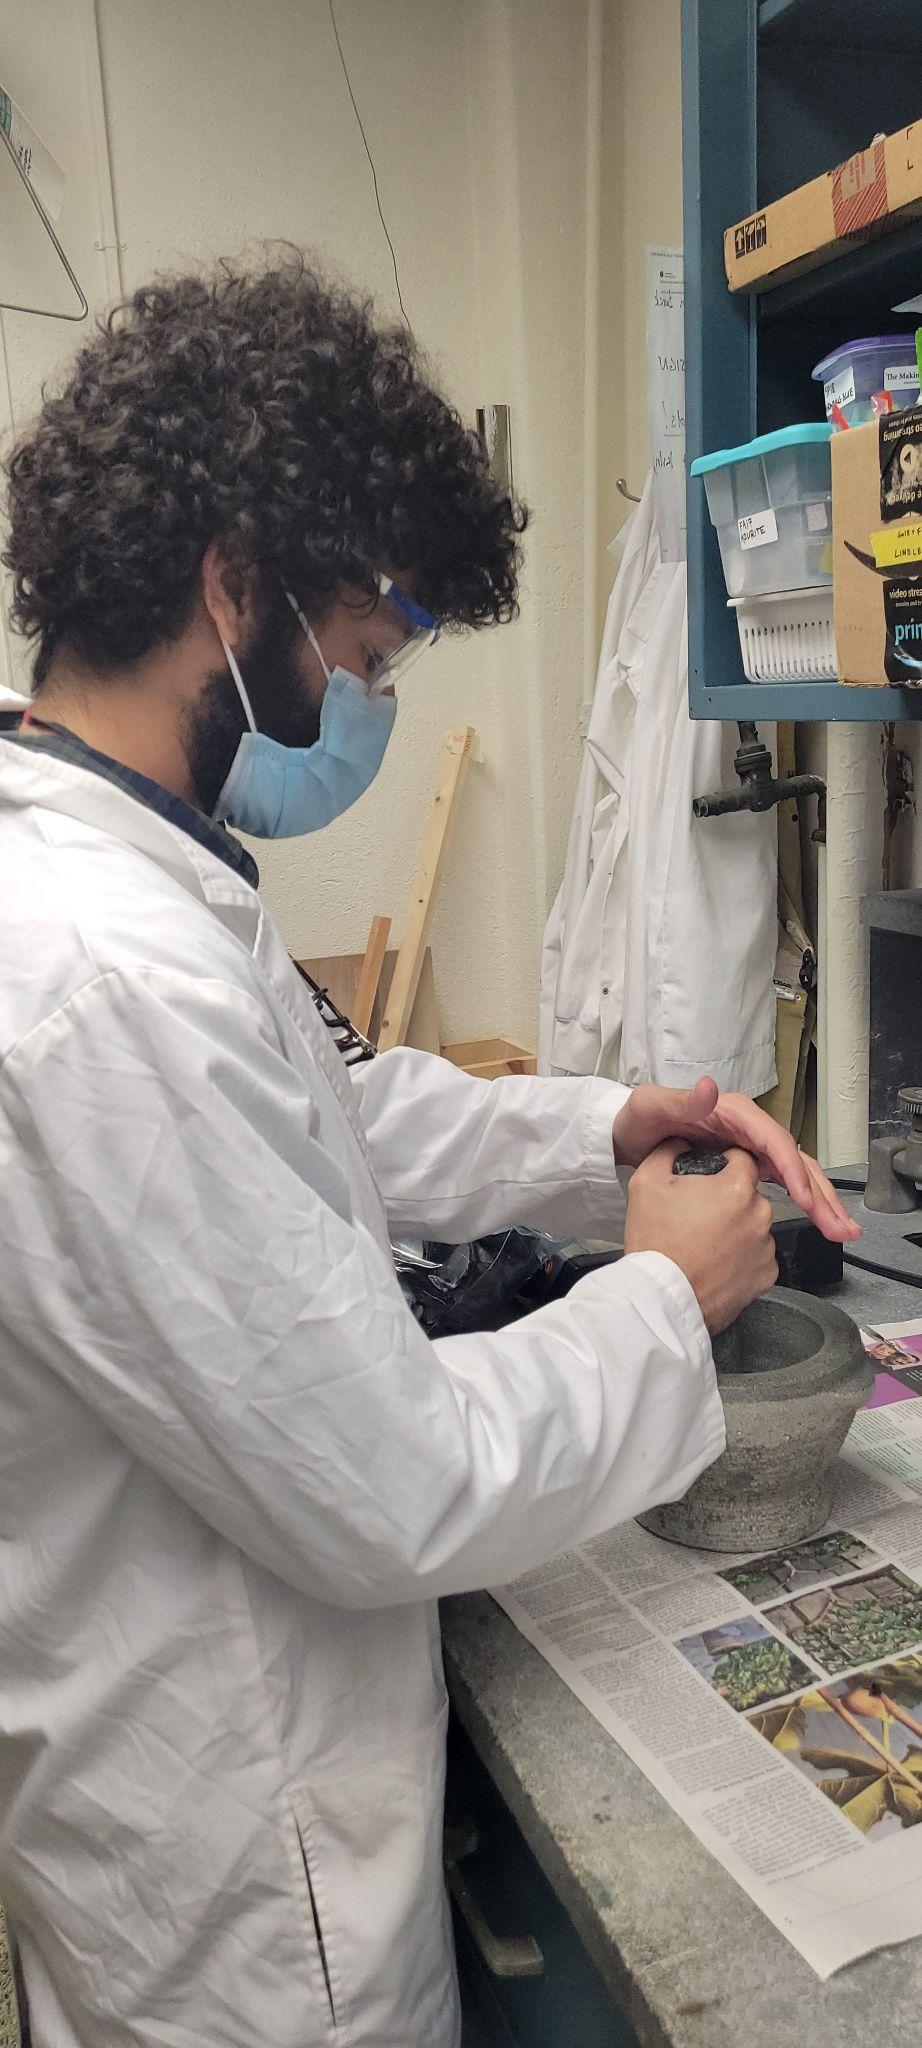
Crushing the shells in a mortar and pestle, attempting to prevent the pieces from flying out of the mortar.
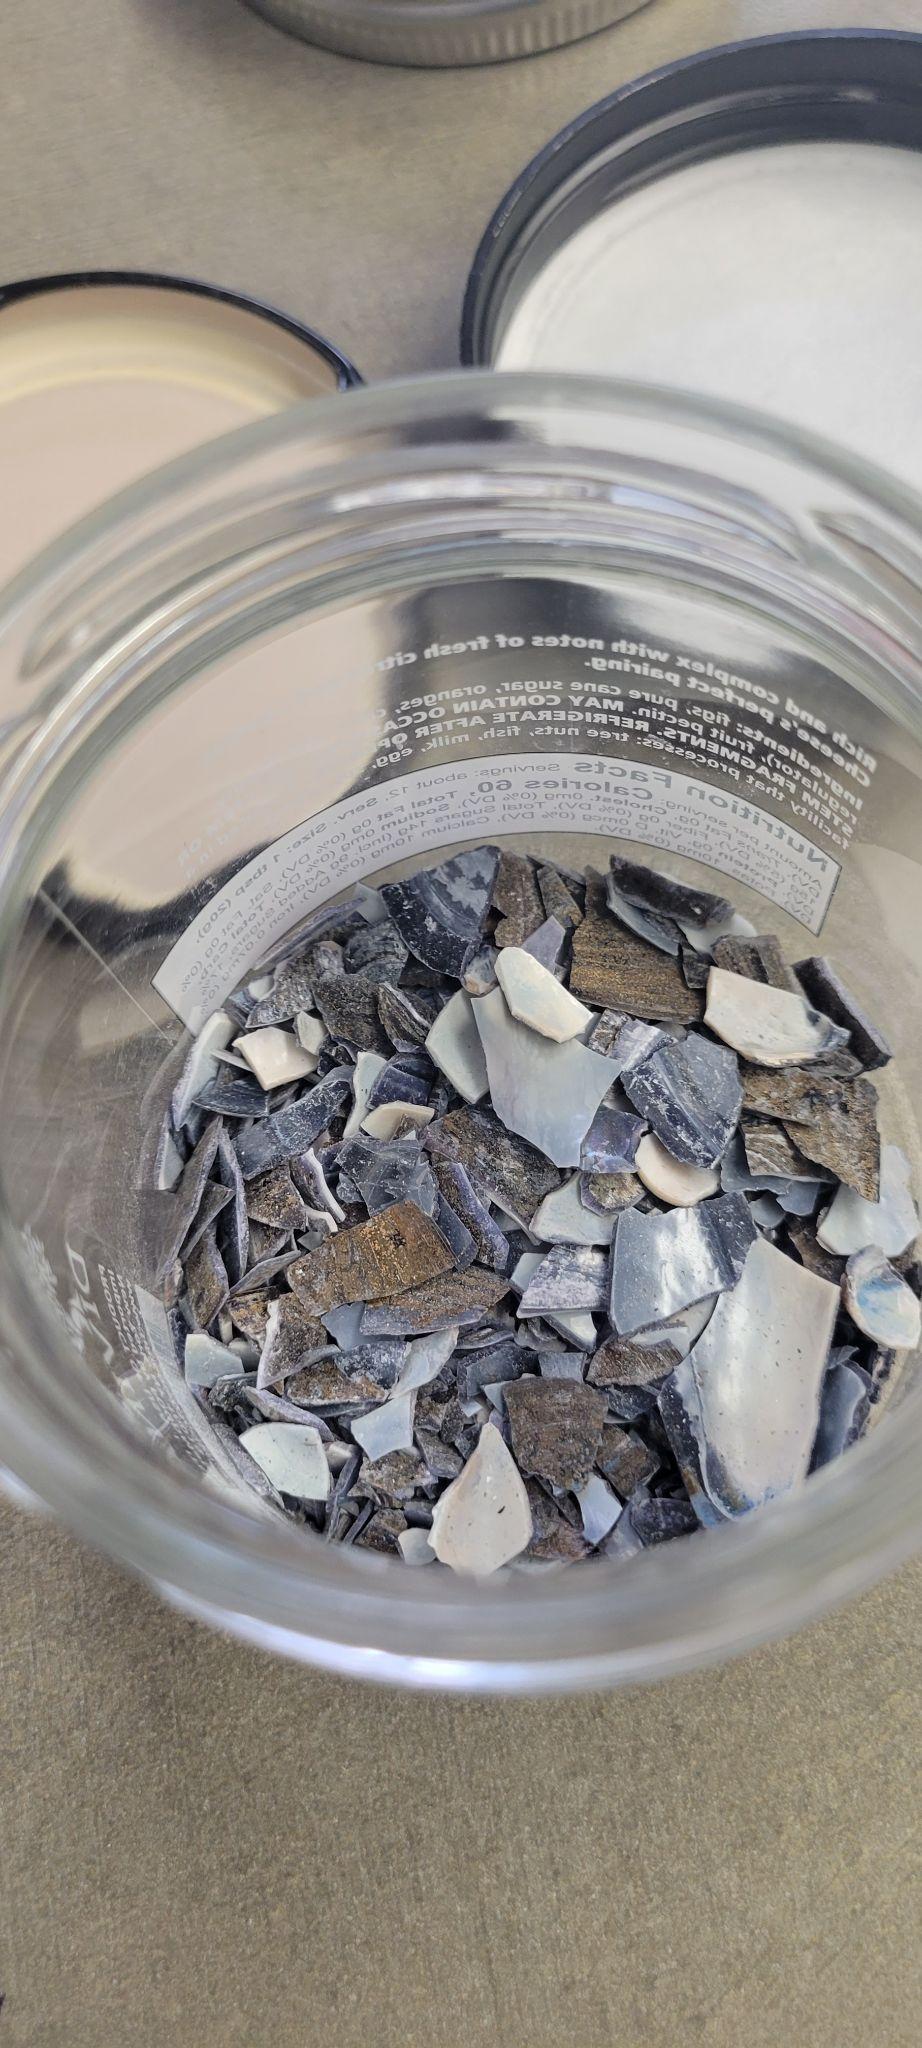
Crushed mussel shells.
Trial One
To determine which method would be best for the mosaic, we ran multiple trials. For the first trial, we pressed white air dry clay in the lid of a jar. The clay was spread into a thin, even layer. The shell fragments were then pressed into the clay, with the shiny side facing up.
While the shells did manage to remain attached to the clay, the final product didn’t achieve the look we were going for.
Trial 1: Shells pressed into white air-dry clay.
Trial Two
For the second trial, we used a commercially popular mosaic cement to contain the shells. The directions for the cement stated we should aim for a runny consistency. To achieve the correct consistency, we experimented with the cement to water ratio. Once the cement was ready, it was poured onto the inside of a shallow wooden box lid. The lid was eleven inches long and four inches high. The cement was then spread evenly with a spatula.
Mosaic cement spread across shallow wooden box lid.
To put the shell fragments into the cement, we used a pair of tweezers. The shells were placed one by one with the shiny side facing up. After each placement, the shell fragment was pushed into the cement to ensure it would stay. When all of the shells were placed, we noticed the shells that were placed earliest had come loose. The shards of shell, being lighter than the cement, had floated to the top completely detaching themselves. It was as if they had never been placed into the cement.

Trial 2: Shells with commercially popular mosaic cement.
Closeup of the shell pieces lifting up out of the mosaic cement and falling off.
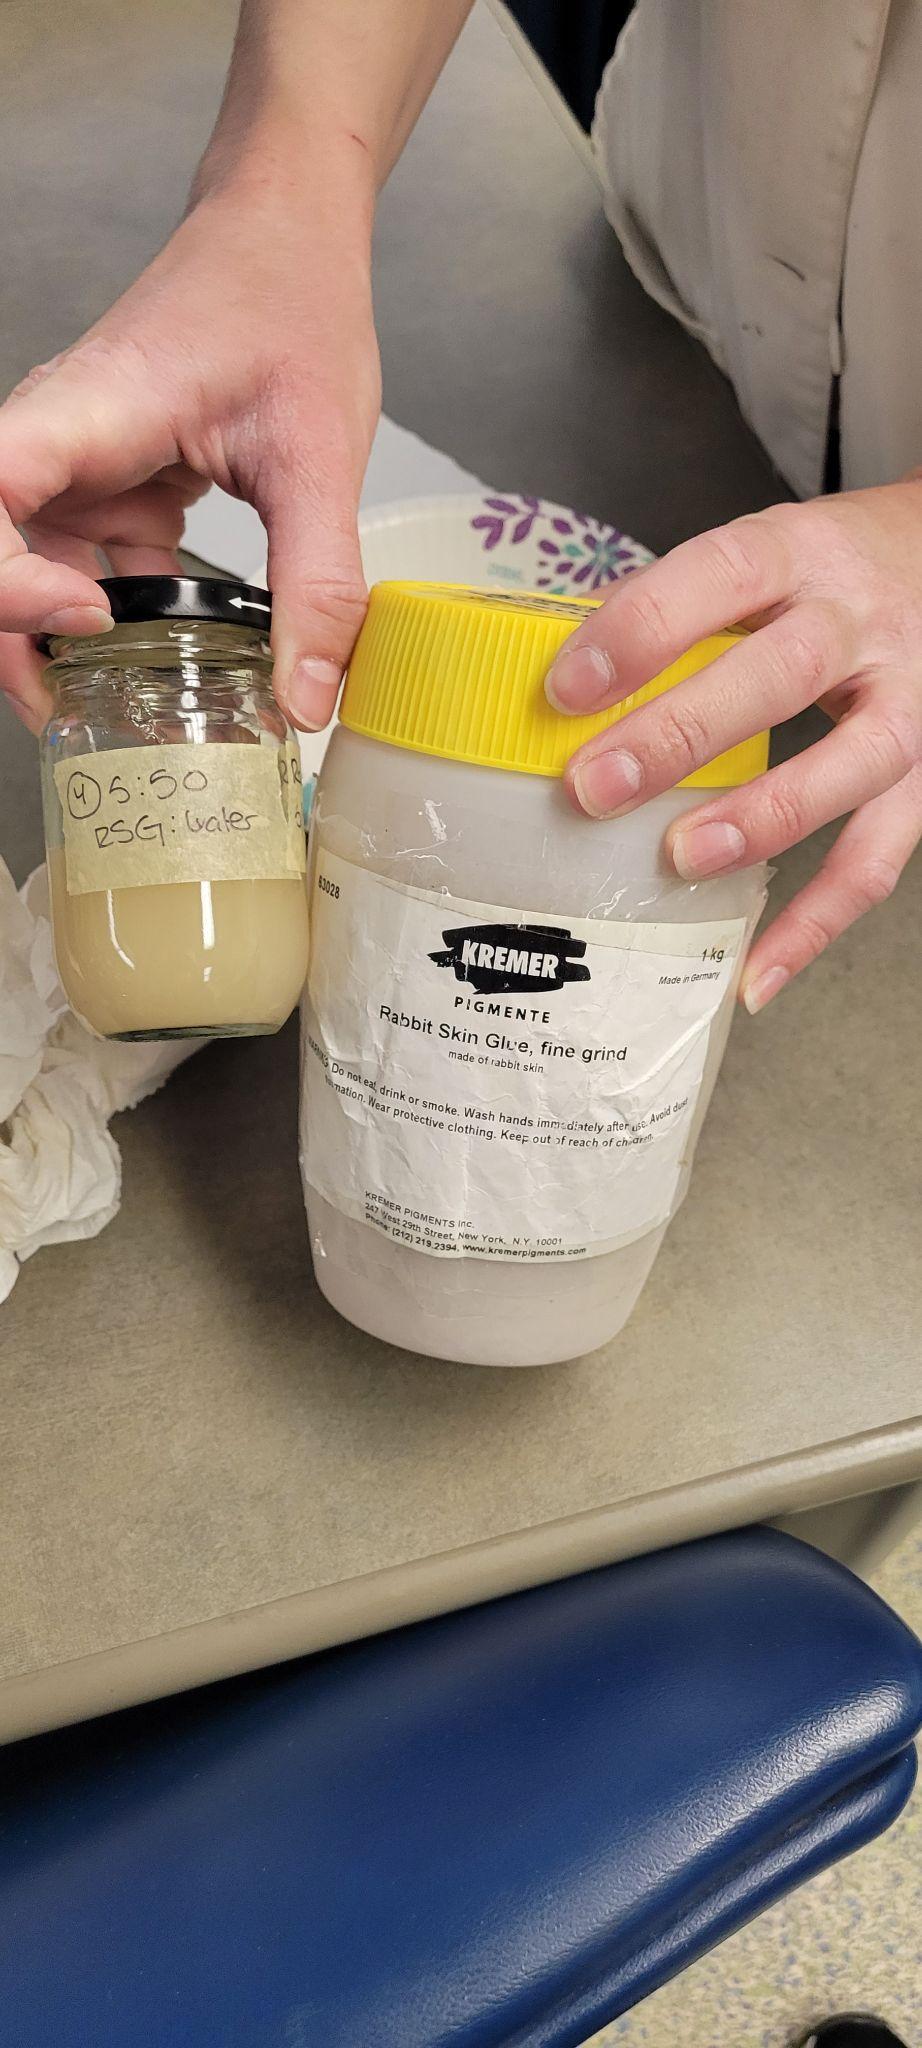
Instead of starting over, we decided to try and salvage what we had. To do so, we decided on using rabbit skin glue to get the shells to stick to the cement. The rabbit skin glue in the lab had been prepared by mixing together one part rabbit skin and ten parts water over heat. Like most hide and gelatin glues, the glue solidifies at room temperature and must be warmed to become liquid, so we had to place the glue vial within a beaker of water. The beaker was then placed on a burner. While on the burner, we used a chopstick to stir the mixture. When the glue was fully melted and well mixed, we removed it from the heat. We then used a pipette to extract the liquid and carefully spread it over the shells. While there wasn’t enough glue to cover the entire piece, we were able to cover about 80% of it.
The rabbit skin glue mixture.
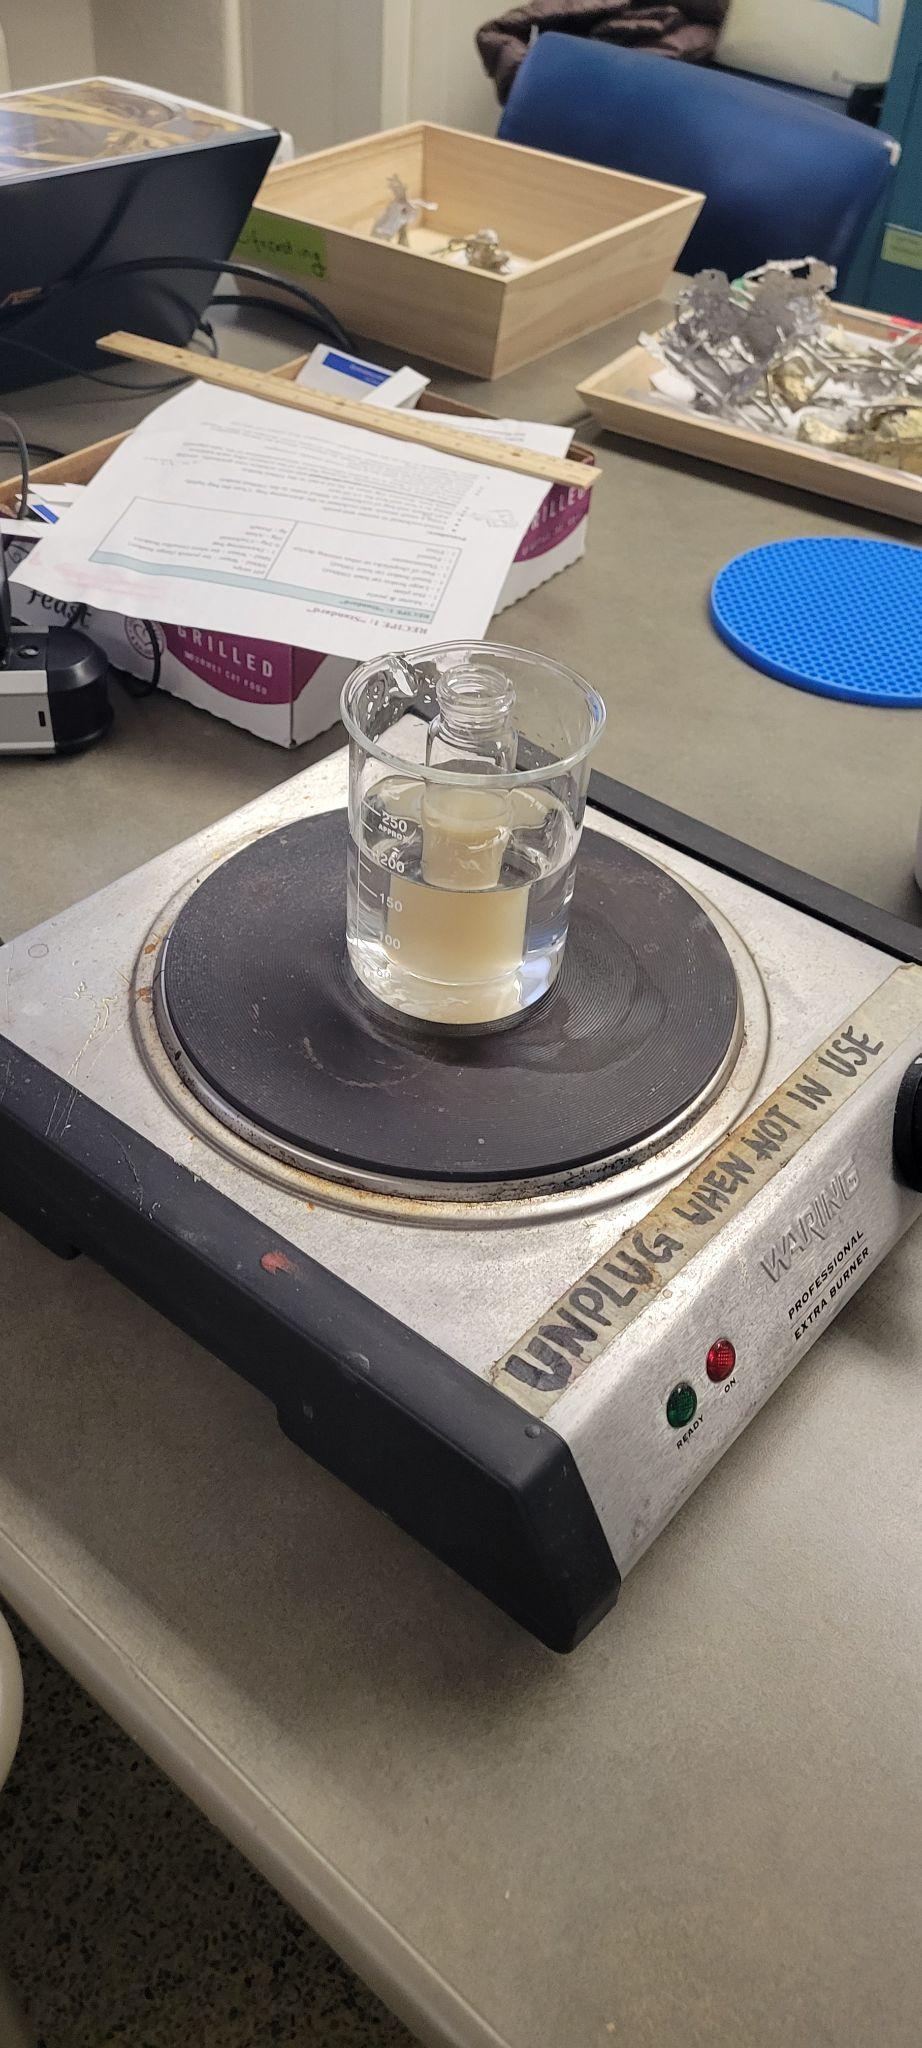
Rabbit skin glue heated inside a beaker of water on a hotplate.
Rabbit skin glue, still hot and in liquid form, spread across the top of the shells detaching from the mosaic cement.
Trial Three
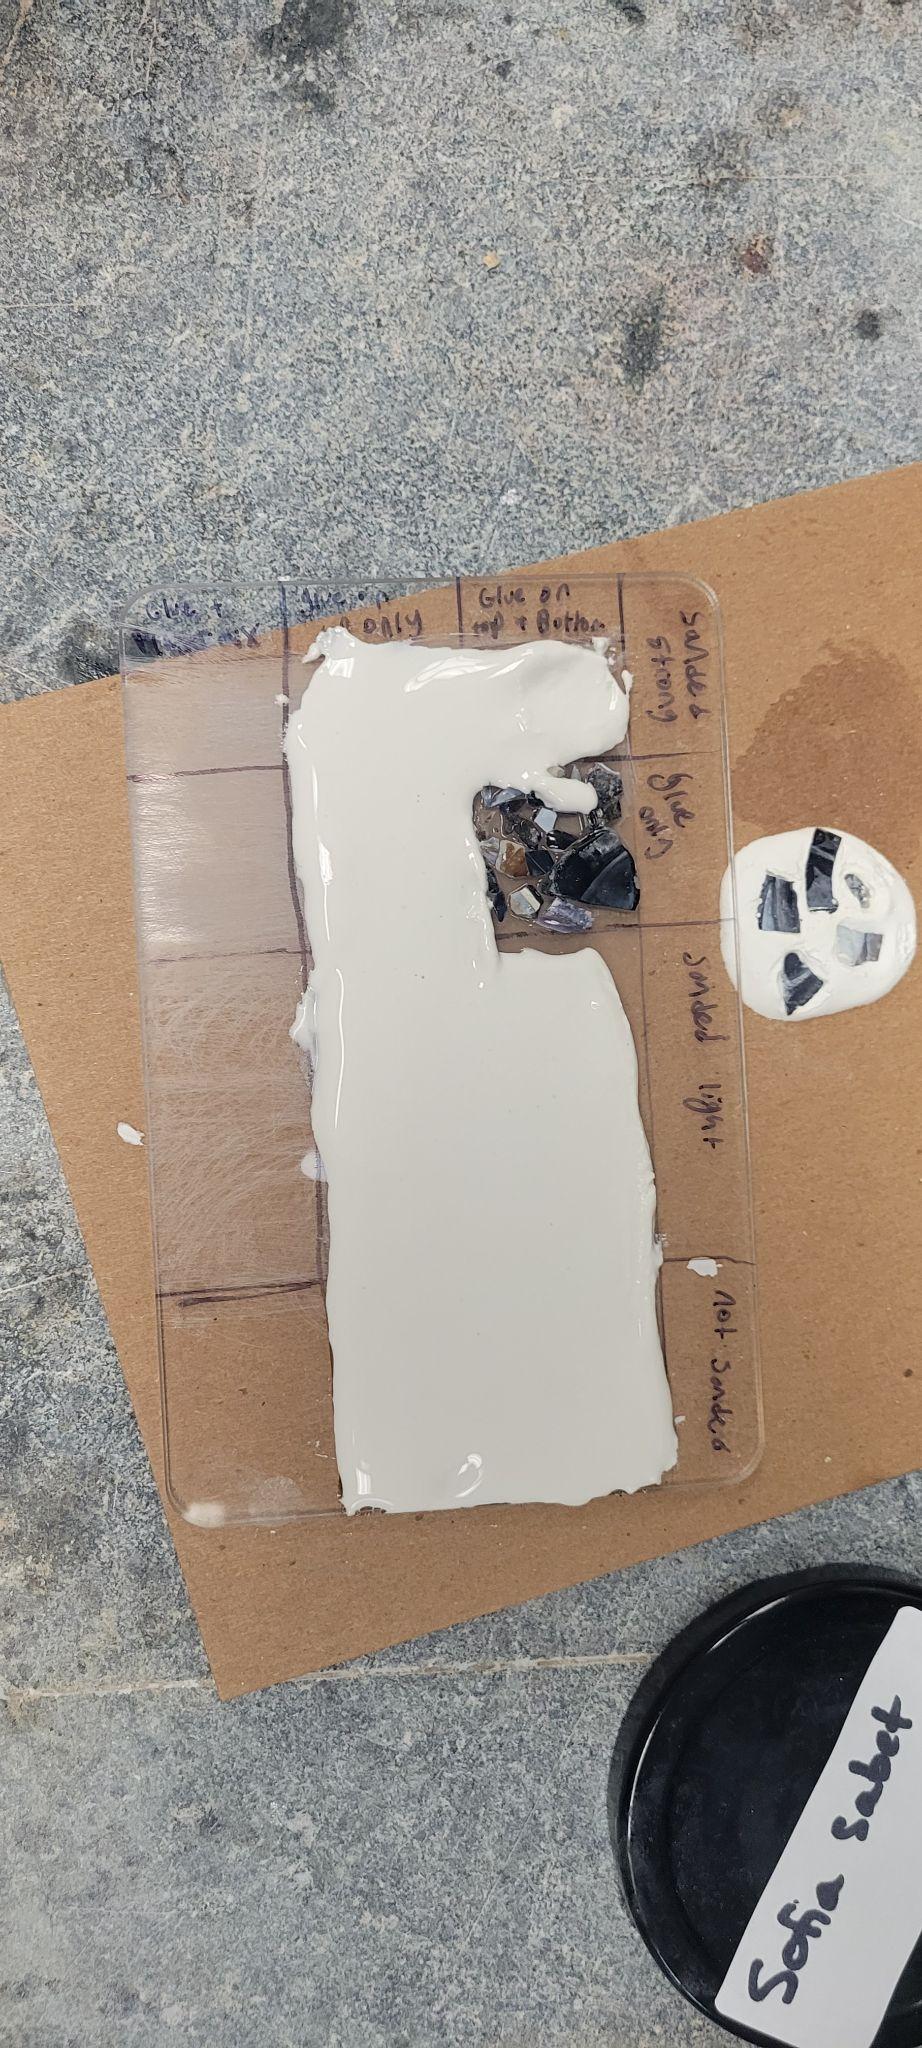
We decided to scale down the trial and used a small spare piece of acrylic to test other options. We were worried about whether the mosaic cement would stick to the acrylic without assistance, so sections of the acrylic were sanded either lightly, heavily, or not at all to test whether a textured surface would aid in adhesion. Within each section, four combinations of rabbit skin glue and cement were tested: rabbit skin glue only, a layer of cement with the shells pressed in and then glue on top, glue applied both on top and underneath the cement, and finally mixing rabbit skin glue with cement instead of water. It turned out that mixing the rabbit skin glue with the cement gave the best results as the resulting texture of the mixture before it dried was a bit tacky, and therefore held on to the shell bits as it dried.
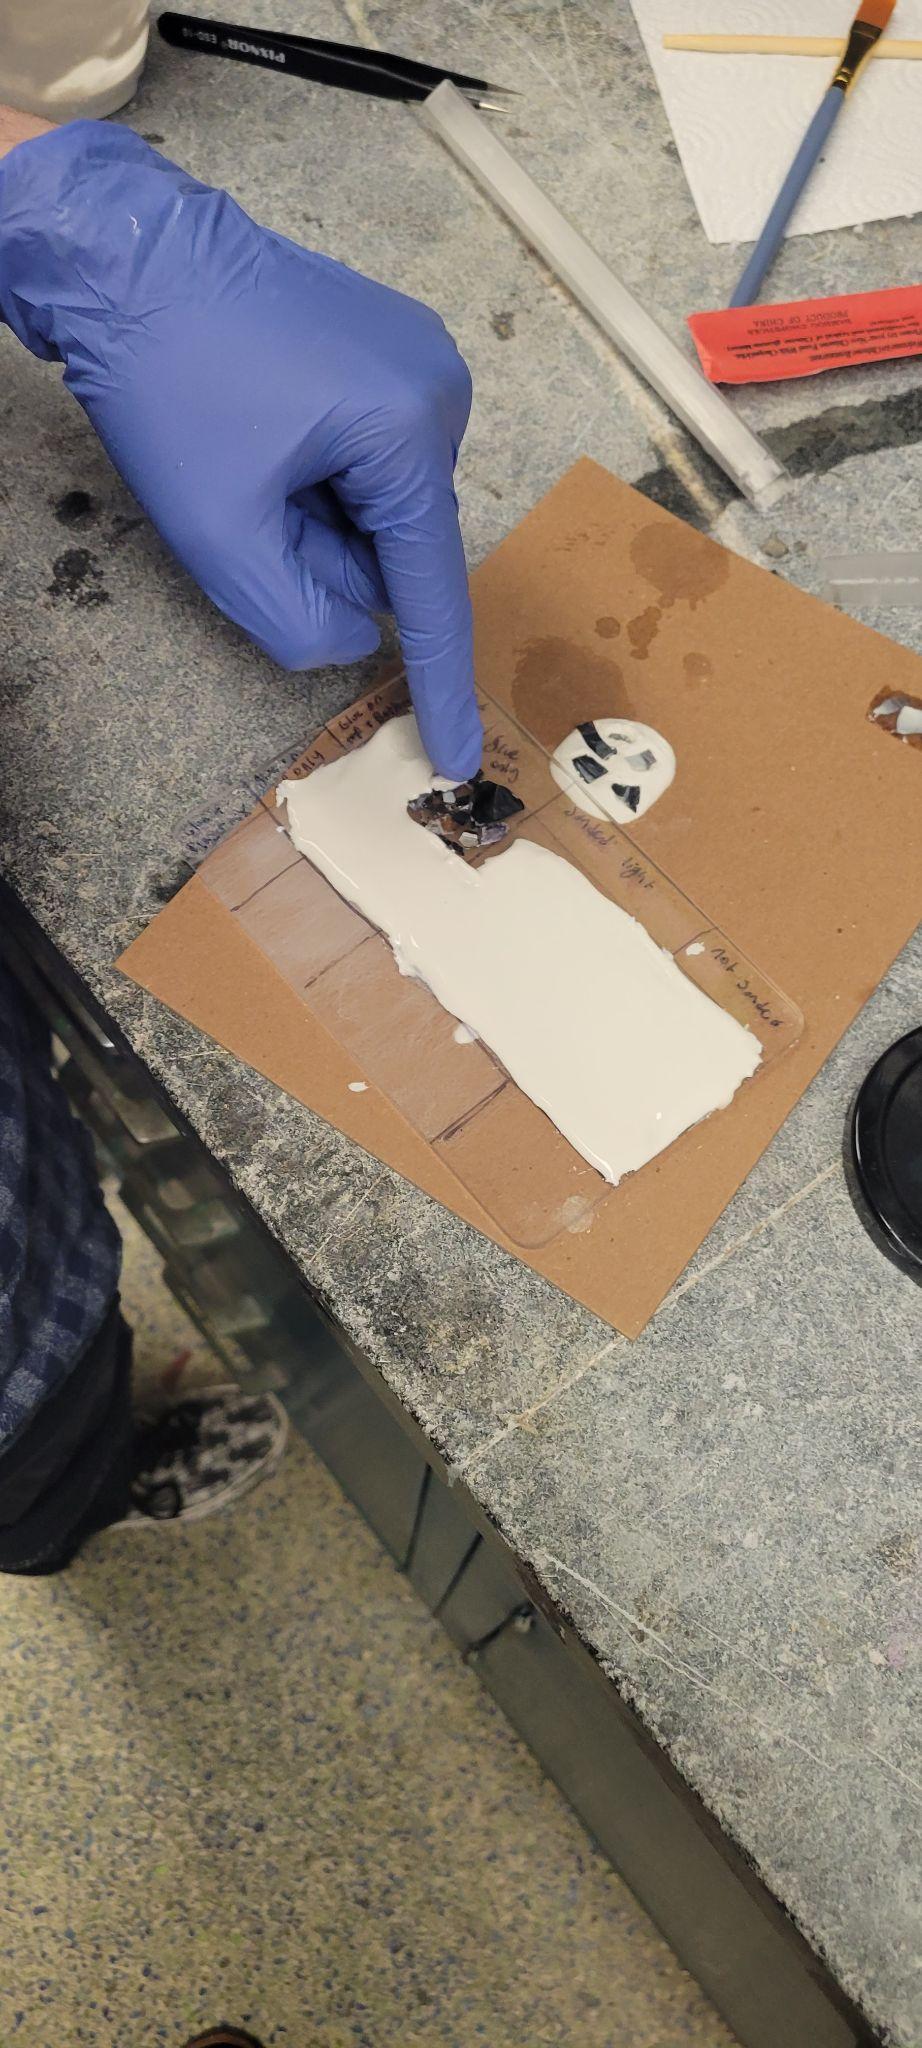
Testing the tackiness of the mosaic cement on a piece of acrylic. The test piece of acrylic was split into sections to test whether sanding it would help the cement mixture adhere and to test different applications of the cement with additions of rabbit skin glue.
The test piece of acrylic with different combinations of cement and rabbit skin glue and varying degrees of sanding.
Final Mosaic
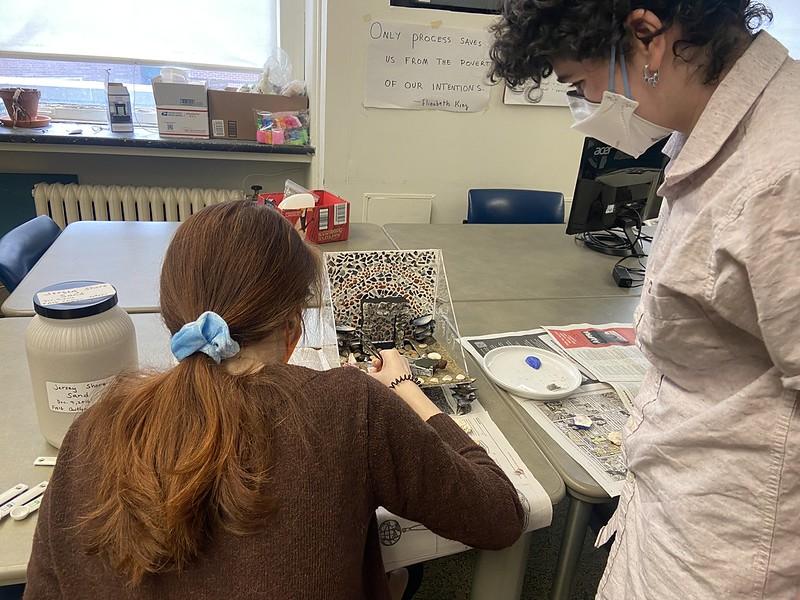
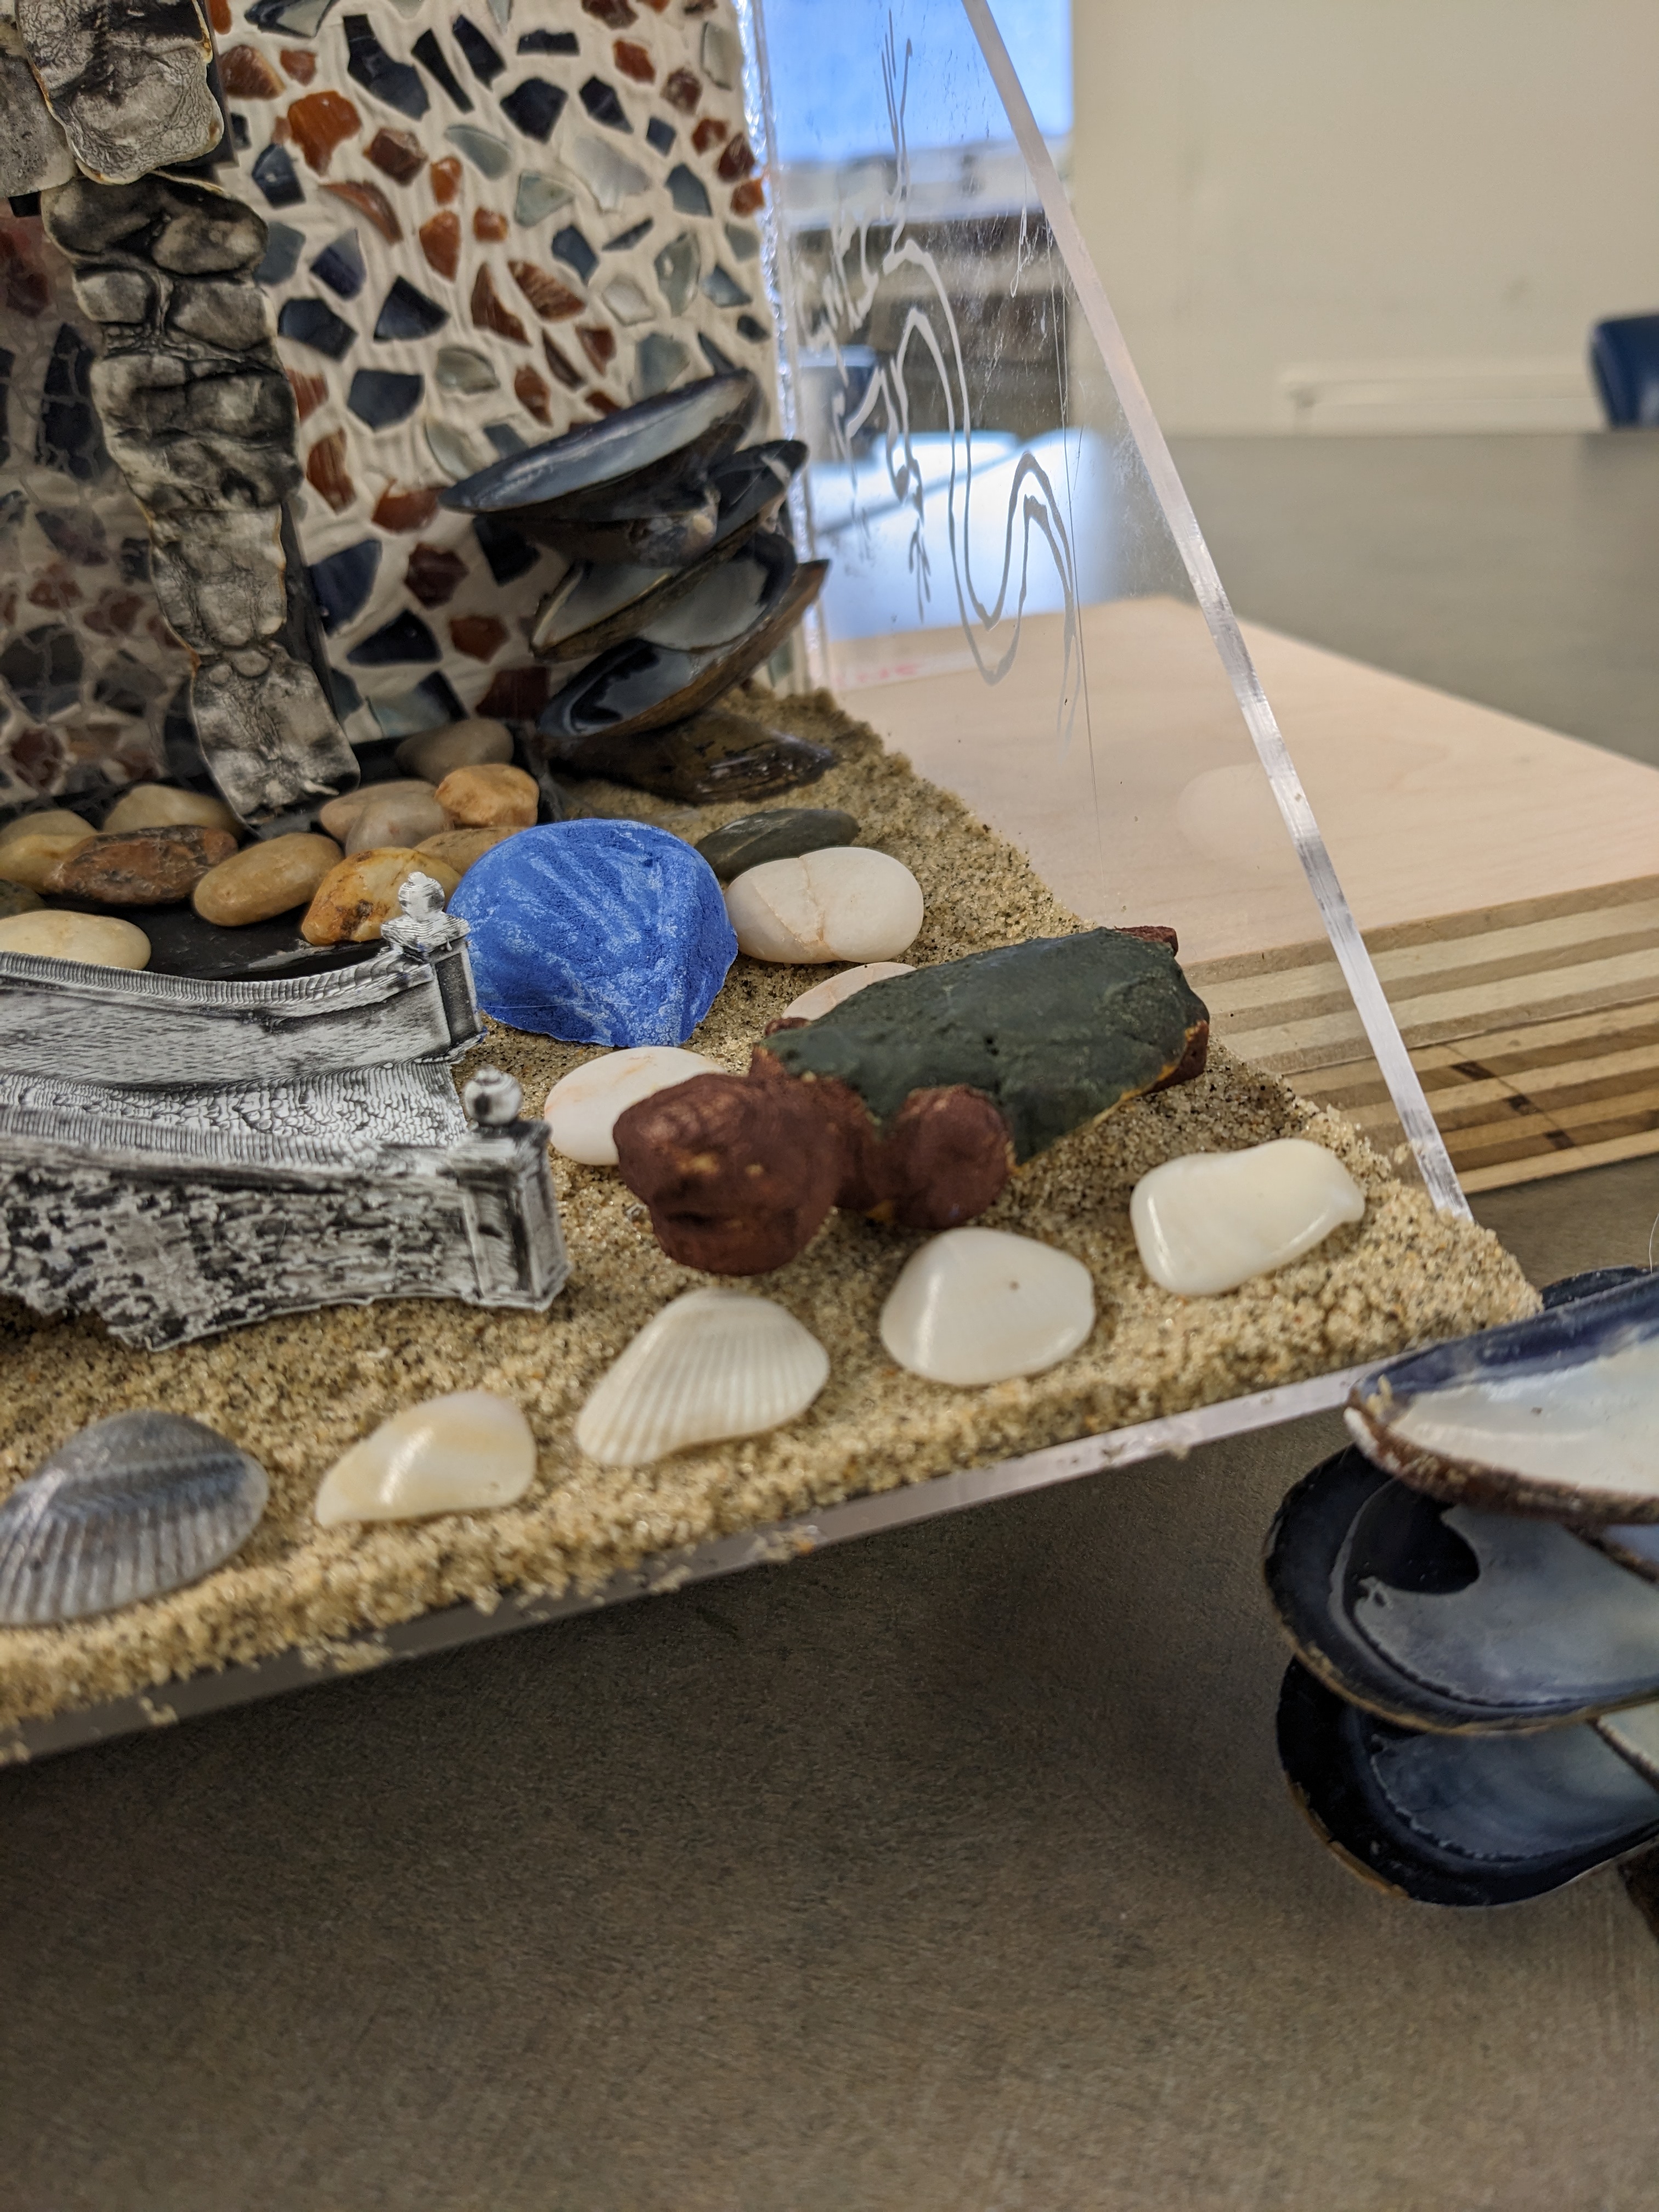
Once the method had been figured out, the final construction of the mosaic could commence. We made rabbit skin glue in a 1:10 ratio of glue to water. This was then mixed into the cement until it formed a loose paste, which was spread on the acrylic sheet for the back wall. Quickly before it dried, shell pieces were individually placed onto the cement in the shape of an archway and pressed into the cement to prevent them from floating upwards. Once the cement dried, a thin coat of rabbit skin glue was brushed on top of the shells to further secure them in place for durability. Then the walls and base of the grotto were glued together using acrylic cement in preparation for the addition of more components.
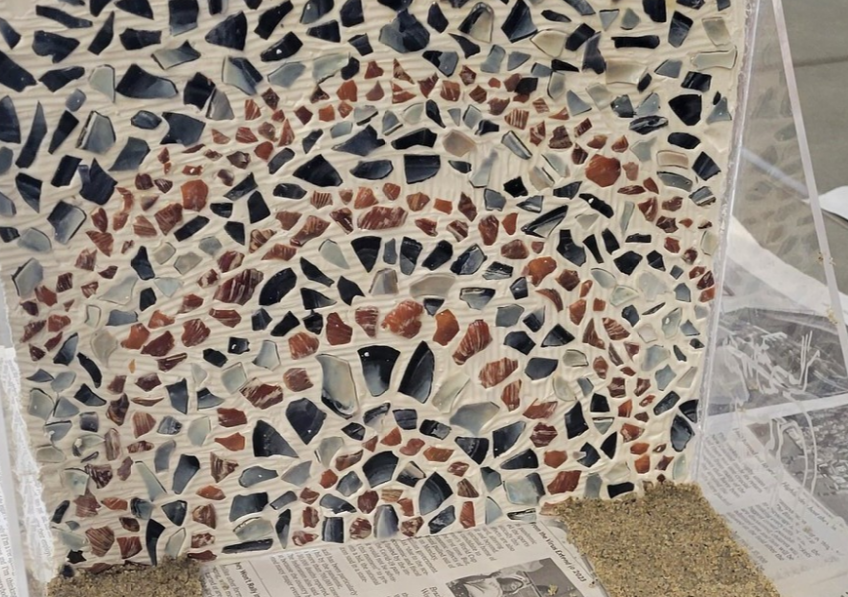
The final design of the shells mosaic, adhered to the back of the grotto with mosaic cement and rabbit skin glue.
Shell Feet/Sculptures
In order to hold up the grotto frame and contain electronics for a water feature underneath, supporting feet were needed. The feet were created by gluing together whole mussel shells layered in alternating directions. At first rabbit skin glue was used to glue together the shells, however it turned out to not be sturdy enough. The only sturdier glue we had on hand was acrylic cement so that was used, however if we had had more time we would have liked to investigate stronger historical glues. The same arrangement of gluing shells was also done to create two miniature shell statues which were placed on either side of the center archway.
Gluing together whole mussel shells to create feet for the frame as well as additional sculptures.
Features in Our Miniature Grotto
Bridge
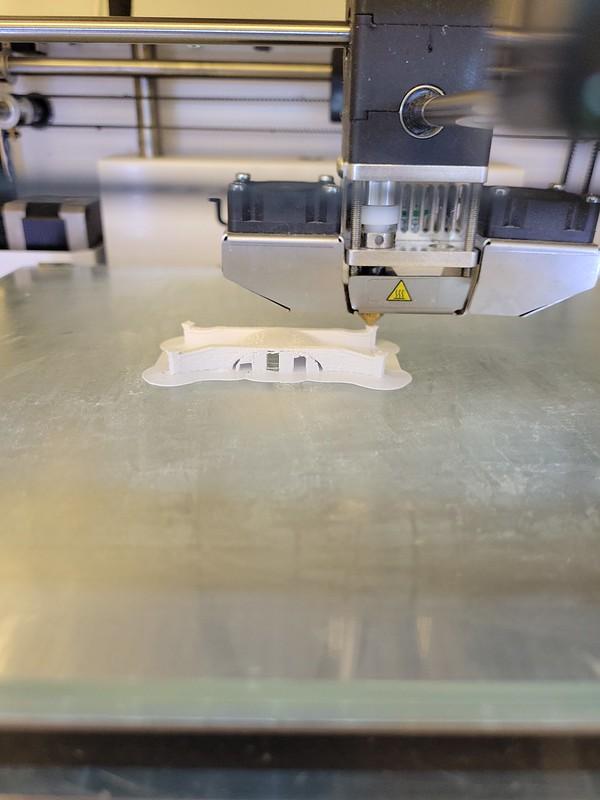
Using the 3D printer, we were able to make a miniature bridge for our grotto. The design for the bridge was obtained through the website Thingiverse—an open source STL file site. To test the viability of the design, we scaled the design down to 1.75 inches. The SD card containing the file was printed on a Makerbot 3D printer in the Barnard College makerspace using PLA filament. Though the bridge was very small, it took over four hours for it to print. When it was done printing, we thoroughly inspected the final product. We liked how there was a cobblestone like texture on the bridge and appreciated the detailing on the base.
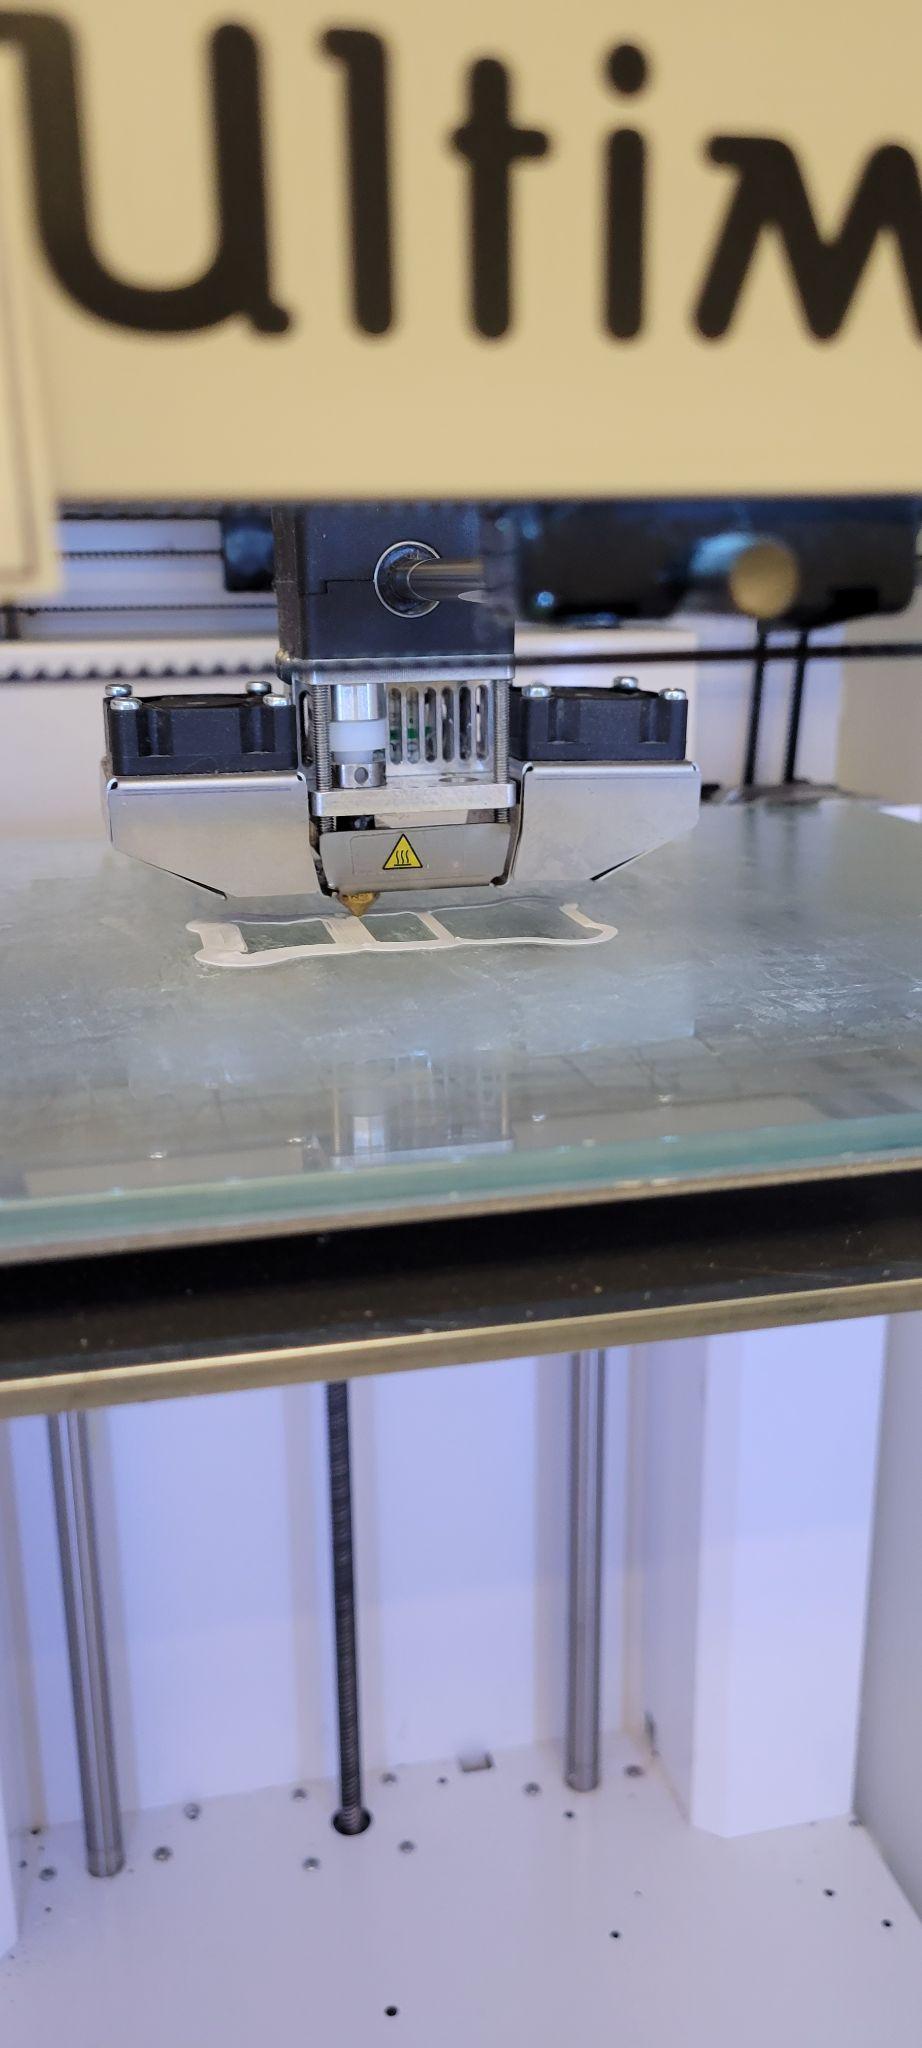
3D printer in the Barnard College Makerspace, printing the bridge in white plastic.
Top view of 3D printer in the Barnard College Makerspace, printing the bridge in white plastic.
The first, miniaturized version of the 3D-printed bridge.
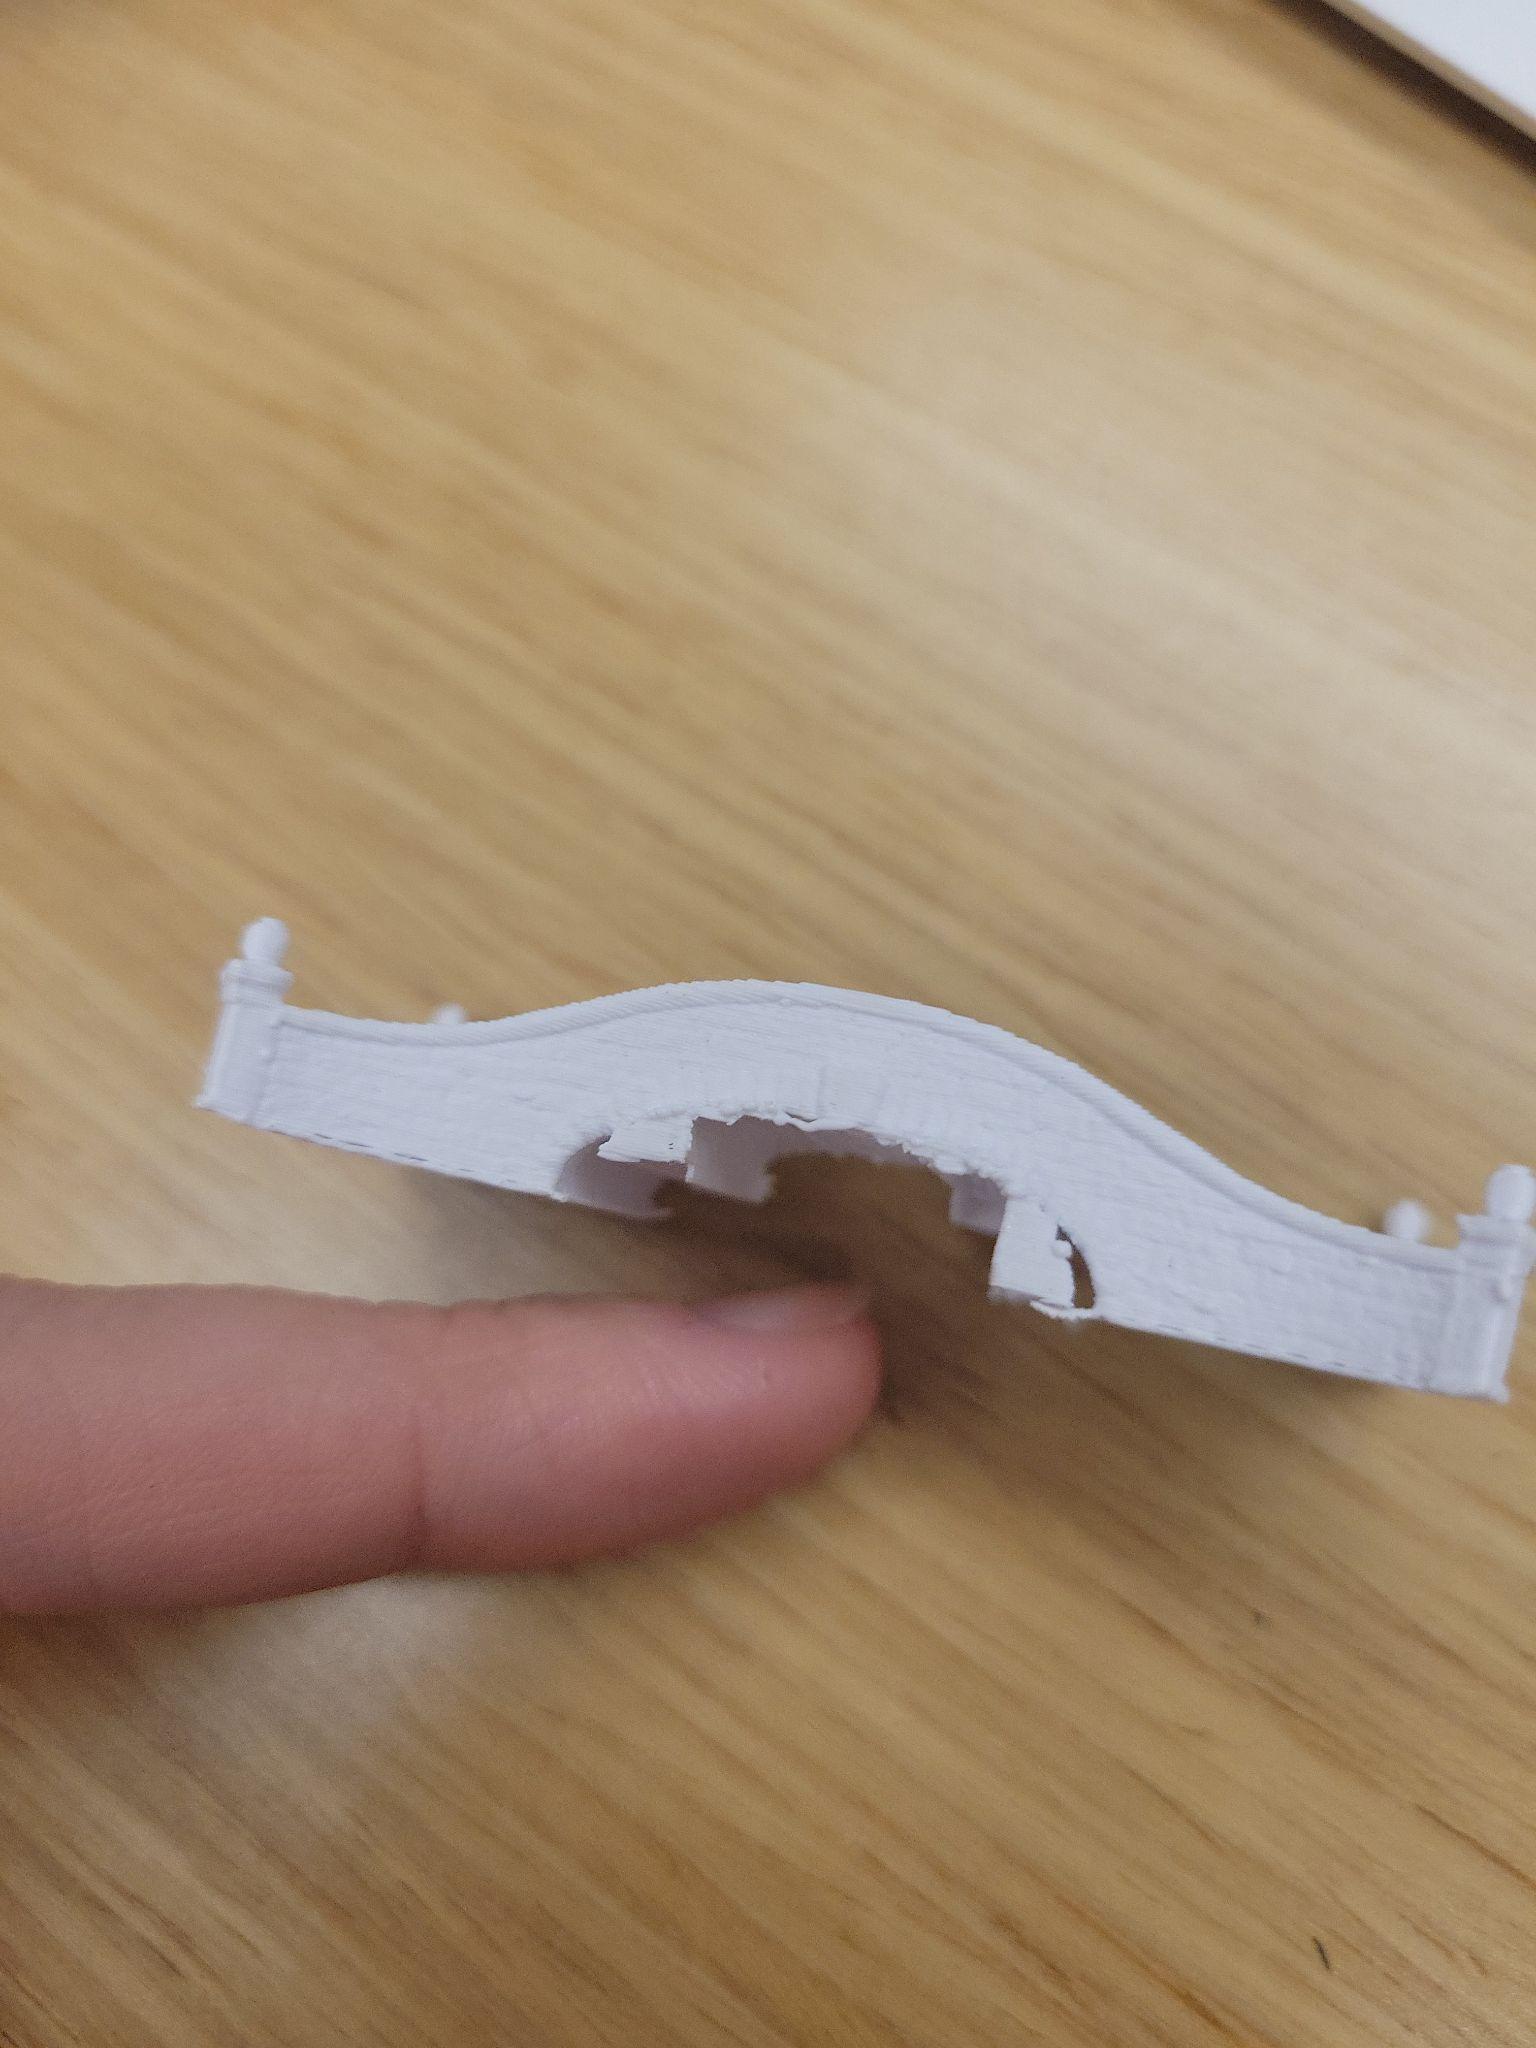
Since the mini bridge was a success, we increased the size to five inches. The estimated print time for the bridge was eight hours, so we let it print overnight. The next morning when we came to pick up the bridge, we were met with a jumble of plastic strands.
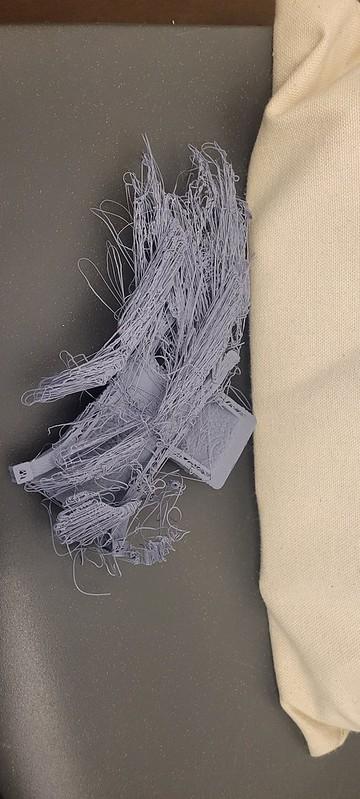
The jumble of plastic strands from the failed 3D printing of the larger bridge.
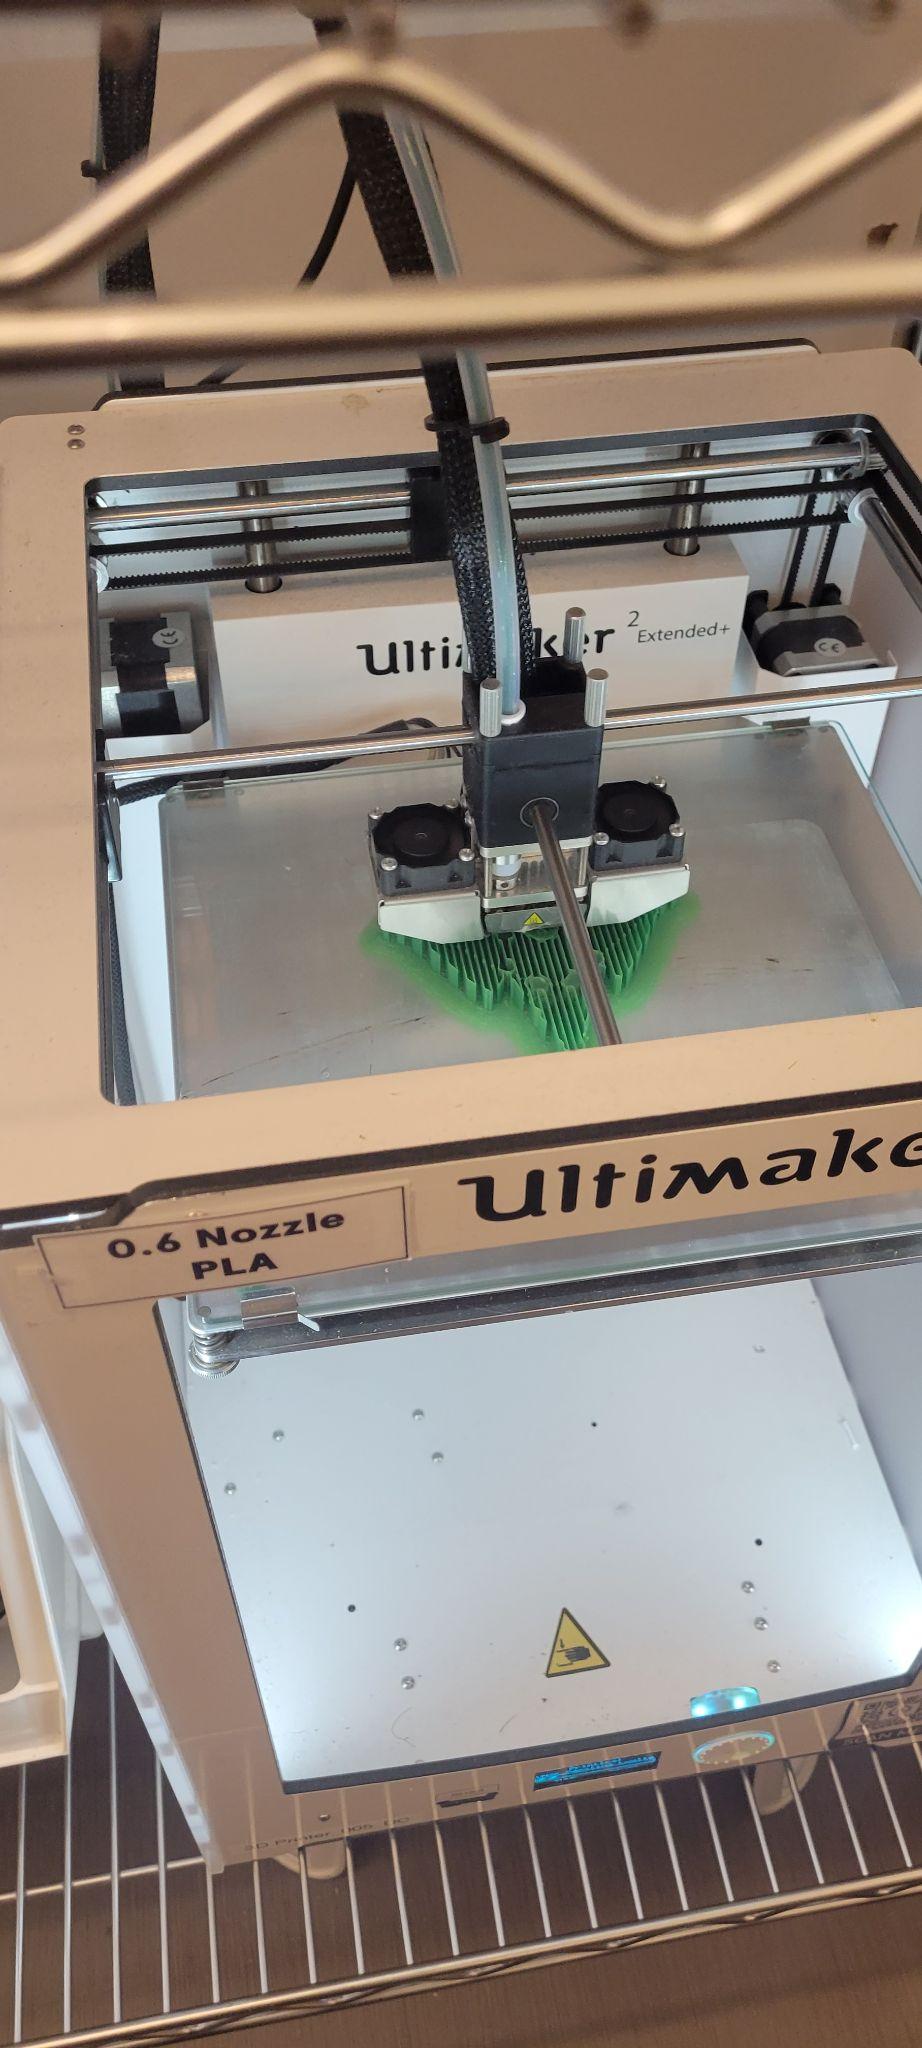
Hoping it was a fluke, we tried reprinting the bridge. Within minutes, the print showed signs of failure. To figure out why the print was failing we reached out to a staff member of the design center. He agreed it couldn’t be a design issue because the miniature bridge printed perfectly. The staff member instructed us to try printing it again, but it continued to fail two more times. After the fourth failure, the staff member decided to thoroughly inspect the file on the computer. The staff member discovered that someone had turned off a key printer setting, which was why our bridge kept failing. We turned the setting back on and eight and a half hours later, we picked up a perfectly printed bridge.
The 3D printer printing the bridge.
Rat with Wings
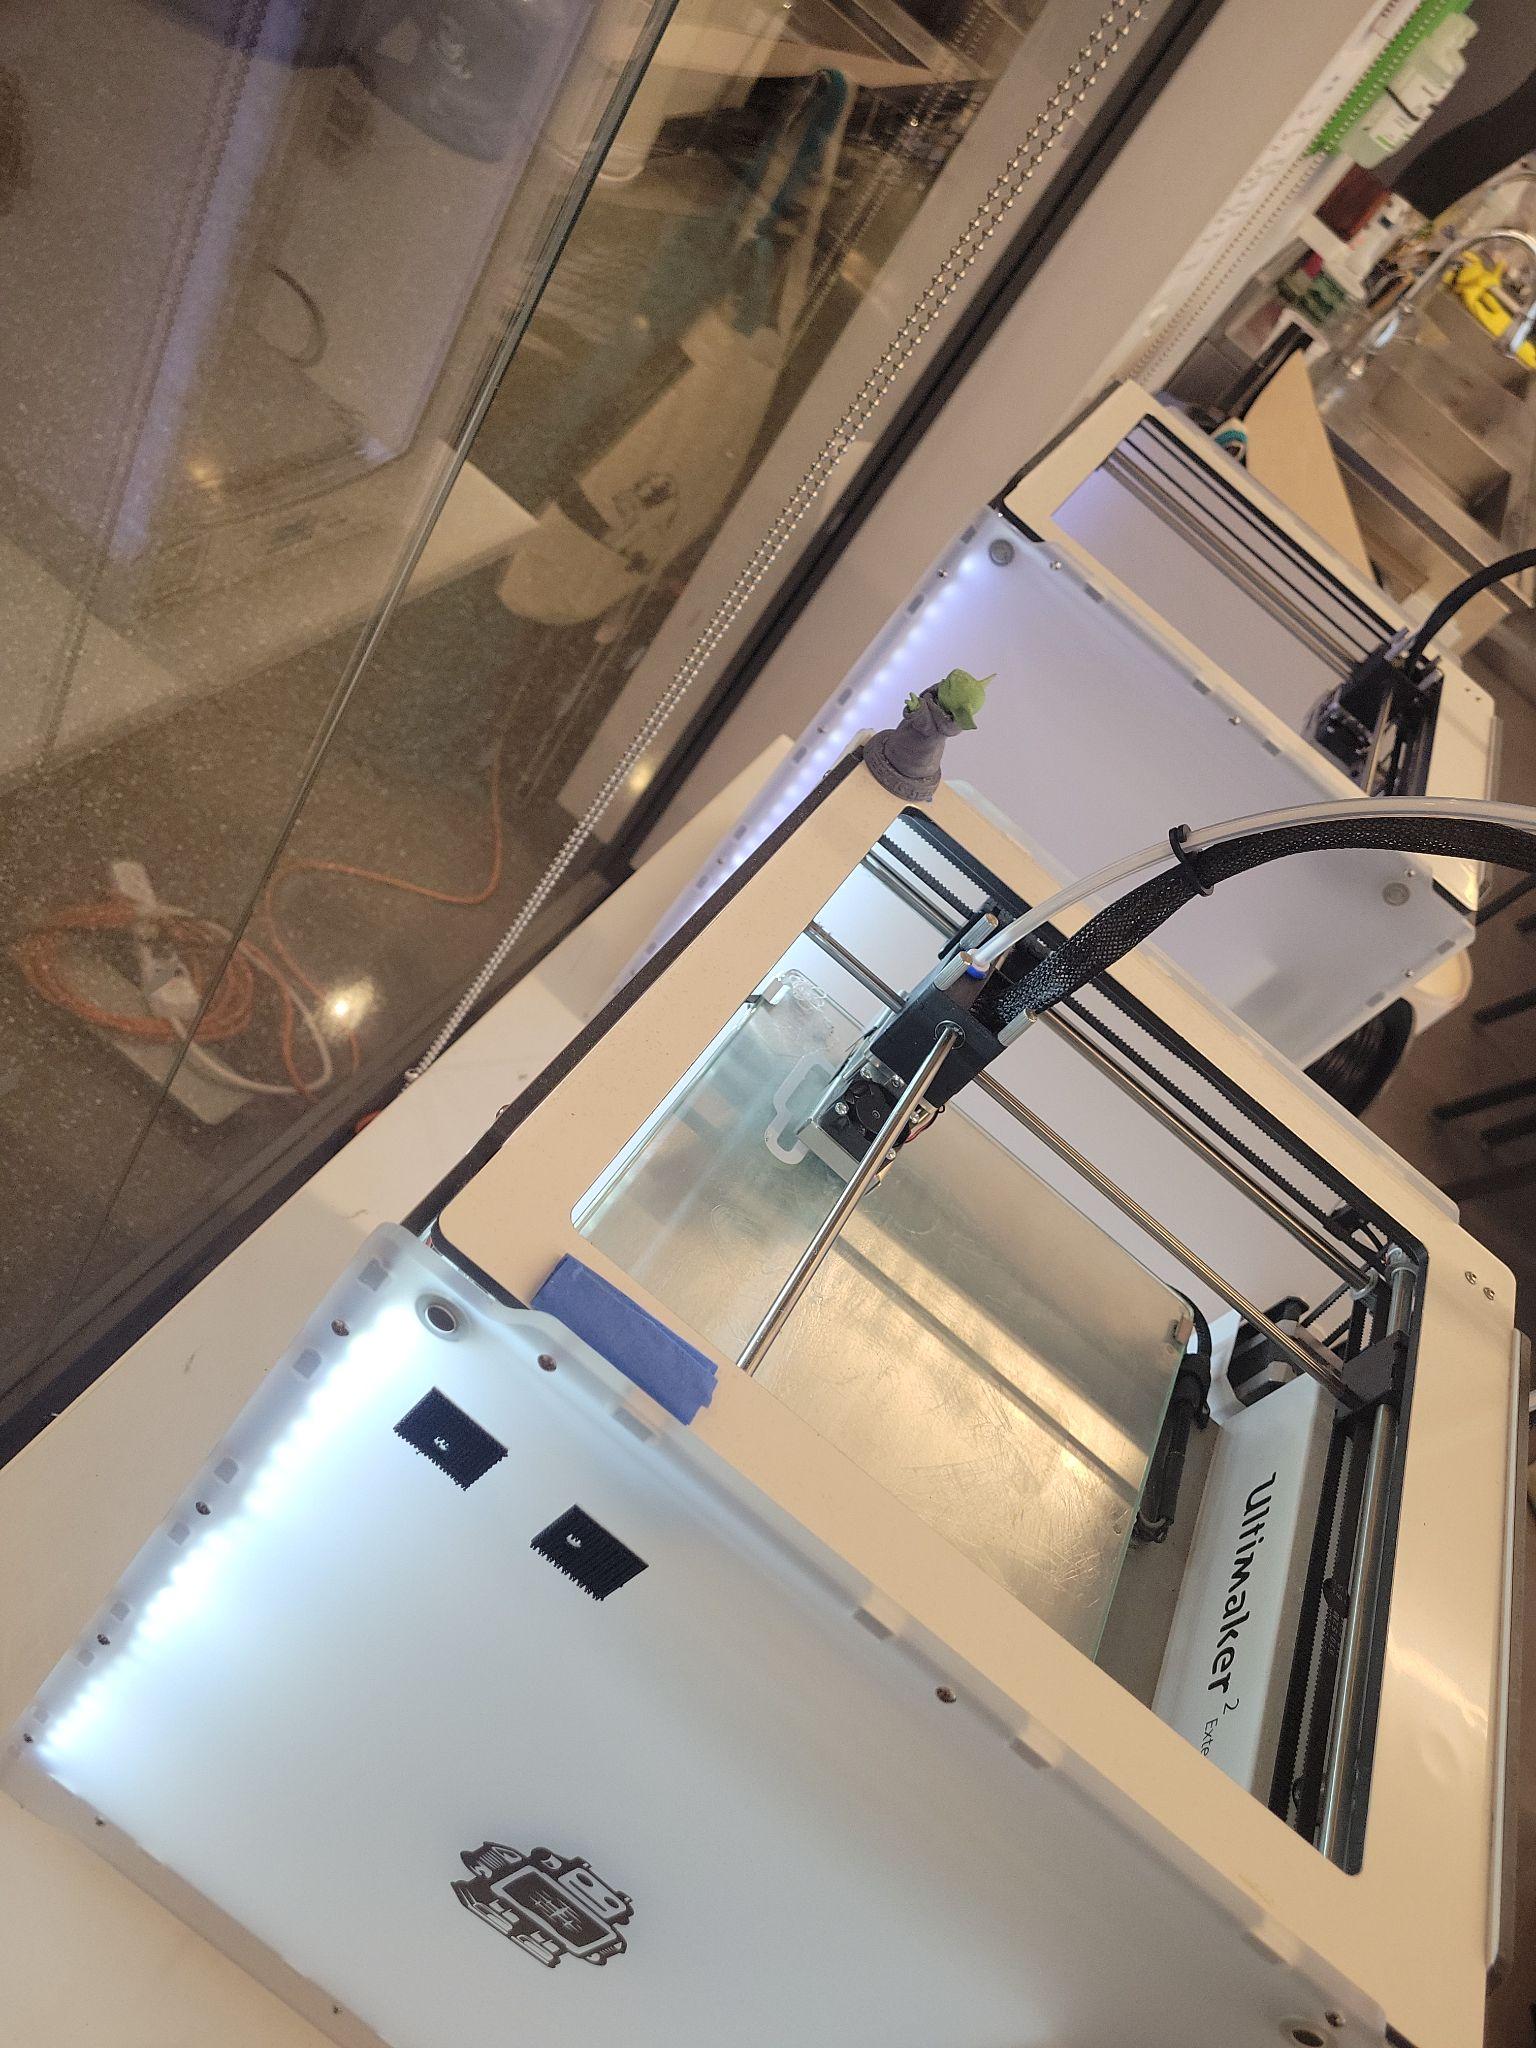
The rat with wings was designed as another fun interaction between modern technology and Ms. Fr. 640. In the lab there is a reconstruction of a historical taxidermy of a rat with wings, that was made following fol. 130r: “One gives it a painted tongue, horns, wings & similar fancies. Thus for rats & all animals.”6 The essay by Divya Anantharaman and Pamela Smith, “Animals Dried in an Oven,” that describes the recreation recounts how the wings are selected and removed from a bird and then affixed to the rat.7 To recreate this technologically, we found 3D models of a rat and a bird on Thingiverse, then removed the wings from the bird model and placed them on the rat model to create a new, hybrid digital model. This was then 3D printed in the same fashion as the bridge.
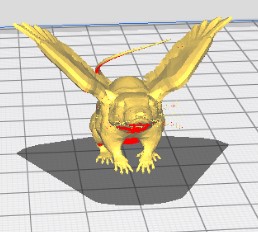
The hybrid digital model of a rat with wings.
3D printing the rat with wings in green plastic.
Cuttlefish Bone Turtle
In Ms. Fr. 640, cuttlefish bones are used to create molds for casting objects such as medals and small pieces of jewelry. Another casting technique described in great detail in the manuscript is lifecasting, in which a plaster mold is created of actual animals or plants and then used to cast a near-perfect metal version of the original animal or plant. While lifecasting and cuttlebone casting were not within the scope of this project, we wanted to utilize cuttlefish bone in the grotto model given how often it is used in Ms. Fr. 640. We decided it might be fun to carve it into an object rather than casting one into it. We made several attempts with cuttlefish bones and a kitchen knife before successfully carving a turtle. The cuttlefish bone turned out to be more brittle than expected and so whole chunks sometimes cracked off when attempting to remove a small piece. The best strategy seemed to be to use the base of the knife to scrape off layers of cuttlebone using motions similar to peeling an apple or potato. The turtle was then painted with oil paint we made by mulling linseed oil and hematite for the face/limbs, yellow ochre for the underside of the shell, and Bavarian green earth for the top of the shell. Once dry the turtle was positioned on the bridge.

Setup for mulling and painting objects for the grotto in linseed oil.
The turtle carved from cuttlefish bone and painted.
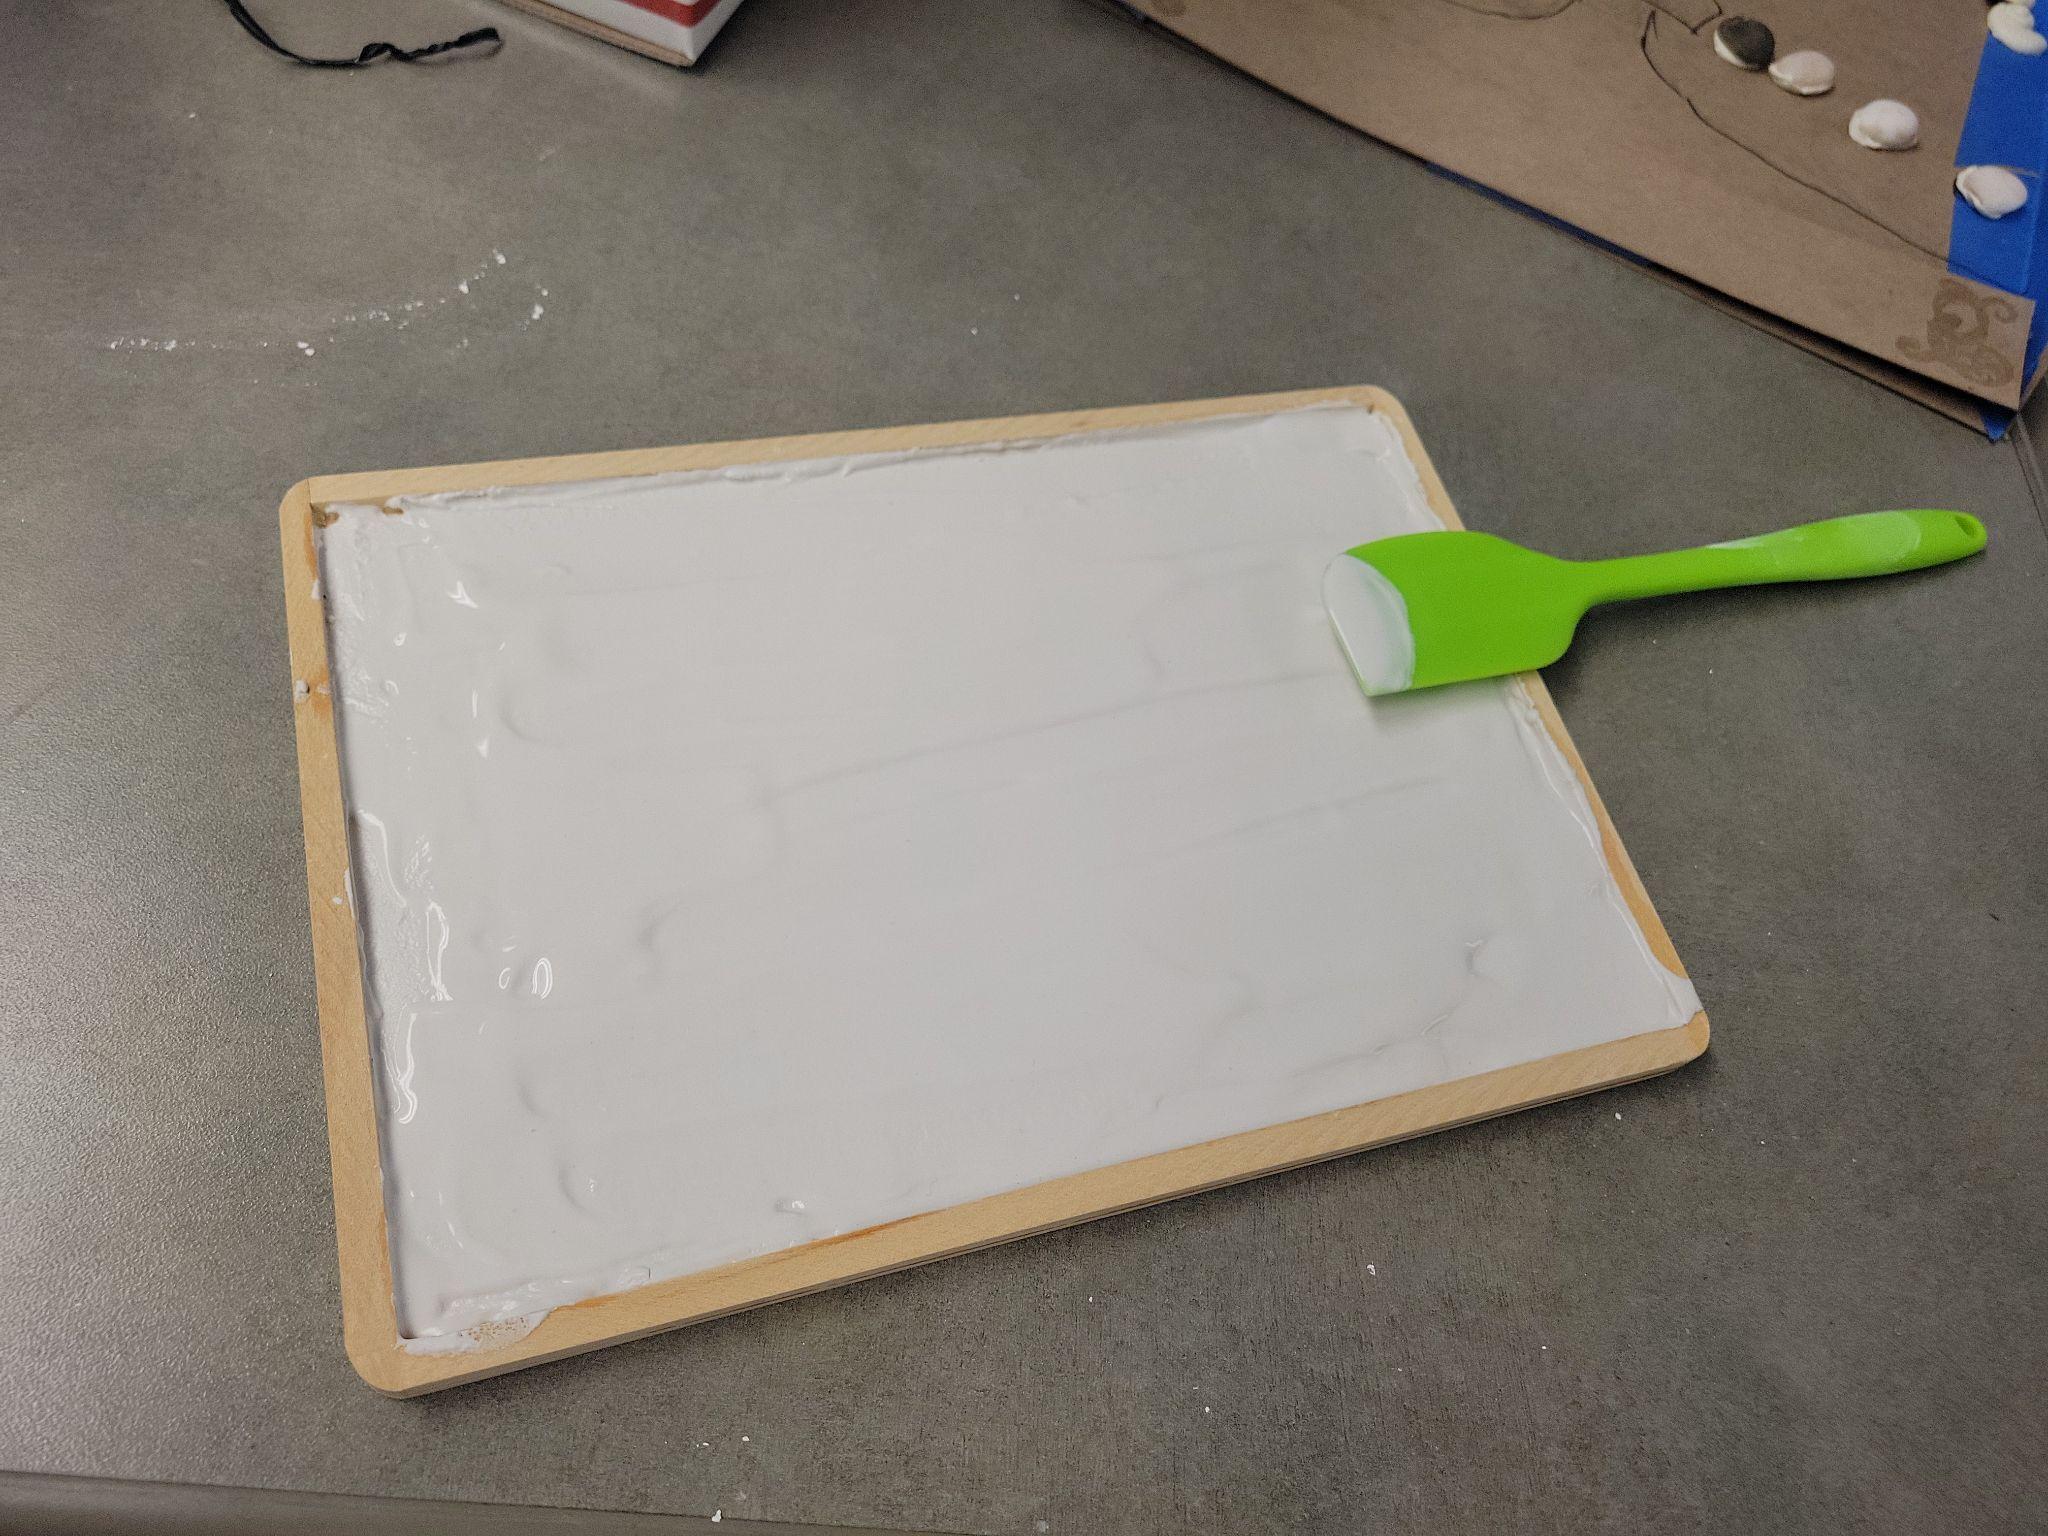
Stucco Shells
To make stucco, we used a process described on fol. 29r.8 combined tragacanth gum to water at a ratio of 1:14. Once combined, we stirred the liquid to ensure the gum gets fully incorporated. Then the mixture was put aside and we waited ten minutes for it to gel.
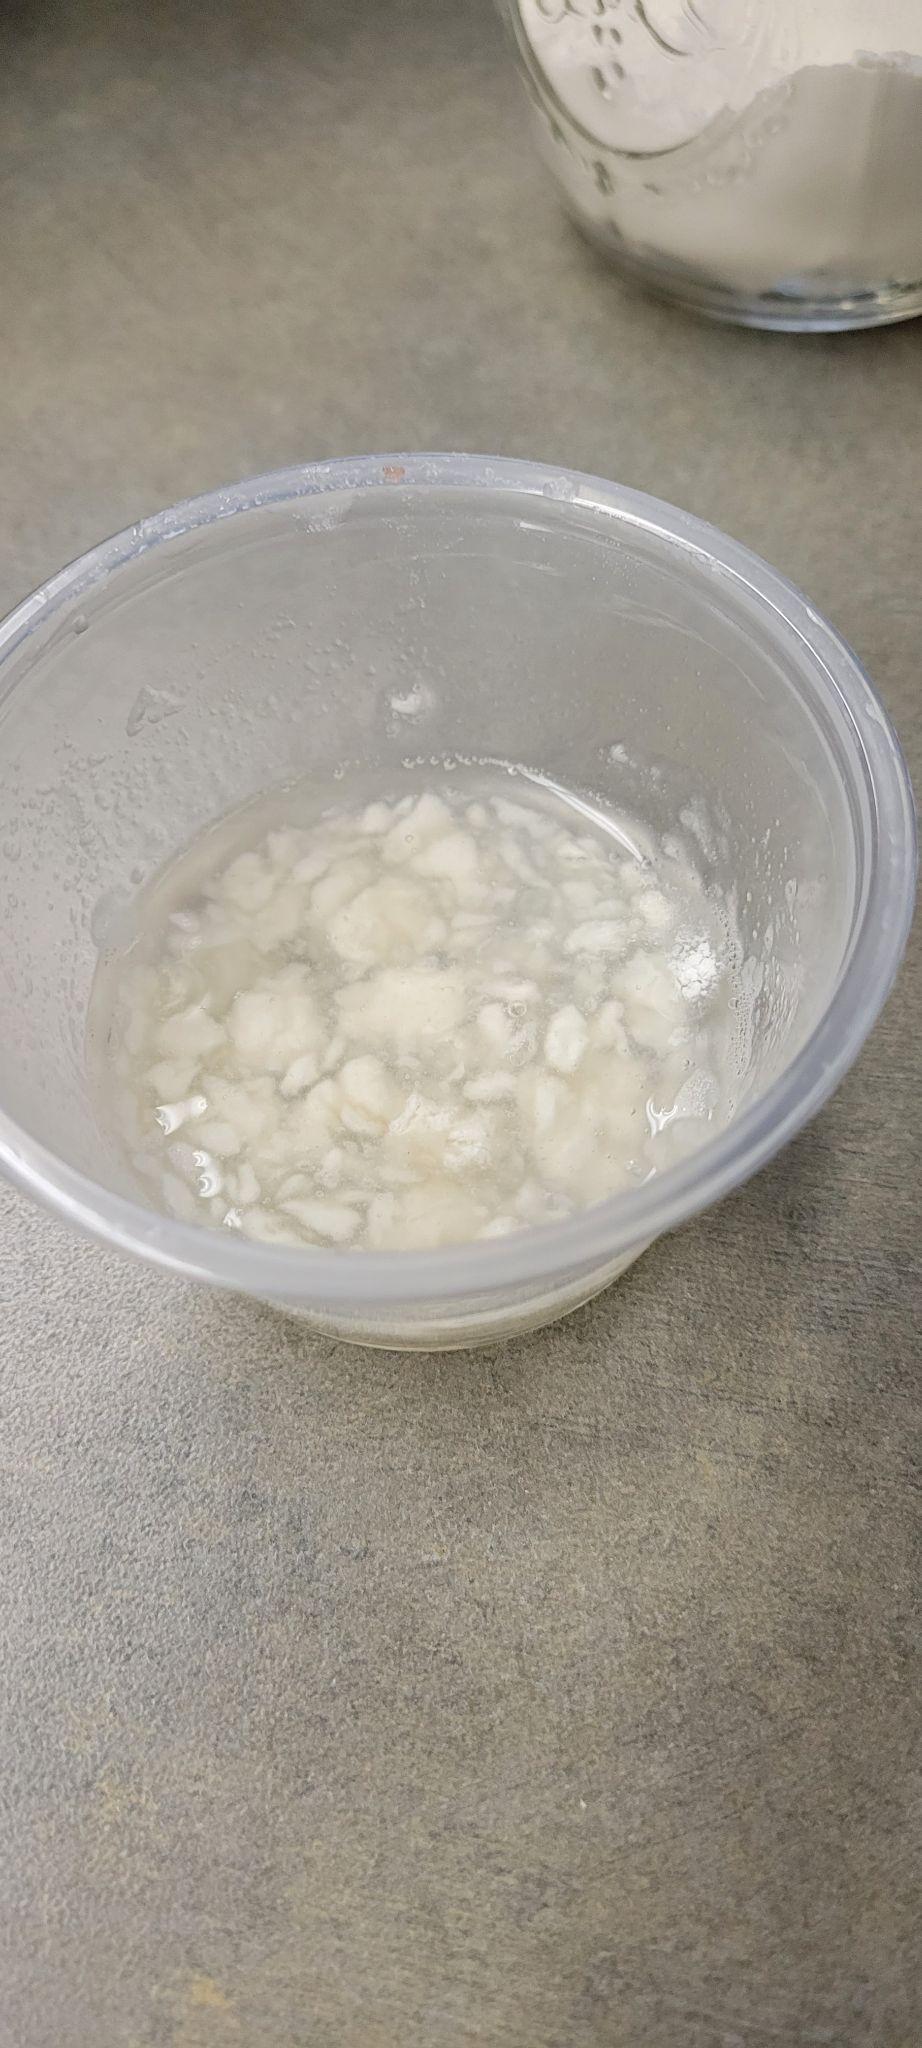
Tragacanth gum in water, waiting for it to gel fully.
When the mixture gelled, chalk powder was added at approximately a 2:5 ratio of gum/water to chalk. To mix the chalk into the mixture, we used a muller, but we eventually had to use our hands to knead it. After the stucco was kneaded, we coated plastic molds of shells with oil to prevent sticking. The stucco was then pressed into the two seashell molds. When it was dry, the shells were painted with oil paint made by mulling linseed oil with lapis lazuli pigment.
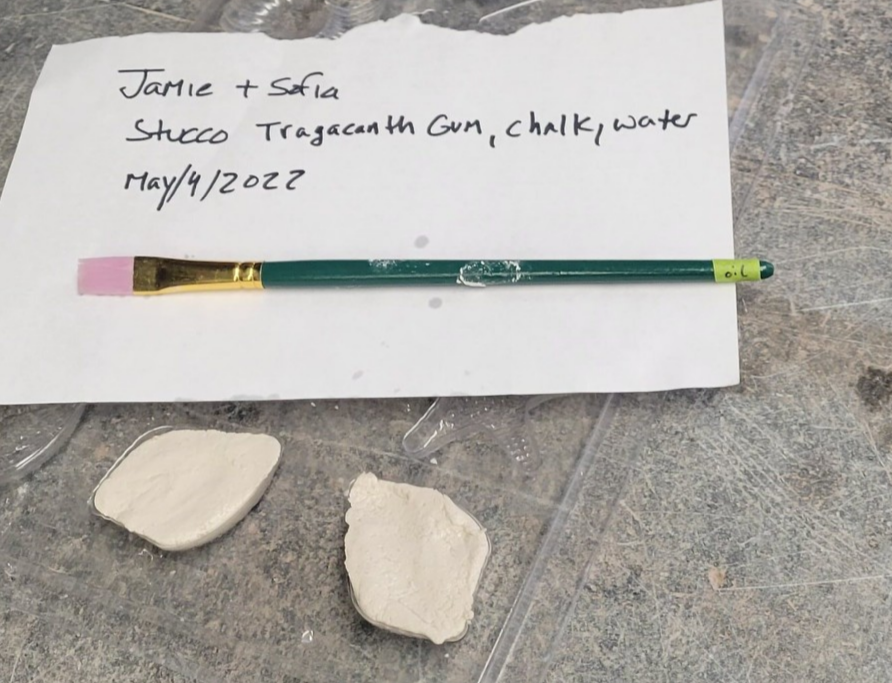
The stucco shells drying in the plastic mold.
Sand
We wanted to coat the bottom of the grotto with sand without having it do what sand does: get everywhere. So having learned from the lesson of combining mosaic cement powder with rabbit skin glue we did the same with the sand to make a thick paste. We then poured this paste on to the base panel of the grotto and spread it with a palette knife. This did the job for keeping the sand mostly in place while maintaining the beach/garden effect we were going for.
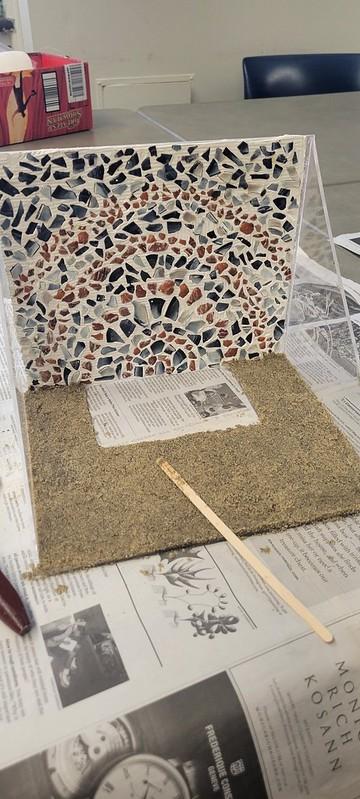
Sand applied to the bottom of the grotto frame.
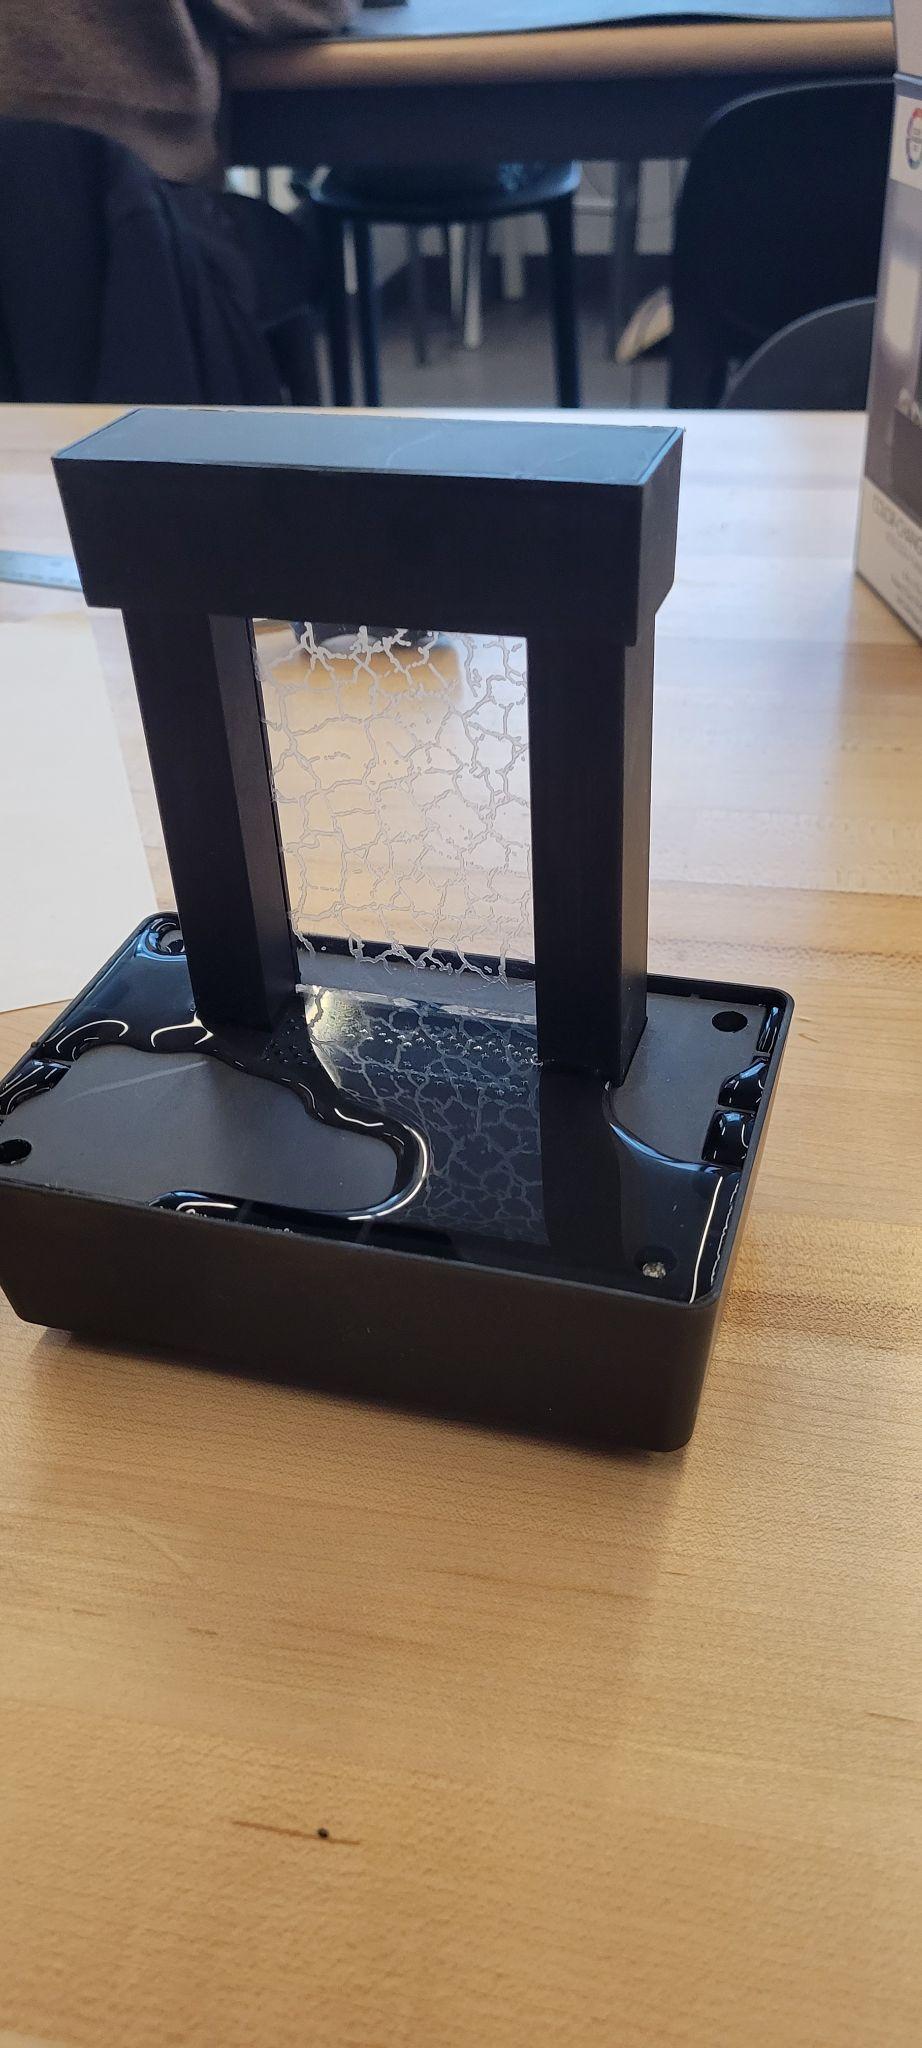
Water Feature/Fake Rock
One of the key features of a large scale grotto is a water feature. Thanks to modern technology a small one can be bought for 5 dollars at Five Below for our miniature grotto.
Electric water fountain purchased at Five Below.
However, this fountain didn’t meet the aesthetic standards for our grotto, which opened the door to a creative solution using a historical recreation. The entry entitled “Grottos” in Ms. Fr. 640, fol. 40r reads:
To fill some empty place that cannot be laden with some sort of hanging rocks, one puts a piece of thick parchment close to the fire, which shrinks & crumples. Then one paints it with distemper, then in oil. Next one affixes it.
We decided to follow this process of creating artificial rock undertaken by another student in a previous semester,9 and use it to cover the front of the archway fountain to create a proper cave look for the grotto. We experimented with cutting different sizes of calf parchment and found that pieces an inch long tended to bubble and warp in a desirable way to create a rock-like texture. Once the heat caused the parchment to crumple, distemper paint was made by mixing rabbit skin glue with vine charcoal as a dark pigment. This was brushed onto the rocks and finally, as recommended by the manuscript entry, oil paint made with linseed oil and charcoal was used to paint a final layer to provide depth. The fake rock was then glued onto the archway using rabbit skin glue.
Final Arrangements and Thoughts
Now with all of the components created, it was time to arrange them on the grotto. Most grottos seem to be symmetrical so we placed the bridge in the center, and the shell statues/stucco shells on either side of the arch. We placed the winged rat to the left side of the bridge and the turtle directly on it. Finally, small stones, sourced from Sunny Isles beach, were placed to create a path from the bridge to the fountain and back.
Arranging the elements of the grotto.
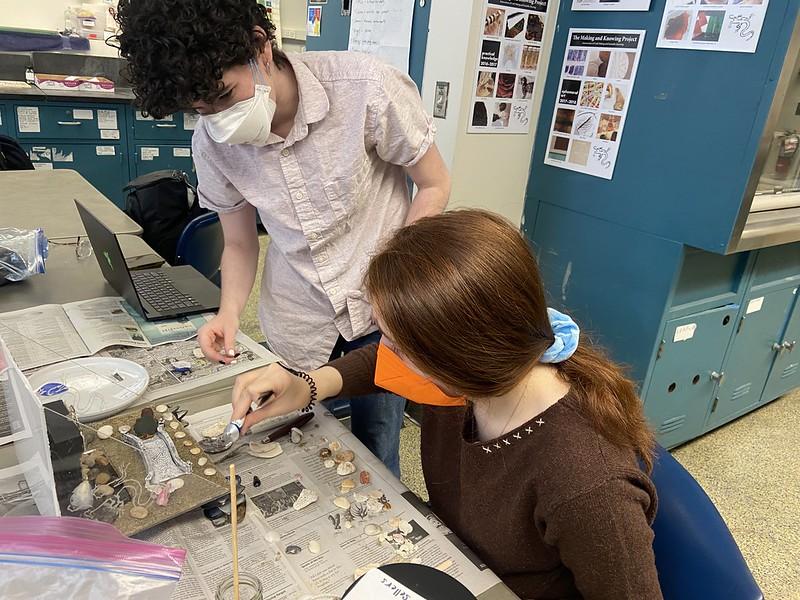
Further arranging of the grotto elements.
The project turned out to be much more labor intensive than either of us anticipated but we also saw much more success with the historical recreations than expected as well. In fact, the historical recreations (with exception of the mosaic) were actually much more reliable to execute than the technology-based ones. 3D printers are super finicky and complicated but parchment and heat turns out not to be. However, technology allowed for the execution of much more complex elements of the grotto with higher success. Compare the cuttlefish turtle and the 3D printed winged rat. Both took several attempts to create a model of an animal, however messing up the turtle and starting over lost a maximum of around 30 minutes. Printing and editing the model of the winged rat took a couple hours when there were issues. However, the winged rat was ultimately much more accurate than the turtle, given lack of previous carving experience.
All in all this recreation was rewarding to create and we learned a lot along the way.
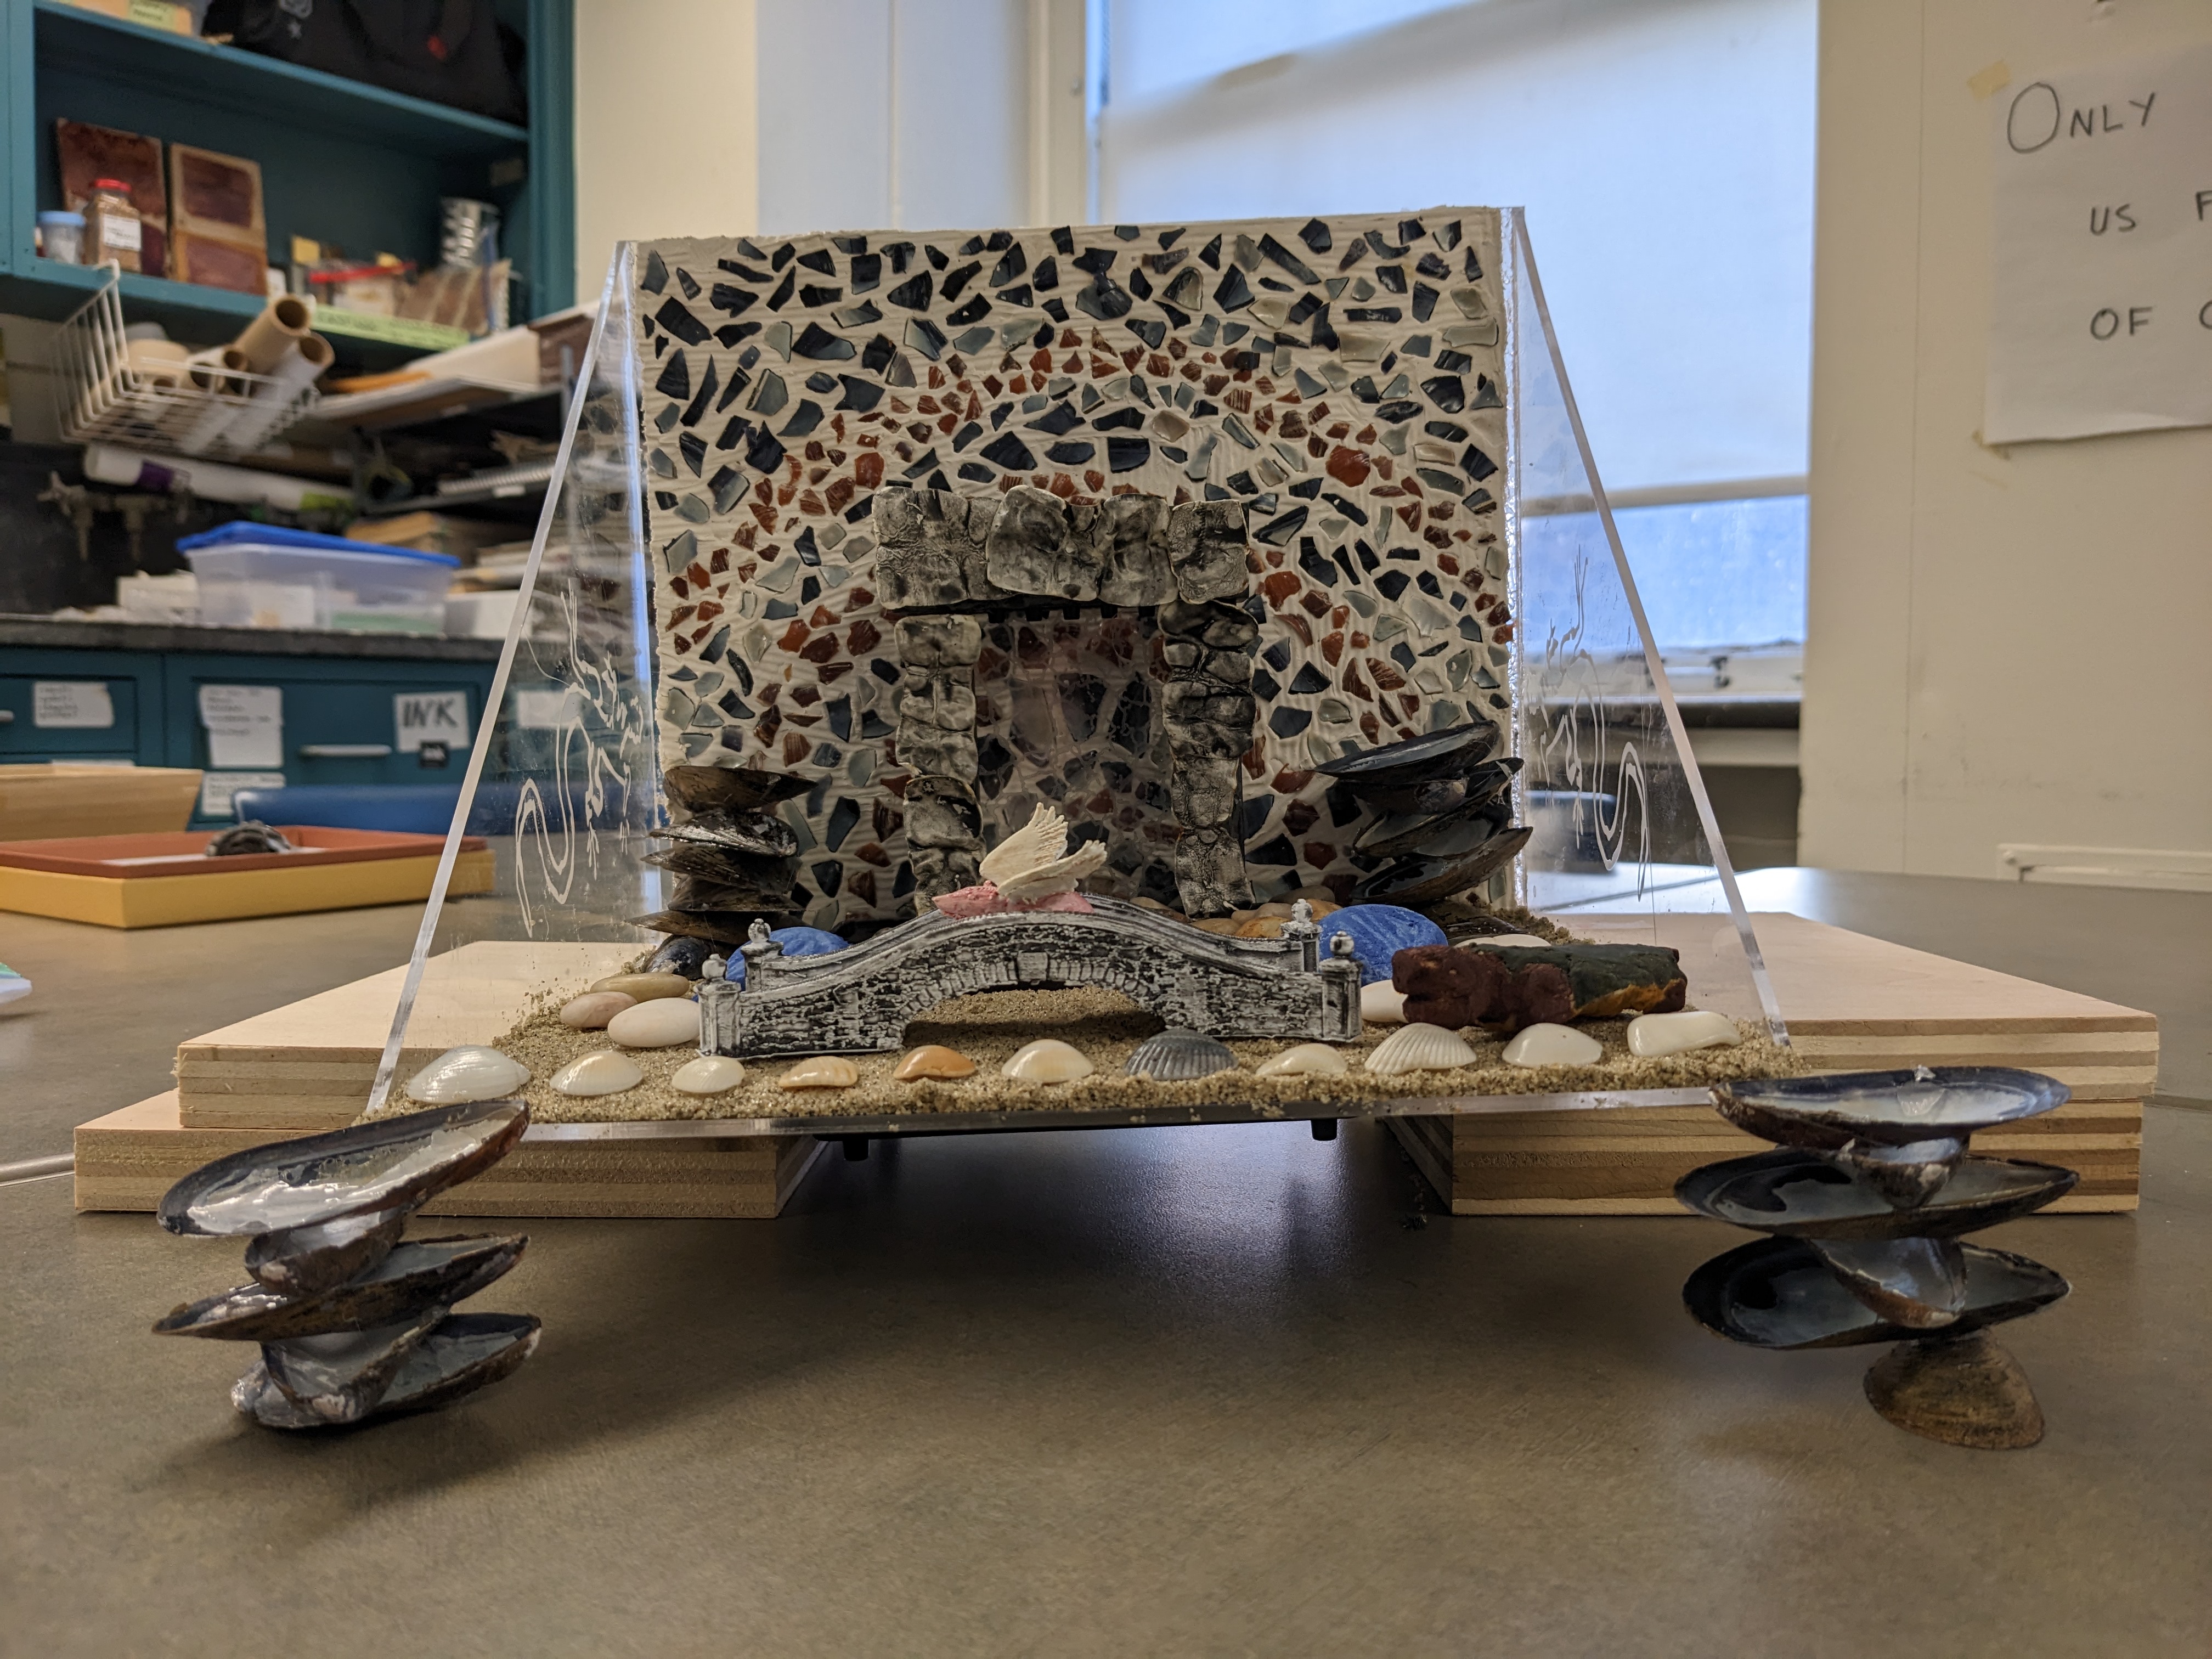
The final grotto.
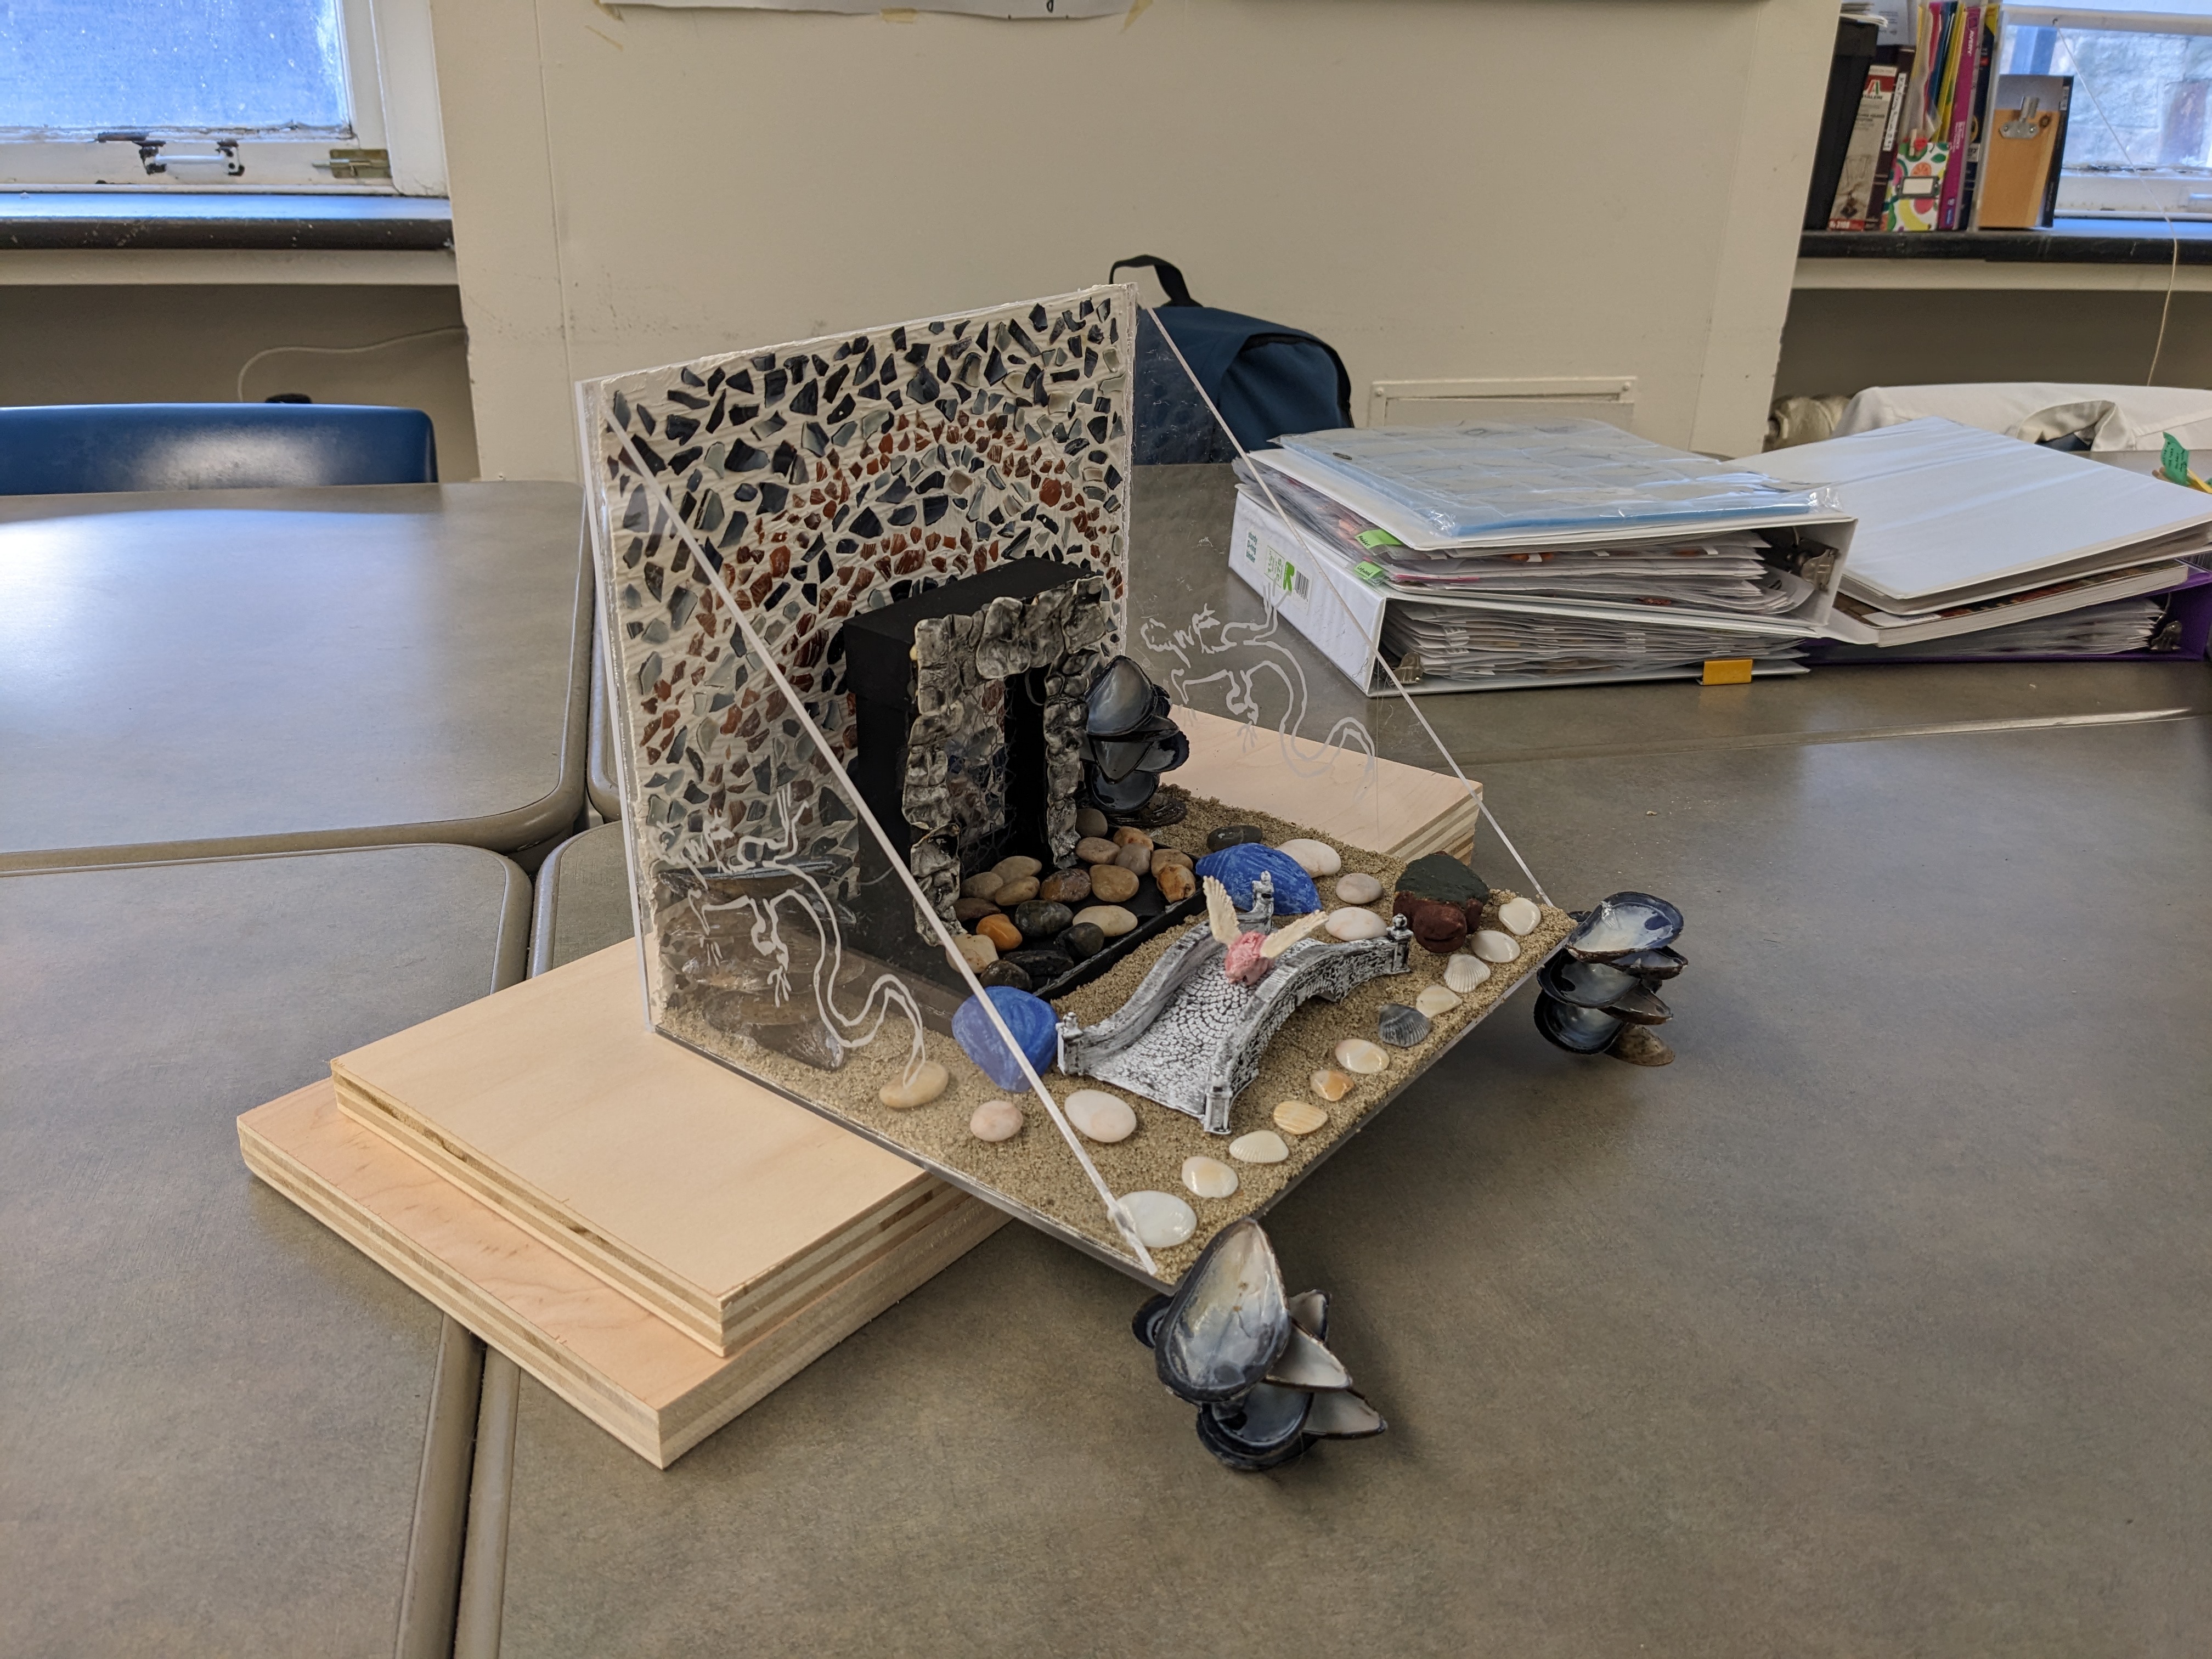
Side view of the grotto.
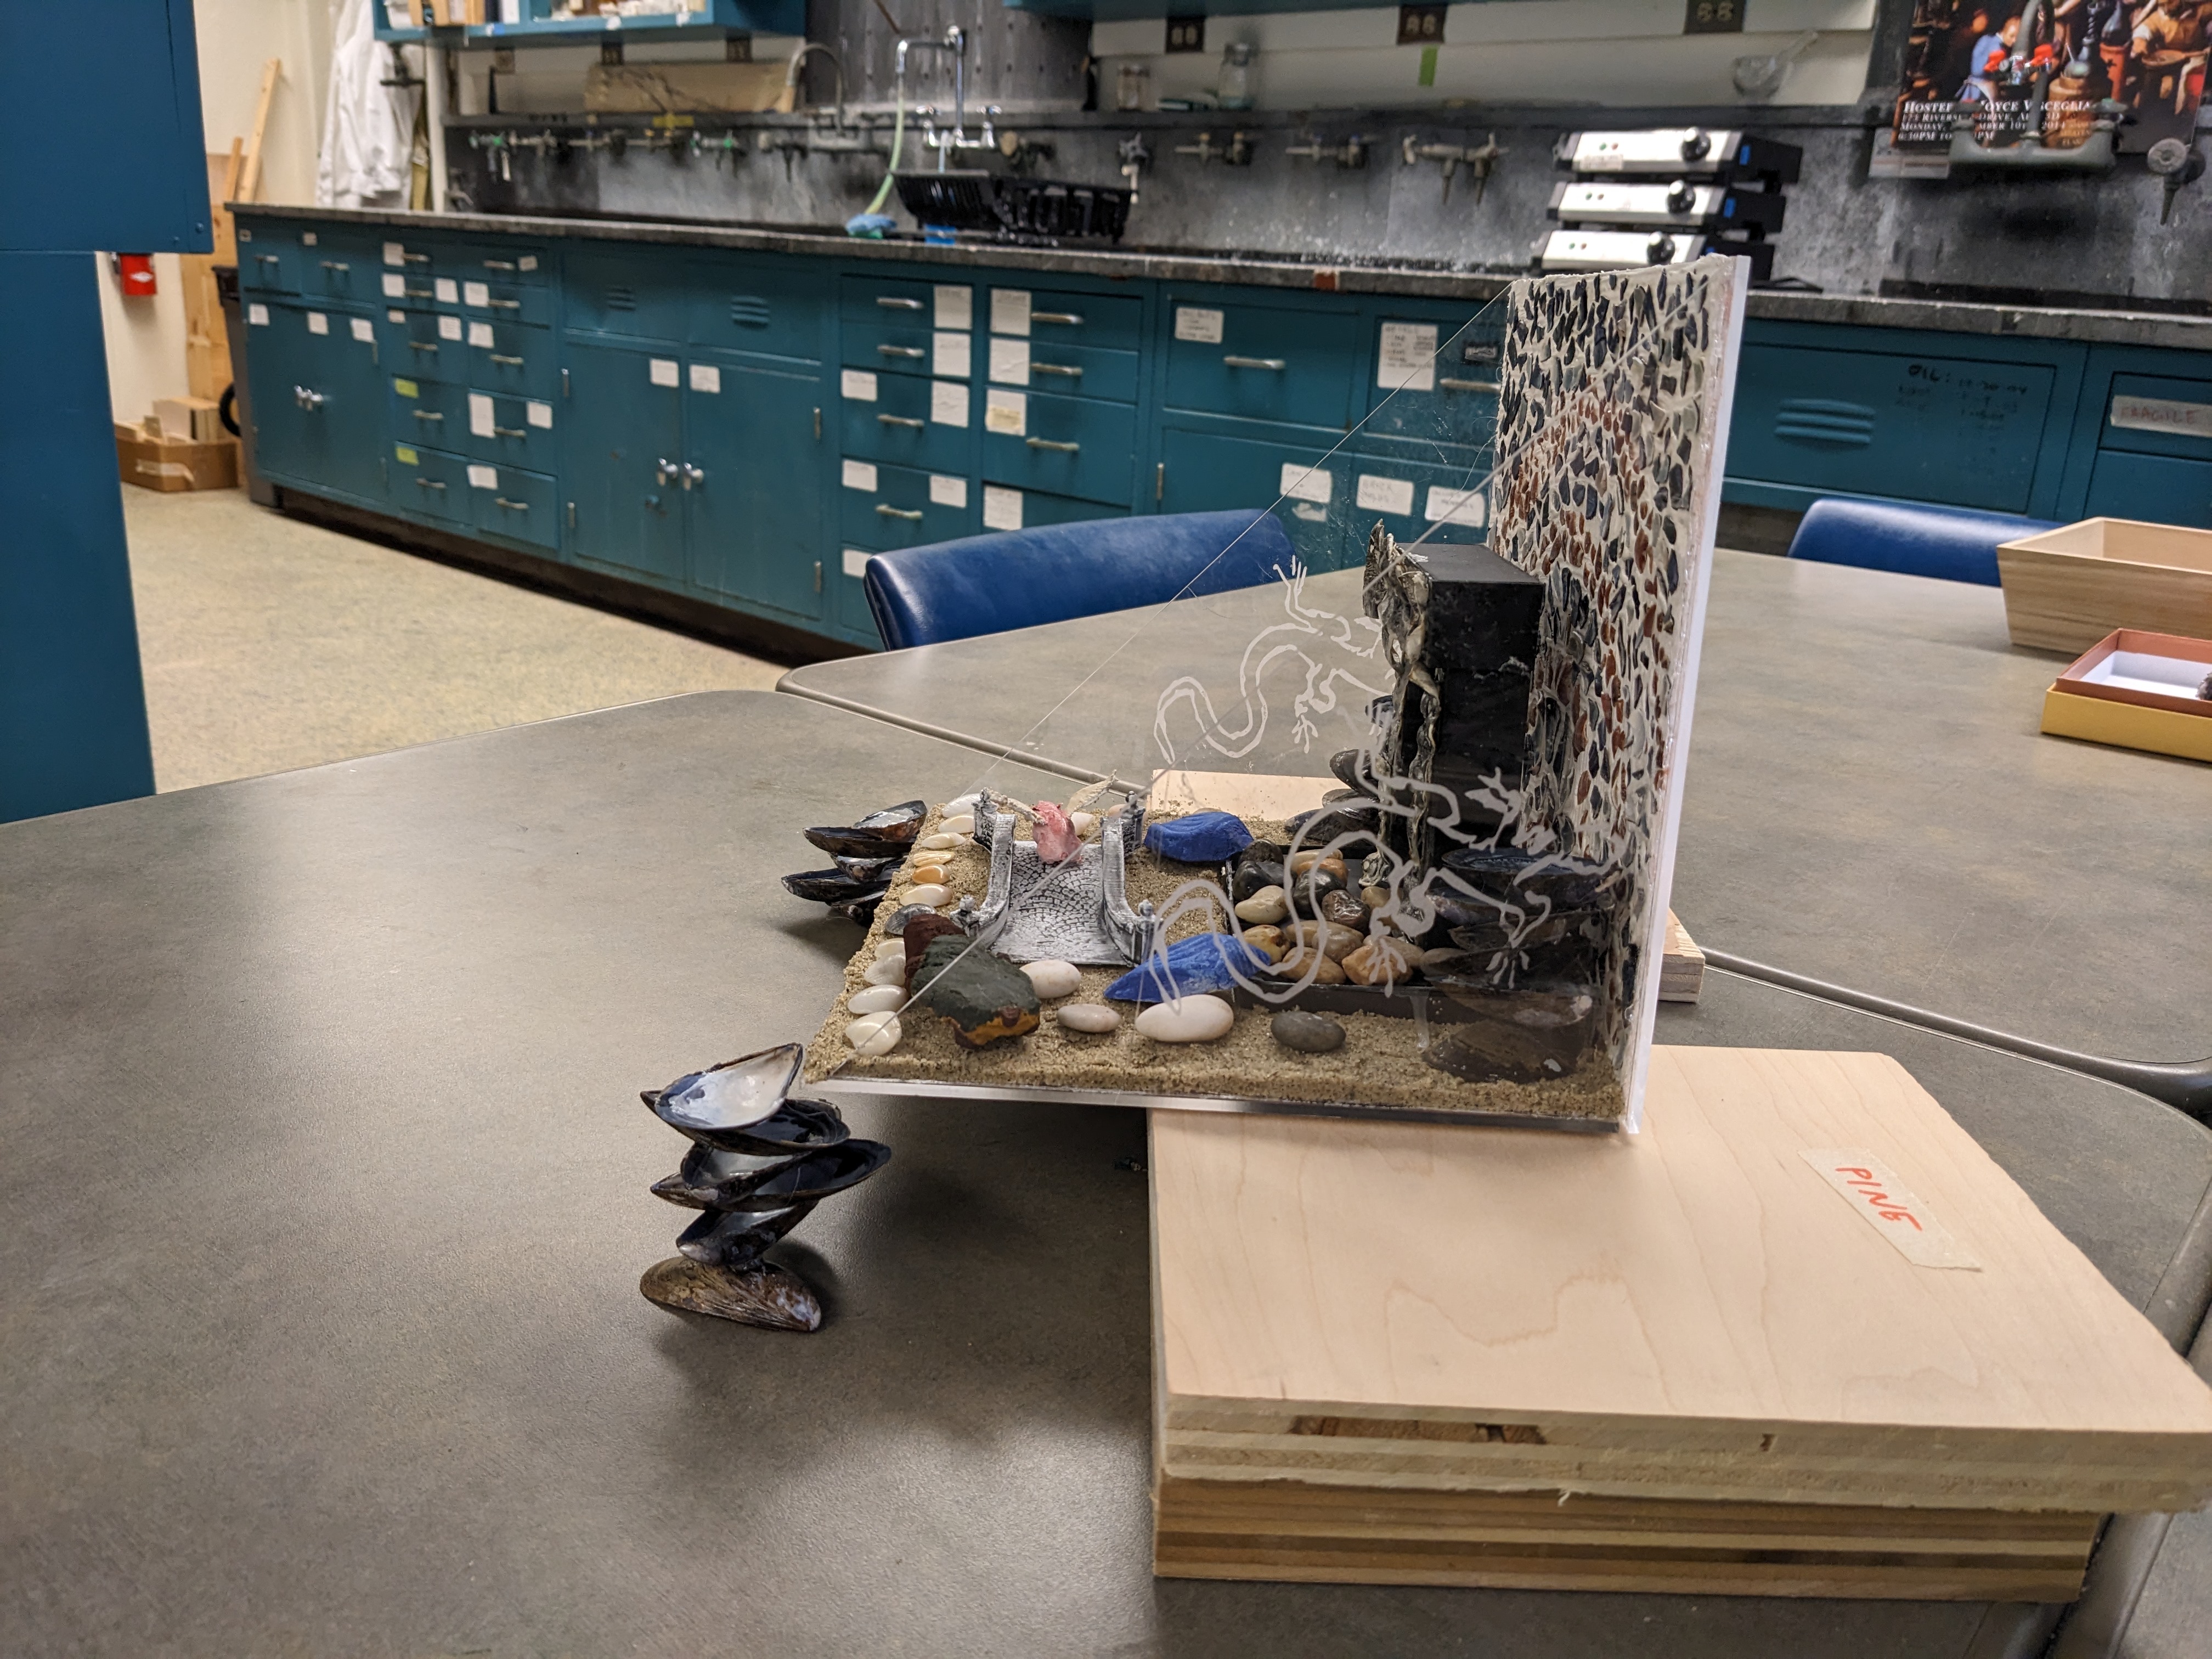
Side view of the grotto.

Close-up of the bridge and rat with wings.
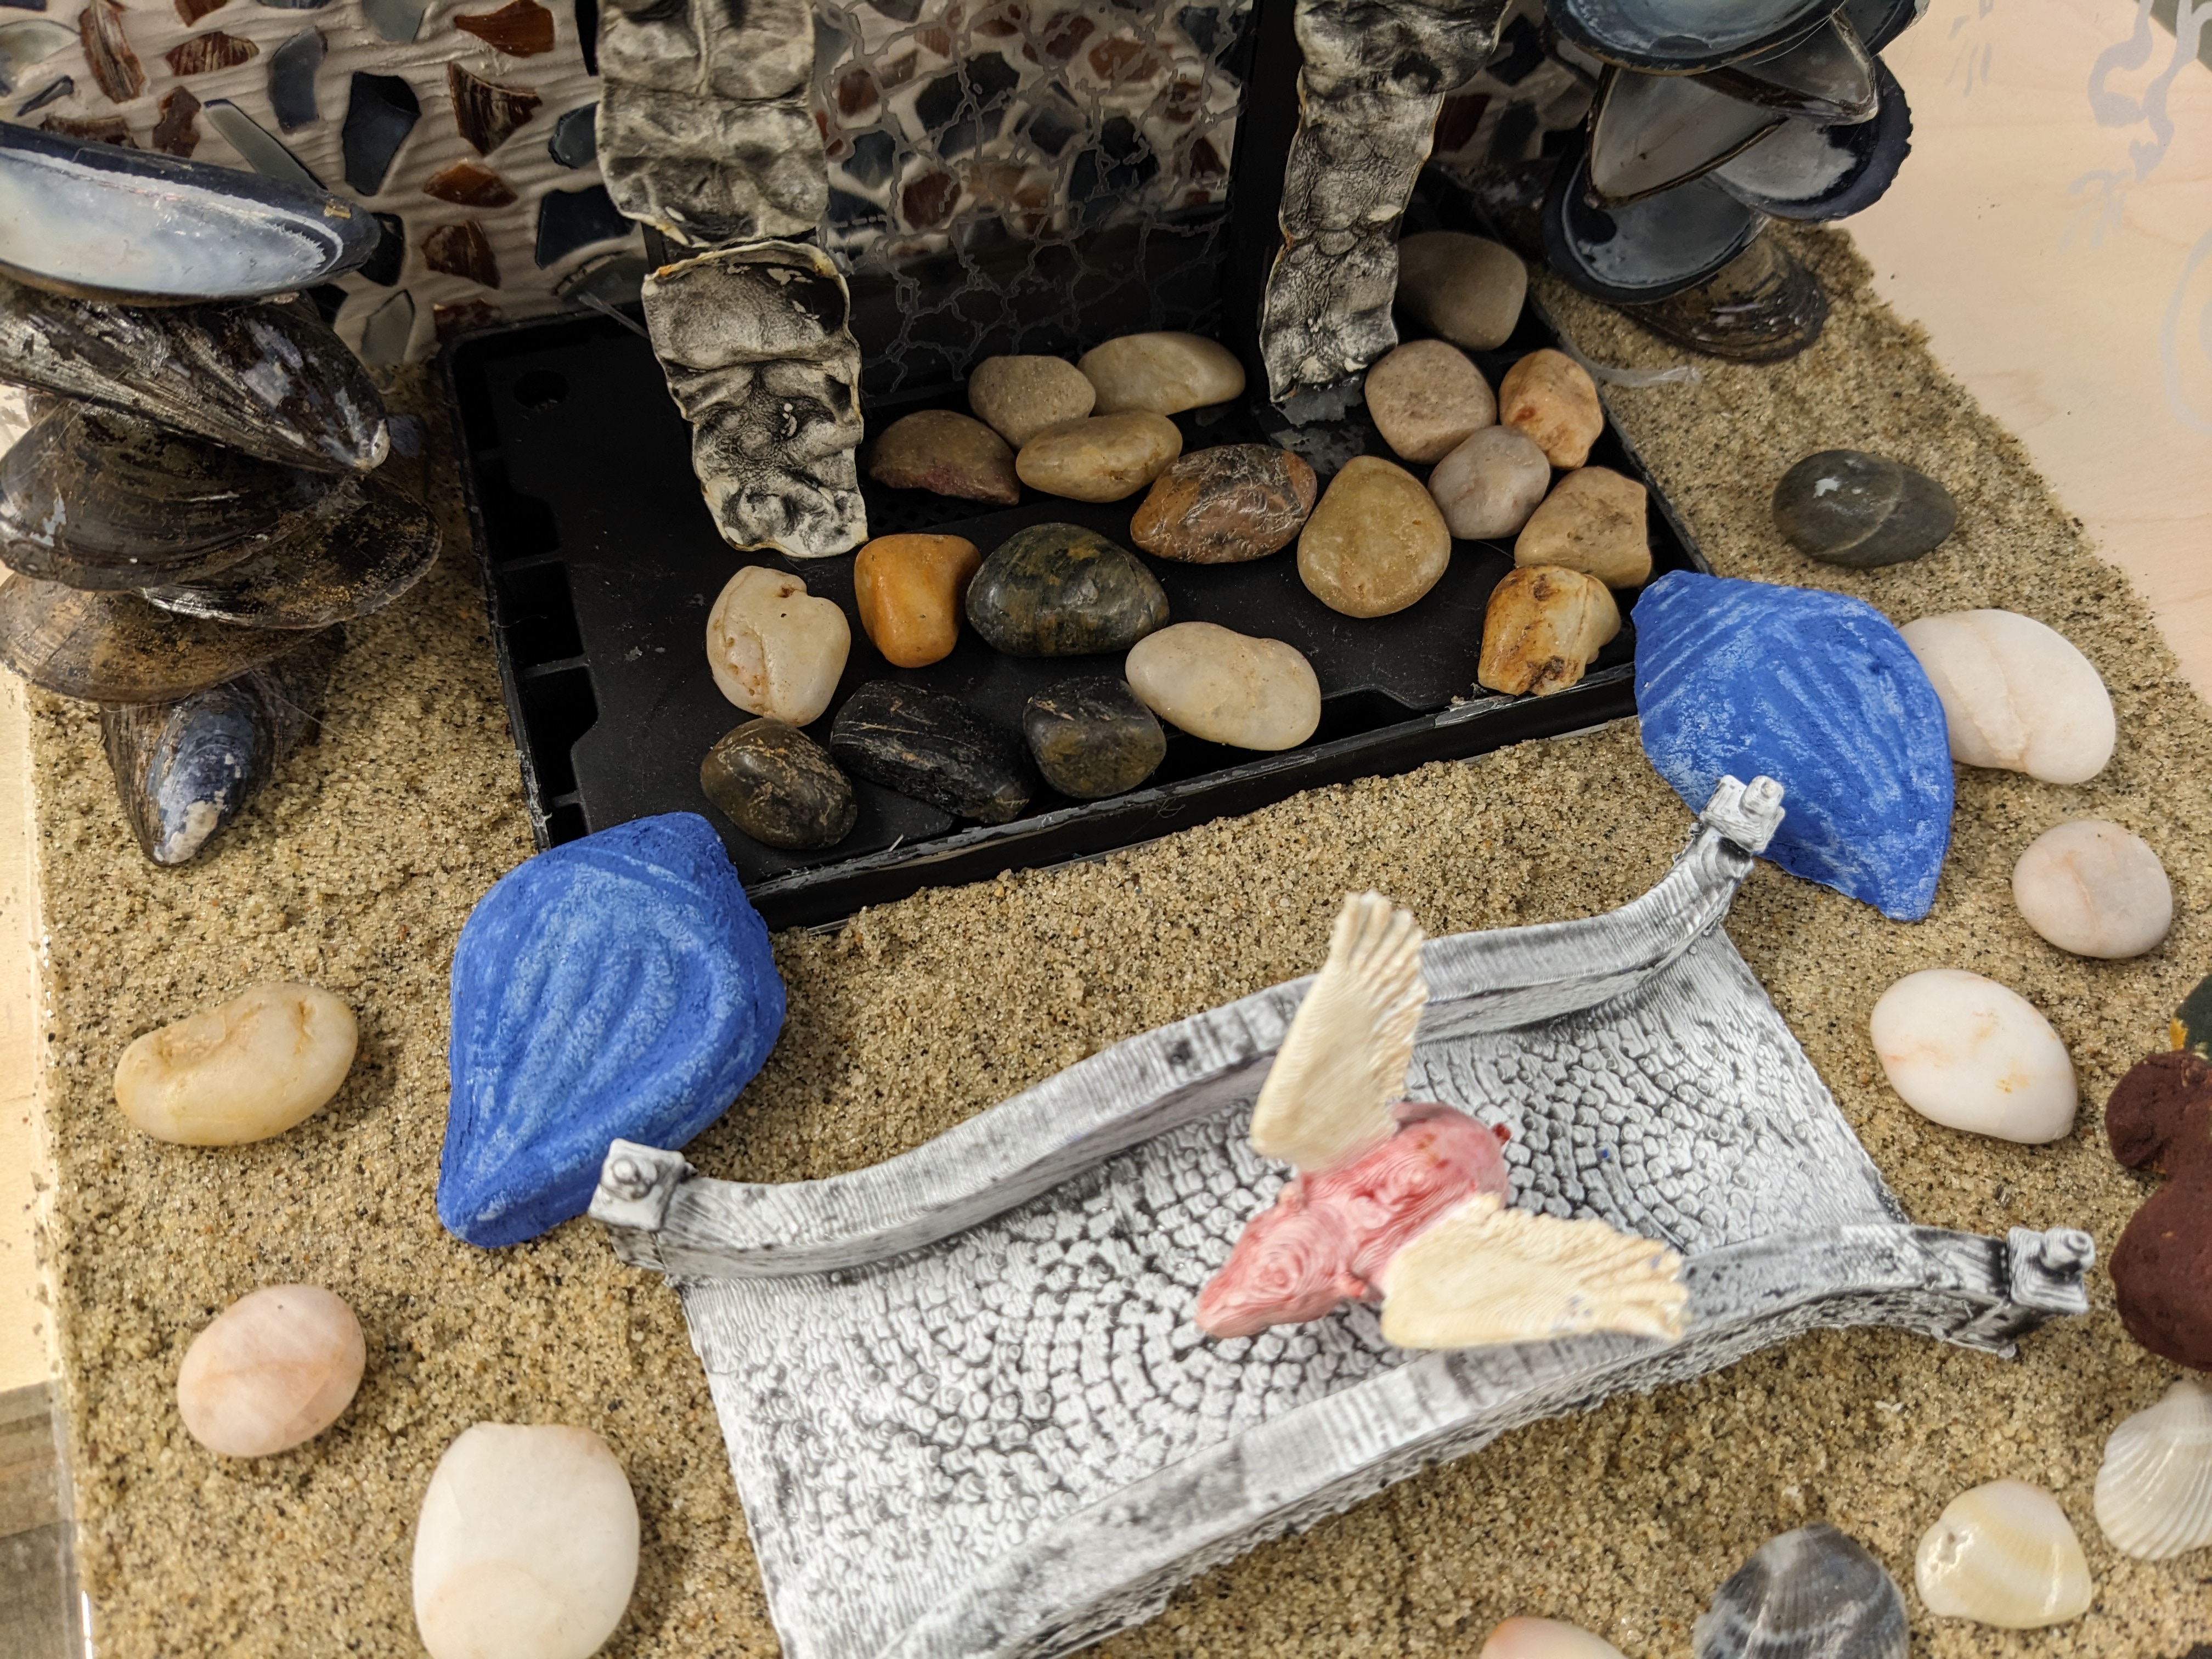
Close-up of the bridge, rat with wings, and blue painted stucco shells.
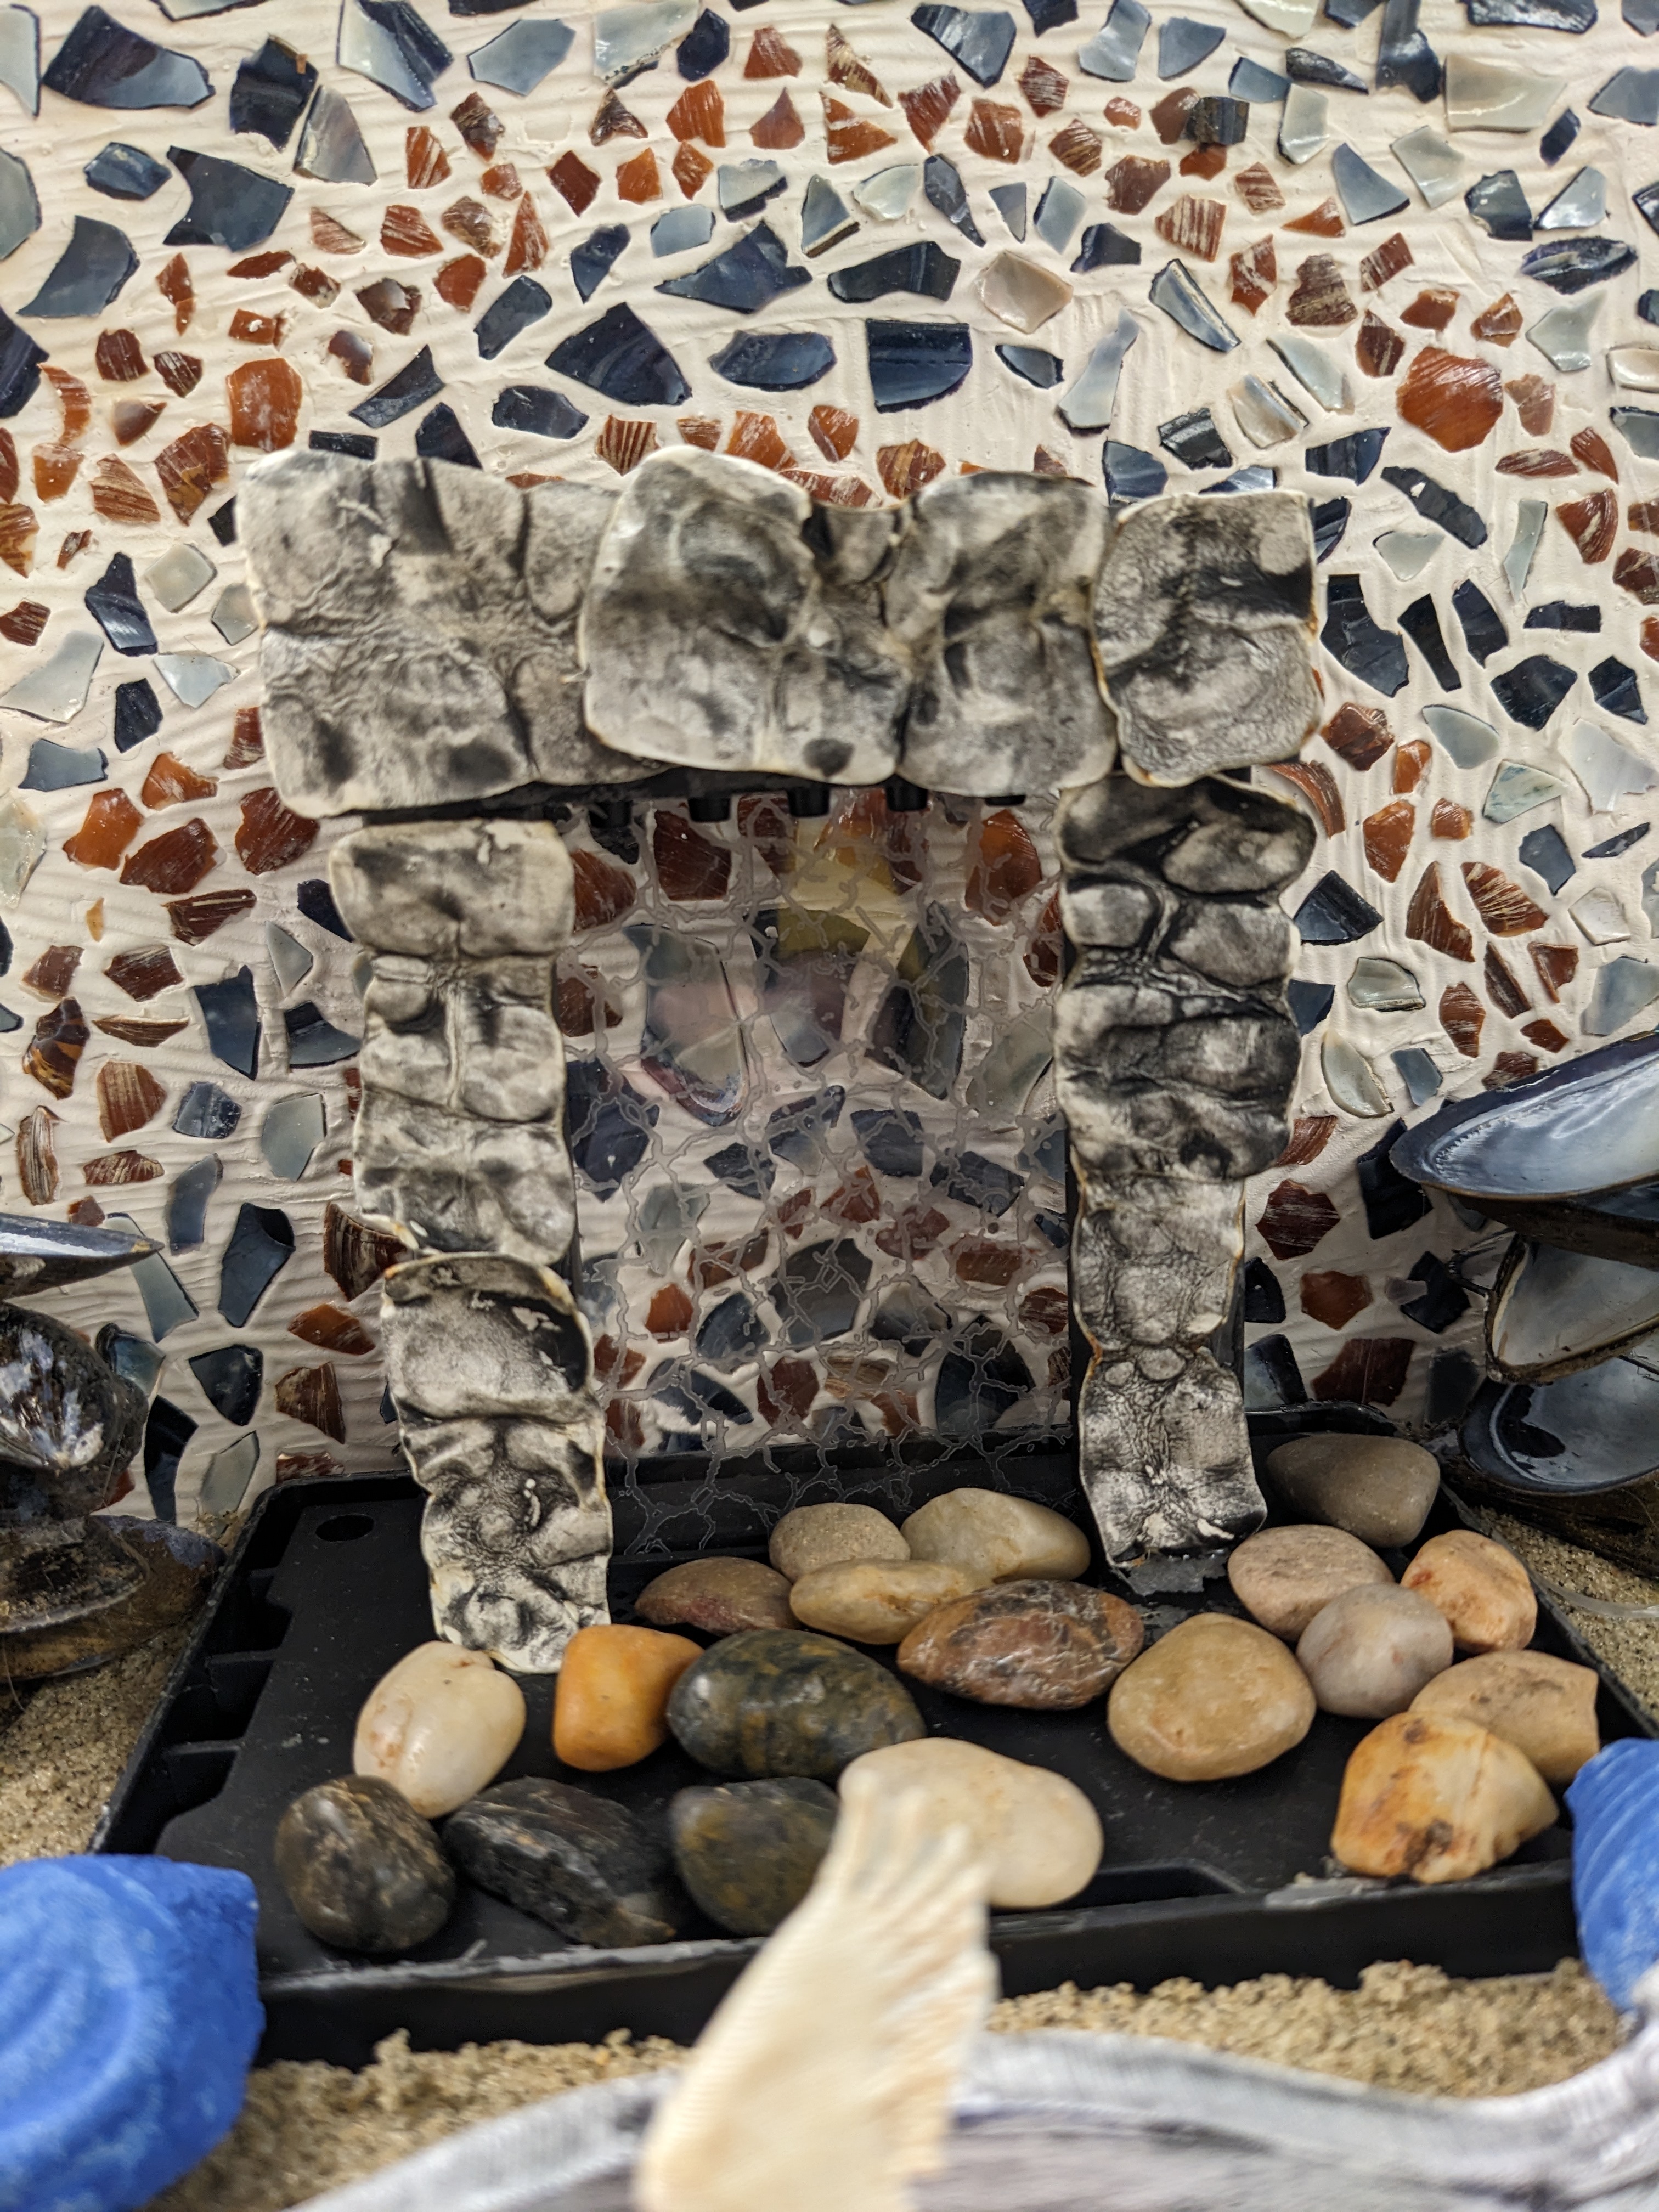
Close-up of water fountain, covered with “rocks” made of parchment.
Turtle carved from cuttlefish.
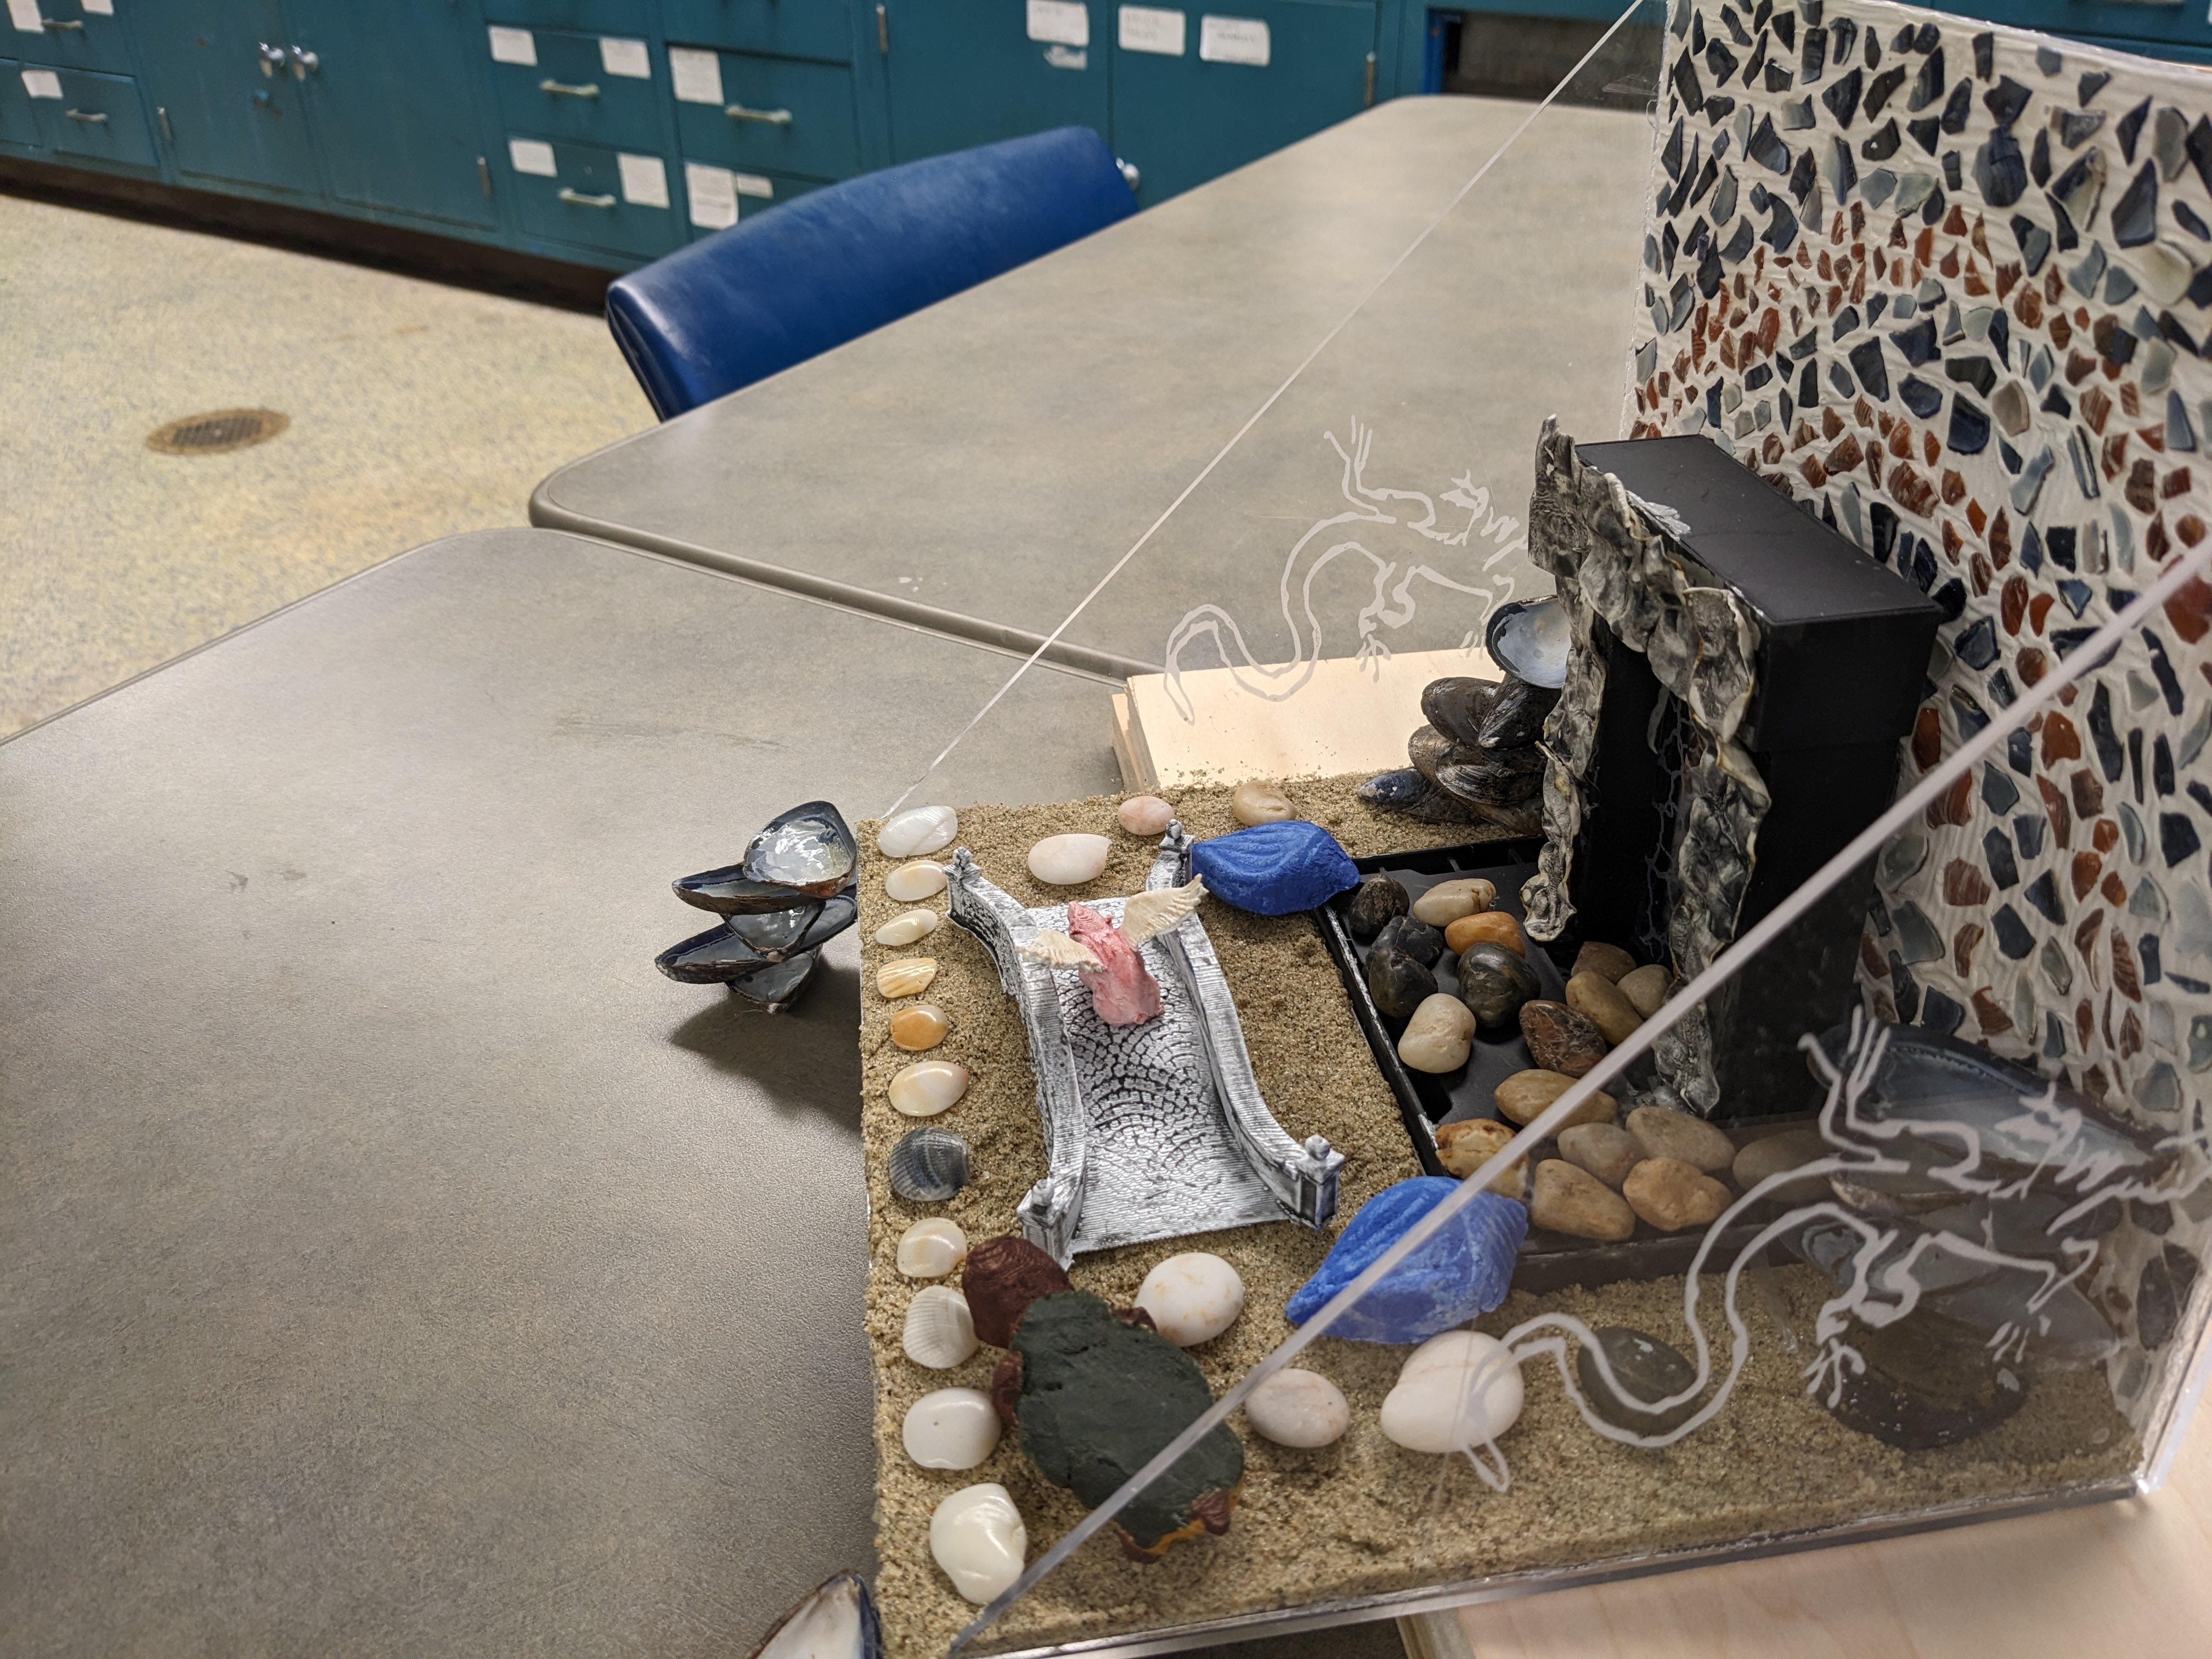
Side view of the grotto.

Top view of the grotto.
-
Vincenzo Scamozzi, L’ Idea Dell’architettura Universale, 1615. ↩
-
Sebastiano Serlio, Reigles generales de l’architecture, sur le cinq manieres d’edifices (Paris: 1545), 66–67; and Miller, Heavenly Caves, 52, quoted in Reut Ullman, “Artificial Grottos,” in Secrets of Craft and Nature in Renaissance France. A Digital Critical Edition and English Translation of BnF Ms. Fr. 640, edited by Making and Knowing Project, Pamela H. Smith, Naomi Rosenkranz, Tianna Helena Uchacz, Tillmann Taape, Clément Godbarge, Sophie Pitman, Jenny Boulboullé, Joel Klein, Donna Bilak, Marc Smith, and Terry Catapano *New York: Making and Knowing Project, 2020), https://edition640.makingandknowing.org/#/essays/ann_063_fa_17. DOI:https://www.doi.org/10.7916/26md-x363. ↩
-
Making and Knowing Project, Pamela H. Smith, Naomi Rosenkranz, Tianna Helena Uchacz, Tillmann Taape, Clément Godbarge, Sophie Pitman, Jenny Boulboullé, Joel Klein, Donna Bilak, Marc Smith, and Terry Catapano, eds., Secrets of Craft and Nature in Renaissance France. A Digital Critical Edition and English Translation of BnF Ms. Fr. 640 (New York: Making and Knowing Project, 2020), https://edition640.makingandknowing.org/#/folios/118r/tl. ↩
-
Flaminia Bardati, “La Grotte des Pins a Fontainebleau”, in Artifici d’acque e giardini: la cultura delle grotte e dei ninfei in Italia e in Europa, ed. Isabella Lapi Ballerini and Litta Medri (Florence: Centro Di, 1999). ↩
-
For all images of our process, see the Flickr Album https://www.flickr.com/photos/128418753@N06/albums/72177720299168770. ↩
-
Ms. Fr. 640, fol. 130r, https://edition640.makingandknowing.org/#/folios/130r/f/130r/tl. ↩
-
Divya Anantharaman and Pamela H. Smith, “Animals Dried in an Oven.” In Secrets of Craft and Nature in Renaissance France. A Digital Critical Edition and English Translation of BnF Ms. Fr. 640, edited by Making and Knowing Project, Pamela H. Smith, Naomi Rosenkranz, Tianna Helena Uchacz, Tillmann Taape, Clément Godbarge, Sophie Pitman, Jenny Boulboullé, Joel Klein, Donna Bilak, Marc Smith, and Terry Catapano. New York: Making and Knowing Project, 2020. https://edition640.makingandknowing.org/#/essays/ann_502_ad_20. ↩
-
For this process, we referred to Ms. Fr. 640, fol. 29r (https://edition640.makingandknowing.org/#/folios/29r/f/29r/tl), and the assignment sheet based on it: https://cu-mkp.github.io/sandbox/docs/stucco-assignment.html. ↩
-
Ullman, “Artificial Grottos,” https://edition640.makingandknowing.org/#/essays/ann_063_fa_17. ↩